Master Handbook V7.0 DOCX
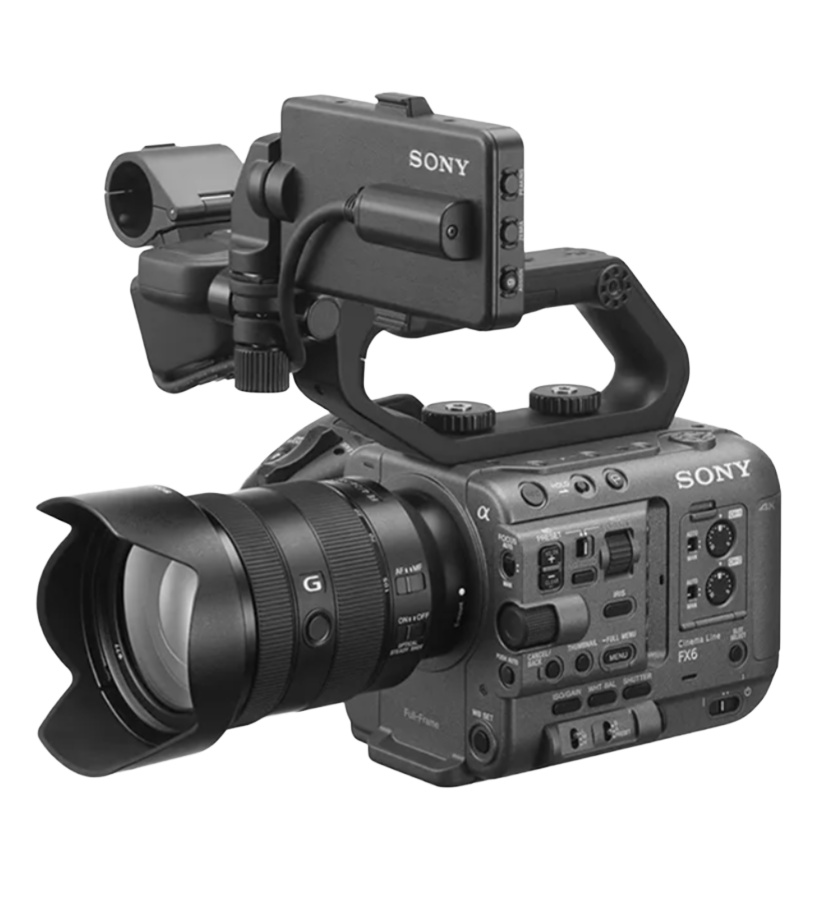
FX6 CINE EI Muted-Color Shooting System Handbook V7.0
Camera System: Sony FX6
Primary Shooting Mode: Cine EI
Primary Color Setup: S-Gamut3.Cine / S-Log3
Primary Audio System: RØDE Wireless
transmitter/receiver workflow, Cable Techniques split cable, optional
boom mic integration
Style Target: Netflix-muted cinematic actor reels,
feature scenes, and documentary work
Co-created by Nelson Cyr with ChatGPT Assist May 2026
Note: FX6 Field-Use Navigation Guide
The Handbook Table Of Contents is on pages i – xxvi. A Field-Use Navigational Guide follows the TOC on pages xxvii – xxxix and is in front of the Handbook operational body text which starts on page 2. This Nav Layer does not replace, rewrite, shorten, or reorganize the canonical manual body. Most topics are hot-linked to relevant pages with return links back to Nav Guide or TOC.
TABLE OF CONTENTS (Hover & Ctl+Click For Hot Link To Pages)
FX6 CINE EI Muted-Color Shooting System Handbook V7.0 1
PART I — PROJECT CONTROL, SCOPE, AND OPERATING DOCTRINE 2
Chapter 1. Project Purpose, Scope, and Master-Handbook Standard 2
1.1 Purpose of the Complete Project Master Handbook 2
1.2 Why this is not a condensed field guide 3
1.3 Covered production types: actor reels, features, documentaries 4
1.4 Project-specific equipment baseline 5
1.5 What “Netflix-type muted color” means in this project 5
1.6 What the muted look is not 6
1.7 Core operating rule: expose cleanly, light selectively, monitor accurately, grade carefully 7
1.8 Master control hierarchy 8
1.8.2 Aperture = depth and lens character 9
1.8.4 White balance = color consistency 9
1.8.5 EI = exposure-rating/monitoring decision 10
1.8.6 LUT/MLUT = viewing reference 10
1.8.7 Lighting and production design = actual look 10
1.8.8 Audio = production credibility 11
1.8.9 Media/logging = post-production survival 11
Chapter 2. Project-Specific Proven Settings and Non-Negotiable Warnings 12
2.1 Proven one-transmitter audio baseline 12
2.2 Proven two-transmitter split-track baseline 13
2.3 Proven boom-addition concept 13
2.4 Proven Cine EI monitoring logic 14
2.5 Proven file-management logic 15
2.6 Non-negotiable warnings 16
2.6.1 Do not use LINE for RØDE receiver 16
2.6.2 Do not use MIC+48V for RØDE receiver 16
2.6.3 Do not assume S-Gamut3.Cine/S-Log3 automatically sends a LUT to the monitor 17
2.6.5 Do not rename camera originals casually 17
2.6.6 Do not split camera-original folders arbitrarily 17
2.6.7 Do not rely on camera filenames alone 18
PART II — FX6 + RØDE AUDIO SYSTEM 18
Chapter 3. One-Transmitter RØDE Wireless GO + FX6 Baseline 18
3.1 Original one-transmitter use case 18
3.2 RØDE receiver mounted on shoe: mounting only, no audio pass-through 19
3.3 Required audio path: RØDE 3.5 mm output to FX6 INPUT1 20
3.4 FX6 INPUT1 physical switch discovery 20
3.4.1 LINE position and why it is wrong 21
3.4.2 Center MIC position and why it fixed the meter problem 21
3.4.3 MIC+48V position and phantom-power warning 21
3.5 Final one-transmitter FX6 routing 22
3.5.1 CH1 Source = INPUT1 MIC 22
3.5.2 CH2 Source = INPUT1 MIC 23
3.6 Reference level: -30 dB 23
3.7 Final RØDE gain: 0 dB / -0 24
3.8 Final FX6 dials: CH1=7, CH2=5 24
3.9 Main track and safety-track logic 24
3.10.1 Normal speech: -12 to -18 dB 25
3.10.2 Loud speech/shout: around -10 dB 25
3.10.3 0/red as clipping ceiling 25
3.11 Alternate tested setting: RØDE -3 dB / CH1 around 8 25
3.12 When to consider -40 dB camera reference 26
3.13 One-transmitter quick setup table 26
3.14 One-transmitter troubleshooting table 27
Chapter 4. RØDE Gain Testing and Button Operation 27
4.1 Why RØDE receiver output matters 27
4.2 RØDE gain values tested: -30, -12, -3, 0 dB 28
4.3 Meaning of more negative RØDE gain numbers 28
4.4 Correct term: 0 dB, not “-0” 29
4.5 Final gain choice and reason 29
4.6.1 Press left button to show gain 29
4.6.2 Briefly press right button to change/cycle gain 29
4.6.3 Avoid holding right button 30
4.7 If RØDE becomes stuck at low output 30
Chapter 5. FX6 Headphone Monitoring and Room-Noise Control 31
5.1 MDR-7506 suitability for FX6 monitoring 31
5.2 MDR-7506 volume-control expectation 31
5.3 FX6 headphone volume versus recorded level 32
5.4 Meter levels versus headphone perception 32
5.5 Breathing noise diagnosis 32
5.7 HVAC and room tone diagnosis 33
5.9 Mic placement correction: 6–8 inches below chin 34
5.11 Why not to lower recording level to hide room noise 35
5.12 Room-noise cleanup checklist 35
5.13 Room tone recording procedure 36
Chapter 6. Dual RØDE Transmitter / One Receiver Split-Track System 36
6.1 Why the one-XLR setup is insufficient for separate tracks 36
6.2 Two-person interview objective 37
6.3 RØDE Merged mode versus Split mode 38
6.4 Correct signal path overview 39
6.5 Cable Techniques 3.5 mm TRS stereo male to dual XLR-3M male cable 40
6.5.2 Why this is not a generic splitter 41
6.5.3 Cable durability / “flimsy” concern 41
6.5.4 Shorter-cable consideration 42
6.8 FX6 physical input settings 43
6.9.1 CH1 Input Select = INPUT1 44
6.9.2 CH2 Input Select = INPUT2 44
6.9.3 INPUT1 MIC Reference = -30 dB 45
6.9.4 INPUT2 MIC Reference = -30 dB 45
6.11 TX1/TX2 channel test procedure 46
Step 3 — Test both transmitters 47
6.12 What to do if both channels move equally 47
6.13 What to do if one channel is missing or thin 48
6.14 Split-track verification checklist 49
Chapter 7. Permanent Split Setup for One or Two Transmitters 49
7.1 Why a permanent split setup is easier 49
7.2 Permanent split settings table 50
7.3 Two-transmitter operation 51
7.4 One-transmitter operation while staying in split mode 52
7.5 What is lost: old CH2 safety-track copy 52
7.6 When to switch back to one-transmitter safety mode 53
7.7 Editing solo CH1 as centered mono audio 54
7.8 Field decision table: split mode versus safety-copy mode 54
Chapter 8. RØDE Onboard Transmitter Recording 55
8.1 What onboard transmitter recording means 55
8.2 Camera audio versus transmitter internal audio 56
8.3 Which RØDE models support onboard recording 56
8.4 Backup mode versus Always mode 57
8.5 Why onboard recording replaces the lost FX6 safety track 57
8.6 RØDE safety channel versus onboard recording 58
8.7 Shoot-day onboard recording checklist 58
8.8 Post-shoot file retrieval 59
8.9 Folder and naming approach for transmitter recordings 59
8.10 Backup procedure for onboard recordings 60
Chapter 9. Adding a Boom Mic to the Dual-RØDE Setup 60
9.1 Why both FX6 handle XLR inputs are already occupied 60
9.2 Professional three-track solution overview 61
9.3 Sony XLR-K3M / XLR-K2M adapter concept 61
9.4 Where the adapter plugs in: Multi Interface Shoe 62
9.5 Boom mic into adapter INPUT1 62
9.6 Professional channel layout 63
9.6.3 CH3 = boom mic via Shoe CH1 63
9.6.4 CH4 = Off or Shoe CH2 63
9.7 FX6 CH3/CH4 menu concept 64
9.8 Phantom-power decision tree 64
9.8.1 Phantom-powered shotgun/condenser 64
9.8.2 Battery-powered boom mic 65
9.9 Warning: never send phantom power to RØDE receiver 65
9.10 Lower-cost alternate: merged lavs plus boom 66
9.10.1 RØDE receiver Merged mode into INPUT1 66
9.10.3 Tradeoff: two lavs baked together 67
9.11 Why not to use a passive Y-cable 67
9.12 Professional three-track versus simpler alternate decision table 68
PART III — CINE EI CAMERA OPERATION AND EXTERNAL CONTROLS 69
Chapter 10. White Balance External Controls 69
10.1 Manual white balance philosophy 69
10.2 Why ATW should usually be avoided 69
10.3 External WB switch positions 70
10.4 Gray card / white card procedure 72
10.5 WB SET button procedure 73
10.6 Indoor custom WB setup 73
10.7 Outdoor custom WB setup 74
10.8 Warm/cool intentional offsets 74
10.9 Why white balance should not be the muted-look tool 75
10.10 Filter White Memory considerations 75
10.11 White balance checklist before recording 76
Chapter 11. ND External Controls 76
11.1 ND as exposure stabilizer 77
11.2 Correct exposure-control order 78
11.3 ND PRESET / VARIABLE switch 79
11.4 ND FILTER POSITION buttons 79
11.6 ND VARIABLE AUTO button 80
11.7.2 Use ND indoors only if too bright 82
11.8.2 Hold aperture with ND 83
11.10 Why not to switch Clear/On while rolling 85
11.11 ND and white balance interaction 85
11.12 Indoor/outdoor ND examples 86
Interior actor reel close-up 86
Interior bright window interview 86
Exterior two-person dialogue 86
Chapter 12. Shutter and Aperture External Controls 87
12.1 Shutter controls motion 87
12.2 Aperture controls depth of field 88
12.3 Normal cinematic shutter values 88
12.4 When to change shutter 89
12.5 When not to change shutter 89
12.6 Aperture selection by scene type 90
12.7 Indoor aperture recommendations 91
12.8 Outdoor aperture recommendations 91
12.9 Two-person aperture recommendations 92
12.10 Manual iris versus auto iris 92
12.11 Why ND should handle brightness after aperture is chosen 93
12.12 Indoor setup examples 93
Interior two-person dialogue 94
Interior documentary interview 94
12.13 Outdoor setup examples 95
Exterior two-person dialogue 95
Chapter 13. Focus External Controls 96
13.1 Focus as subject-attention control 96
13.9 Indoor focus procedure 100
13.10 Two-person focus strategy 101
13.11 Outdoor focus procedure 101
13.13 When to use autofocus 102
13.14 When to avoid autofocus 102
13.15 Rack focus procedure 103
Chapter 14. Zoom Controls, Push-Ins, Pull-Outs, and Emotional Close-Ups 104
14.1 Zoom as framing control, not exposure control 104
14.3 FX6 handle/grip zoom rocker 105
14.4 Sony power zoom lenses 106
14.6 Prime lenses and Clear Image Zoom 106
14.7 Clear Image Zoom limits 107
14.9 Why “never zoom while recording” is not absolute 107
14.10 When zooming while recording is acceptable 108
14.13 Slow zoom-in for psychological pressure 110
14.14 Slow zoom-out for isolation/reveal 110
14.15 Indoor zoom guidance 110
14.16 Outdoor zoom guidance 111
14.17 Zoom-focus recheck rule 111
14.18 Variable-aperture zoom warning 112
14.19 Coverage versus zooming mid-take 112
Chapter 15. Cine EI Exposure Monitoring 113
15.1 Why LCD appearance is not enough 113
15.2 Monitoring LUT versus exposure truth 114
15.3 Waveform as primary exposure truth 114
15.4 Zebras as fast warnings 115
15.5 Histogram as secondary tool 116
15.6 S-Log3 exposure references 116
15.6.1 18% gray around 41 IRE 116
15.6.2 90% white around 61 IRE 116
15.7 Skin-tone exposure guidance 117
15.9 Indoor exposure procedure 118
15.10 Outdoor exposure procedure 119
15.11 Why not to underexpose for mood 119
15.12 Test-clip exposure review 120
Chapter 16. Cine EI, Base ISO, and EI Workflow 121
16.1 Cine EI versus normal ISO operation 121
16.4 EI as exposure-rating / monitoring decision 123
16.7 Indoor Base ISO choices 125
16.8 Outdoor Base ISO choices 126
16.9 Low-light Cine EI choices 127
16.10 Cine EI Quick versus Cine EI concept 128
16.11 Practical EI field rules 128
Chapter 17. Recording Format, Codec, Frame Rate, and Audio Channel Planning 129
17.1 Recommended cinematic defaults 129
17.4 23.98p / 24p actor reel and feature workflow 131
17.5 Documentary interview options 132
17.6 Slow motion / S&Q considerations 132
17.8 Audio channel verification 133
17.9 Matching recording format to post workflow 134
17.10 Avoiding mixed frame rates without plan 135
Chapter 18. Assignable Buttons and User Menu Field Map 135
18.1 Why field controls should be fast 136
18.2 Assignable button priorities 136
18.2.2 Waveform / Video Signal Monitor 137
18.3 User Menu Page 1: Exposure 139
18.4 User Menu Page 2: Look / LUT 140
18.5 User Menu Page 3: Focus 141
18.6 User Menu Page 4: Audio 141
18.7 User Menu Page 5: Recording / Media 142
18.8 Button-map operating rule 142
PART IV — LUT, MONITORING, SETTINGS FILES, AND FX6 SETTINGS CARD 143
Chapter 19. LUT / MLUT Monitoring Setup 143
19.1 S-Gamut3.Cine/S-Log3 does not automatically mean monitor LUT 143
19.3.1 VF/Proxy/Stream MLUT On 145
19.3.3 Internal Rec MLUT Off 146
19.4 External monitor LUT behavior 146
19.5 Why monitor does not need its own LUT if FX6 sends MLUT 147
19.7 Internal recording safety 148
19.9 709(800%) reference look 149
19.10 Custom Nelson Muted Preview LUT concept 149
Chapter 20. Elvid RigVision Monitor and External Monitoring 149
20.1 Elvid RigVision LUT-import limitation 150
20.2 Why FX6-applied MLUT solves the issue 150
20.3 Monitor LUT off when FX6 SDI/HDMI MLUT is on 151
20.4 External monitor as view-only device versus recorder warning 151
20.5 Practical monitoring setup table 152
Chapter 21. LUT Acquisition and FX6 Settings Card 153
21.1 Why to preload only a small LUT set 153
21.2.3 Sony official S-Gamut3.Cine/S-Log3 LUTs 155
21.2.4 Optional creative Sony looks 156
21.2.5 Custom Nelson Muted Preview LUT 156
21.3 Avoiding random LUT packs 157
21.4 Correct card folder paths 158
21.4.2 CFexpress Type A LUT path 159
21.5 Importing LUTs into FX6 159
21.6 Selecting the imported Base Look 159
21.7 Input/output LUT setting warning 160
21.8 Why to keep LUT files backed up separately 160
Chapter 22. ALL Files, User Files, Scene Files, and Dedicated Settings Card 161
22.2 What ALL File does not save 162
22.3 Menu 0–10 settings and ALL File capture 163
22.4 Level 1–Level 4 camera values versus written documentation 164
22.5 Slot B / Media(B) workflow 164
22.6 ALL File save/load procedure 165
22.10 Physical switch limitations 168
22.11 RØDE settings not saved by FX6 168
22.12 External monitor settings not saved by FX6 169
22.13 Boom adapter switch settings not saved by FX6 169
22.14 Dedicated FX6 Settings Card 170
22.15 Why not to rely on production recording cards 170
22.16 Recommended card label: FX6 SETTINGS — DO NOT FORMAT 171
22.17 Computer/NAS/USB duplicate backup 171
22.18 Settings-card checklist 172
PART V — MUTED-COLOR SHOOTING METHOD, LIGHTING, LENSES, MOVEMENT, AND DESIGN 173
Chapter 23. Pro Tips for Netflix-Type Muted Color 173
23.1 Do not underexpose for mood 173
23.2 Use Cine EI like a negative workflow 174
23.3 Record clean log, monitor with LUT 174
23.4 Use s709 as safe monitor look 175
23.6 Let ND protect aperture 175
23.7 Keep shutter boring and correct 176
23.8 Pick aperture for emotion and focus reliability 176
23.9 Use waveform and zebras 176
23.11 Control wardrobe and set color 177
23.13 Do not overlight the room 179
23.14 Use practical lights carefully 179
23.16 Focus on the near eye 180
23.17 Use deeper focus for two-person scenes 180
23.19 Do not casually zoom while recording 181
23.20 Push-ins beat zoom-ins 182
23.21 Actor reel priority: performance clarity 182
23.22 Feature priority: visual grammar 182
23.23 Documentary priority: reality first 183
23.24 Audio is half the image 183
23.25 Use the boom as safety and tone tool 184
23.27 Build a pre-roll ritual 184
23.29 Keep a dedicated FX6 Settings Card 185
23.30 Keep only a few LUTs on the camera 186
23.31 Shoot a 10-second technical test 186
23.33 Actor reel grading versus feature grading 187
23.34 Background must support the face 187
23.35 Use longer lenses to simplify chaos 188
23.36 Outside, choose shade before fighting sun 188
23.37 Inside, control mixed color temperatures 188
23.38 Shoot gray card and color reference 189
Chapter 24. Lighting Layouts for Actor Reels 190
24.1 Universal muted-color lighting rules 190
24.2 One-person dramatic close-up interior 191
24.3 Two-person dialogue scene interior 193
24.4 Moody practical-light interior 196
24.5 Exterior emotional close-up 197
24.5.1 Best exterior layout 197
24.6 Actor reel lighting priorities 199
24.6.3 Controlled background 199
24.6.4 Performance over style 200
Chapter 25. Lighting Layouts for Feature Scenes 200
25.1 Interior naturalistic dialogue scene 200
25.2 Dark dramatic close-up 202
25.3 Window-motivated daylight interior 204
25.4 Night interior with practicals 205
25.5 Exterior day dialogue 206
25.6 Repeatable visual grammar 207
25.7 Motivated light direction 208
25.8 Matching coverage between angles 208
25.9 Consistent contrast and palette 209
Chapter 26. Lighting Layouts for Documentaries 210
26.1 Sit-down interview interior 210
26.2 Sit-down interview with window light 214
26.3 Run-and-gun interior / available light 216
26.5 Walk-and-talk exterior 220
26.6 Quick one-light field interview 222
26.7 Documentary lighting priorities 224
Chapter 27. Lens, Movement, and Emotional Coverage 225
27.3 Interior focal-length choices 227
27.4 Exterior focal-length choices 227
27.5 Emotional close-up hierarchy 228
27.6 Push-in for emotional intensity 229
27.7 Pull-back for isolation 230
27.8 Longer lens for compression 230
27.9 Walk-and-talk support 231
27.10 Tripod, slider, dolly, gimbal, handheld considerations 232
27.11 Focus during movement 233
27.13 Coverage map for actor reels and features 235
Chapter 28. Production Design and Muted Color Control 236
28.1 Why wardrobe and set color matter 236
28.2 Preferred muted palette 236
28.3 Colors to avoid unless intentional 237
28.4 Controlling props and clutter 237
28.5 Practical lights as color sources 238
28.6 Background separation 239
28.7 Skin tone must remain natural 239
28.8 Muting the environment, not the person 240
28.9 Actor reel visual restraint 241
28.10 Feature color consistency 241
28.11 Documentary credibility 242
PART VI — PRE-SHOOT, ON-SET, AND SHOOT-DAY WORKFLOW 242
Chapter 29. Pre-Shoot Checklist and On-Set Test Procedure 243
29.1 Night-before setup checklist 243
29.2 Camera mode checklist 244
29.3 Recording format checklist 245
29.5 White balance checklist 246
29.9 Physical switch checklist 248
29.10 RØDE split cable checklist 249
29.11 Boom adapter checklist 249
29.12 10-second technical test 250
29.13 Playback review checklist 250
29.14 During-shoot continuity check 251
29.15 After-shoot backup checklist 251
Chapter 30. Master Shoot-Day Workflow 252
30.1 Load or confirm ALL File 252
30.2 Confirm physical switches 252
30.3 Confirm RØDE receiver mode 253
30.4 Confirm Cable Techniques routing 253
30.5 Confirm boom adapter if used 254
30.6 Set frame rate and recording format 254
30.7 Set Cine EI / Base ISO / EI 255
PART VII — FILE MANAGEMENT, SLATES, LOGGING, OFFLOAD, RESOLVE/PREMIERE, PROXIES, AND STORAGE 261
Chapter 31. FX6 File-Management Doctrine 261
31.1 Why camera filenames alone are unsafe 261
31.2 Why same-name clips happen across cards 262
31.3 Why camera originals should not be casually renamed 263
31.4 Folder identity versus clip identity 264
31.5 Project codes, reel IDs, physical card IDs, and unique clip IDs 265
31.6 Short-name discipline to avoid Windows/path-length problems 268
31.7 Never dump different cards into one flat folder 268
31.8 File-management master rule 269
Chapter 32. Production Card and Reel Naming System 270
32.1 Physical card labels: CFE-01, CFE-02 270
32.2 Reel IDs: A001, A002, A003 270
32.3 Reused physical card gets a new reel ID 271
32.4 Folder format: YYYYMMDD_PROJECT_FX6_A001 271
32.5 Examples for actor reel projects 272
32.6 Examples for feature projects 273
32.7 Examples for documentary projects 274
32.8 Production card versus settings card distinction 275
Chapter 33. Clip Name Footage Description Log System 275
33.2 Full Excel log columns 276
33.3 Unique Clip ID formula 277
33.5 Shot-size and angle fields 279
33.7 Look/LUT and format fields 280
33.8 Quality/select fields 281
33.9 Backup/import/proxy status fields 282
33.10 Example row: indoor action scene 283
33.11 Example row: outdoor dialogue scene 284
33.12 Example row: outdoor chase scene 285
33.13 How to use the Word/DOCX log version 285
33.14 How to use the paper log version 286
Chapter 34. Minimal Field Logging Workflow 287
34.1 Why not to fill the full spreadsheet on set 287
34.2 Five-field field log method 288
34.3 Before-recording notes 288
34.4 During-recording slate 289
34.5 After-recording quick note 289
34.6 After-offload spreadsheet completion 290
34.7 Practical paper log example 291
34.8 Field log rhythm: slate it, shoot it, write one short line, move on 291
Chapter 35. Verbal, Paper, Phone, Electronic, and Smart Slate Workflow 292
35.4 Phone/tablet slate app method 295
35.5 Basic electronic slate 295
35.6 Professional timecode smart slate 296
35.7 What smart slates help with 296
35.8 What smart slates do not solve 297
35.9 Timecode synchronization versus file naming 298
35.10 Why Reel ID + Clip ID remains required 298
35.11 When a real timecode slate becomes justified 299
35.12 Recommended slate workflow for current FX6 use 299
Chapter 36. FX6 Full-Card Offload Integrity 300
36.1 Why full card structure matters 300
36.2 Why non-footage files matter 301
36.3 Why not to drag only MXF files into one folder 302
36.4 Full-card copy procedure 303
36.4.1 Prepare the destination folder 303
36.4.2 Confirm physical card and reel ID 304
36.4.3 Copy the full card contents 304
36.4.4 Do not change the original structure 305
36.4.5 Record the copy in the log 305
36.5 Verify before formatting 305
36.7 Folder structure for camera originals 307
36.8 RØDE onboard recording backup location 308
36.9.4 Before formatting card 310
Chapter 37. Large Card / 400GB Footage Management 310
37.1 Why not to split camera-original folders into arbitrary 100GB chunks 310
37.2 Safer method: split archive volumes 311
37.3 Safer method: future smaller reel offloads 312
37.4 Safer method: proxies/transcodes 313
37.5 If splitting is unavoidable 314
37.6 Preserve the full-card master untouched 315
37.7 80–160GB reel/offload target 315
Chapter 38. Resolve and Premiere Import and Audio-Channel Workflow 316
38.1 Import full reel folders 316
38.2 Do not flatten media from multiple cards 317
38.3 Resolve bin structure 318
38.4 Premiere bin structure 319
38.5 Left/right audio inspection 320
38.6 Why muting a whole event does not prove channel separation 321
38.7 Two-transmitter split audio in post 321
38.8 Boom/lav channel organization 322
38.9 Solo CH1 mono centering 323
38.10 Post-import checklist 323
38.10.1 Media organization 324
Chapter 39. Proxy, Storage, and Archive Planning 325
39.1 Shoot high-quality originals, edit with proxies if needed 325
39.2 XAVC-I 4K file-size planning 326
39.3 XAVC-L 4K file-size planning 326
39.4 80–160GB reel/offload target 327
39.5 1080p DNxHR LB proxies 328
39.6 1080p DNxHR SQ proxies 328
39.8 Resolve proxy workflow 329
39.9 Premiere proxy workflow 330
39.10 Storage planning per 1TB originals 331
39.11 Project folder structure 332
39.12 Backup/archive rules 332
Chapter 40. Created Deliverables and Templates 334
40.1 Excel/XLSX Clip Name Footage Description Log 334
40.2 Word/DOCX Clip Name Footage Description Log 335
40.5.3 Audio routing codes 338
40.7 How to use these templates in the field 339
40.8 How to use these templates in post 341
40.8.1 Resolve/Premiere import 341
40.8.6 Final project archive 342
PART VIII — APPENDICES AND QUICK REFERENCES 343
Appendix A. One-Transmitter RØDE Quick Reference 343
A.4 Troubleshooting checklist 345
Appendix B. Two-Transmitter RØDE Split Quick Reference 346
B.2 Cable Techniques routing 346
B.3 Blue XLR / Red XLR table 347
Appendix C. Boom Mic Quick Reference 349
C.4 Phantom-power decision table 351
C.5 Pro versus lower-cost setup comparison 351
Appendix D. Cine EI Indoor Quick Reference 352
Appendix E. Cine EI Outdoor Quick Reference 356
Appendix F. Actor Reel Lighting Quick Reference 360
Appendix G. Feature Scene Lighting Quick Reference 363
Appendix H. Documentary Interview Quick Reference 365
Appendix I. File Naming Quick Reference 368
Appendix J. Offload and Backup Quick Reference 371
J.5 Format only after confirmation 373
Appendix K. Resolve/Premiere Proxy Quick Reference 374
K.4 Audio-channel inspection rule 375
NOTE: For All FX6 Audio Setup and Operations, Refer to FX6 AUDIO FIELD SETUP GUIDE Ver. 1.0 instead. Audio information in this Handbook is for detailed background reference and learning. The Audio Guide is specially abbreviated for Field Setup and Operational Use and is specific to the TriGenFilms.com Sony FX6 Camera and Audio Equipment already setup.
FX6 Field-Use Navigation Guide
NOTICE: (All page links in Nav guide will take you “very close” to page requested)
Purpose
This section adds a Field-Use Navigation Guide in front of the Handbook Operational body text. It does not replace, rewrite, shorten, or reorganize the canonical manual body.
Source Status
• Canonical Master TOC remains the controlling TOC source.
• Canonical Master Operational Manual / Master Handbook v1.0 remains the controlling full-body source.
• This v4 page-corrected linked-return-nav document is a derivative navigation overlay only.
• Operational overlay page references below have been corrected to the actual rendered target start pages in this v4 derivative.
• Internal links are bookmark-based and are placed only in the front navigation overlay.
• No visible Return to Field Navigator links were inserted into the manual body text; return navigation is provided through the body-section footer, preserving body pagination.
Navigation Use Note
Use Ctrl+click to follow links in Word. To return to this Field Navigator after following a link, use Alt + Left Arrow in Word, or the Back button in PDF readers that support link history.
NAVIGATION HUB
| Navigation Area | Jump Link |
|---|---|
| Start Here Field Map | Start Here Field Map |
| First 60 Seconds on Set | First 60 Seconds on Set |
| If This Happens Troubleshooting Index | If This Happens Troubleshooting Index |
| Scenario-Based Shooting Recipes | Scenario-Based Shooting Recipes |
| Audio Setup Paths | Audio Setup Paths |
| Cine EI Camera Setup Paths | Cine EI Camera Setup Paths |
| LUT / Monitor / Settings-Card Paths | LUT / Monitor / Settings-Card Paths |
| Muted-Color Cinematic Look Paths | Muted-Color Cinematic Look Paths |
| Pre-Shoot, Shoot-Day, and Post Paths | Pre-Shoot, Shoot-Day, and Post Paths |
| Quick Reference Appendix Map | Quick Reference Appendix Map |
START HERE - ONE-PAGE FIELD MAP
Choose the problem or task first. Then follow the linked page references into the preserved master manual body.
| I need to... | Go to... |
|---|---|
| Set up one RODE lav | Proven one-transmitter baseline - p. 12 |
| Set up two RODE lavs as split tracks | |
| Add a boom mic | |
| Check headphones / room noise | |
| Set Cine EI indoor shooting | |
| Set Cine EI outdoor shooting | |
| Verify LUT / monitor | |
| Save/load FX6 settings | |
| Shoot muted cinematic look | |
| Run pre-shoot / shoot-day checklist | |
| Offload media safely | |
| Import into Resolve/Premiere |
Field rule: Do not skip the 10-second technical test and playback review before serious recording. See 29.12 p. 252 / 29.13 p. 253 and 30.17 p. 261 / 30.18 p. 262.
THE FIRST 60 SECONDS ON SET
Use this sequence before the first real take. It compresses the shoot-day workflow without replacing the full procedure.
• Load or confirm ALL File - p. 254
• Confirm physical switches - p. 255
• Confirm RODE receiver mode - p. 255
• Confirm Cable Techniques routing if using split mode - p. 256
• Confirm boom adapter if used - p. 256
• Set frame rate and recording format - p. 257
• Set Cine EI / Base ISO / EI - p. 257
• Set waveform/zebras - p. 259
Stop condition: If audio, focus, LUT, waveform/zebras, or media identity is not verified, do not proceed as if the setup is safe.
IF THIS HAPPENS - TROUBLESHOOTING INDEX
| Problem | Primary reference |
|---|---|
| No FX6 audio meters | Required RODE path to INPUT1 - p. 20 |
| Audio too low / RODE gain stuck | |
| Both lavs appear on both channels | RODE Merged mode versus Split mode - p. 39 |
| One split channel is missing or thin | |
| Room noise, breathing, TV, HVAC, clothing rub | Headphone monitoring and room-noise control - p. 31 |
| Need boom plus two lavs | Professional boom-addition solution - p. 61 |
| Monitor image looks flat / no LUT | |
| Image looks overcooked / double-LUTted | |
| Image too dark / muddy in S-Log3 | Cine EI exposure monitoring - p. 114 |
| White balance shifts during takes | |
| Same filenames appear on cards | File-management doctrine - p. 264 |
| Need safe full-card offload | Full-card offload integrity - p. 303 |
| Resolve/Premiere audio seems wrong | Resolve and Premiere workflow - p. 319 Left/right audio inspection - p. 323 |
SCENARIO-BASED SHOOTING RECIPES
Recipe 1 - One-person actor reel, indoor, one RODE lav
• Audio: Proven one-transmitter baseline - p. 12 | Full setup - p. 18 | Appendix A - p. 346
• Noise check: Headphone monitoring - p. 31 | Mic placement - p. 34 | Room tone - p. 36
• Camera: White balance - p. 69 | Indoor ND workflow - p. 82 | Shutter/aperture - p. 88 | Focus - p. 97 | Exposure monitoring - p. 114 | Cine EI/Base ISO/EI - p. 122
• Look: Muted-color priorities - p. 175 | Actor-reel lighting - p. 192 | Appendix F - p. 364
• Workflow: Pre-shoot checklist - p. 245 | Shoot-day workflow - p. 254
• Post safety: File naming doctrine - p. 264 | Clip log system - p. 278 | Full-card offload - p. 303
Recipe 2 - Two-person interview, two RODE transmitters
• Split setup: Receiver Split mode - p. 39 | Cable Techniques routing - p. 40 | Red XLR to INPUT1 - p. 43 | Blue XLR to INPUT2 - p. 43
Permanent split: Permanent split setup - p. 50
• Verification: TX1/TX2 channel test - p. 46 | Split-track verification checklist - p. 49 | Appendix B - p. 349
• Documentary lighting: Documentary lighting layouts - p. 212 | Appendix H - p. 369
• Post: Left/right audio inspection - p. 323 | Two-transmitter split audio in post - p. 325
Recipe 3 - Two lavs plus boom mic
• Input limit: Both FX6 handle XLR inputs occupied - p. 61
• Boom adapter: Sony XLR-K3M / XLR-K2M concept - p. 62 | CH3 = boom via Shoe CH1 - p. 64
• Power: Phantom-power decision tree - p. 65 | Never send phantom power to RODE receiver - p. 66
• Comparison: Merged lavs plus boom alternate - p. 66 | Three-track versus simpler alternate table - p. 68 | Appendix C - p. 353
Recipe 4 - Exterior muted-cinematic dialogue
• Audio path: One lav - p. 18 | Two-lav split - p. 37 | Lav + boom - p. 61
• ND: Outdoor ND workflow - p. 83 | Hold aperture with ND - p. 84
• Shutter/aperture: Shutter and aperture controls - p. 88 | Two-person aperture recommendations - p. 93
• Exposure: Exposure tools - p. 114 | Skin-tone exposure guidance - p. 118 | Highlight protection - p. 118
• Base ISO/EI: Outdoor Base ISO choices - p. 127 | Practical EI field rules - p. 129 | Appendix E - p. 359
• Look: Exterior emotional close-up - p. 199 | Exterior day dialogue - p. 208
Recipe 5 - Documentary sit-down or run-and-gun
• Objective: Covered production types - p. 4
• Audio protection: Room-noise control - p. 31 | Audio protection - p. 227
• Lighting: Documentary lighting layouts - p. 212 | Appendix H - p. 369
• Fast setup: Pre-shoot checklist - p. 245 | Shoot-day workflow - p. 254
• Field discipline: Logging - p. 278 | Slating - p. 295 | Offload - p. 303
Recipe 6 - Offload, import, proxy, and archive
• File management: File-management doctrine - p. 264
• Reel naming: Production card and reel naming - p. 272
• Logging: Clip log system - p. 278 | Minimal field logging - p. 290
• Offload: Full-card offload integrity - p. 303 | Appendix J - p. 374
• Post: Resolve/Premiere import - p. 319 | Appendix K - p. 378
• Storage: Proxy/storage/archive planning - p. 328
AUDIO SETUP PATHS
| Path | Go to | Field note |
|---|---|---|
| One transmitter / safety copy | Use CH1 main and CH2 lower safety copy from INPUT1 MIC. | |
| RODE gain operation | Chapter 4 starts p. 28 | 0 dB final gain; use left button to show gain and right button briefly to cycle. |
| Headphone and room-noise check | Chapter 5 starts p. 31 | Meters show level; headphones reveal noise, rub, bleed, distortion. |
| Two transmitters / split tracks | Split mode; Cable Techniques TRS-to-dual-XLR; CH1=TX1, CH2=TX2. | |
| Permanent split setup | Chapter 7 starts p. 50 | Simplifies one/two transmitter use but loses old CH2 safety-copy workflow. |
| Onboard RODE recording | Chapter 8 starts p. 56 | Backup depends on exact RODE model and must be retrieved after shoot. |
| Boom addition | Professional route uses Sony XLR-K3M/K2M for boom as separate source. | |
| Post audio inspection | Verify channel separation after import; do not rely on assumptions. |
CINE EI CAMERA SETUP PATHS
| Control area | Go to | Field note |
|---|---|---|
| White balance | Chapter 10 starts p. 69 | Avoid ATW for controlled work; use A/B/Preset deliberately. |
| ND control | Chapter 11 starts p. 77 | Use ND to hold shutter and aperture; do not switch Clear/On while rolling. |
| Shutter and aperture | Chapter 12 starts p. 88 | Shutter = motion; aperture = depth/lens character. |
| Focus | Chapter 13 starts p. 97 | Use near-eye rule; know when AF helps and when it hurts. |
| Zoom and framing movement | Chapter 14 starts p. 105 | Zoom is framing control, not exposure; push-ins often beat zoom-ins. |
| Exposure monitoring | Chapter 15 starts p. 114 | Waveform is primary truth; zebras are fast warnings. |
| Base ISO and EI | Chapter 16 starts p. 122 | Cine EI is not ordinary ISO/gain; change EI deliberately. |
| Recording format | Chapter 17 starts p. 130 | Set codec, frame rate, audio channels, and post workflow together. |
| Assignable buttons / User Menu | Chapter 18 starts p. 137 | Make field controls fast: waveform, zebras, LUT, focus, audio status. |
| Indoor quick reference | Appendix D p. 355 | Use for indoor Cine EI field setup. |
| Outdoor quick reference | Appendix E p. 359 | Use for outdoor Cine EI field setup. |
LUT, MONITOR, AND SETTINGS-CARD PATHS
| Task | Go to | Field note |
|---|---|---|
| MLUT logic | Chapter 19 starts p. 145 | Separate camera color/gamma, SDI/HDMI MLUT, and Internal Rec MLUT. |
| Recommended MLUT settings | 19.3 starts p. 146 | VF/Proxy/Stream On, SDI/HDMI On, Internal Rec Off. |
| External monitor behavior | Chapter 20 starts p. 151 | If FX6 sends MLUT, external monitor LUT should stay off. |
| LUT acquisition/import | Chapter 21 starts p. 154 | Keep only a small LUT set; avoid random LUT packs. |
| ALL/User/Scene files | Chapter 22 starts p. 163 | Know what is saved and what is not. |
| Settings card | Dedicated card label: FX6 SETTINGS - DO NOT FORMAT. | |
| Physical limitations |
RODE settings not saved - p. 170 |
Physical switches, RODE settings, monitor settings, and adapter switches are not saved by FX6. |
MUTED-COLOR CINEMATIC LOOK PATHS
| Look area | Go to | Field note |
|---|---|---|
| Overall muted-color rule set | Chapter 23 starts p. 175 | Expose cleanly, light selectively, monitor accurately, grade carefully. |
| Actor reels | Performance clarity, readable face, sharp eyes, controlled background. | |
| Feature scenes | Continuity, motivated direction, contrast, palette. | |
| Documentaries | Truthfulness, clean faces, audio protection, speed. | |
| Lens/movement/coverage | Chapter 27 starts p. 228 | Lens choice, push-in/pull-back, support, focus during movement. |
| Production design/color control | Chapter 28 starts p. 238 | Mute the environment, not the person; keep skin natural. |
PRE-SHOOT, SHOOT-DAY, AND POST PATHS
| Path | Go to | Field note |
|---|---|---|
| Night-before setup | 29.1 p. 245 | Prepare camera, cards, batteries, audio, LUTs, settings, logs. |
| Camera/format/LUT/WB/ND/focus/audio checks | Use as pre-roll verification. | |
| Physical switch / split cable / boom checks | Physical switch checklist - p. 251 |
Avoid menu/physical mismatch. |
| 10-second test and playback review | Mandatory before serious recording. | |
| Master shoot-day workflow | Chapter 30 starts p. 254 | From ALL File through record take, log clip, and backup media. |
| File-management doctrine | Chapter 31 starts p. 264 | Do not rely on camera filenames alone. |
| Reel naming system | Chapter 32 starts p. 272 | Physical card labels, reel IDs, folder format. |
| Logging | Full log plus minimal field log. | |
| Slating | Chapter 35 starts p. 295 | Verbal, paper, phone, electronic, or smart slate workflow. |
| Offload integrity | Copy full card, verify, second backup, then format only after confirmation. | |
| Large-card management | Chapter 37 starts p. 313 | Avoid arbitrary splits; preserve full-card master. |
| Resolve/Premiere and proxies | Import full folders, inspect audio channels, and use proxies safely. | |
| Created templates | Chapter 40 starts p. 337 | Use log templates in field and post. |
QUICK REFERENCE APPENDIX MAP
Use the appendices as the on-set quick reference layer after the full procedure has already been understood from the body chapters.
| Appendix | Reference | Page |
|---|---|---|
| Appendix A | Appendix A. One-Transmitter RØDE Quick Reference | p. 346 |
| Appendix B | Appendix B. Two-Transmitter RØDE Split Quick Reference | p. 349 |
| Appendix C | Appendix C. Boom Mic Quick Reference | p. 353 |
| Appendix D | Appendix D. Cine EI Indoor Quick Reference | p. 355 |
| Appendix E | Appendix E. Cine EI Outdoor Quick Reference | p. 359 |
| Appendix F | Appendix F. Actor Reel Lighting Quick Reference | p. 364 |
| Appendix G | Appendix G. Feature Scene Lighting Quick Reference | p. 366 |
| Appendix H | Appendix H. Documentary Interview Quick Reference | p. 369 |
| Appendix I | Appendix I. File Naming Quick Reference | p. 371 |
| Appendix J | Appendix J. Offload and Backup Quick Reference | p. 374 |
| Appendix K | Appendix K. Resolve/Premiere Proxy Quick Reference | p. 378 |
WORKING COPY v4 PAGE-CORRECTED LINKED-RETURN-NAV INTEGRITY LEDGER
| Item | Status |
|---|---|
| Source file | Created from FX6_Field_Manual_WORKING_NAV_OVERLAY_v3_LINKED_RETURN_NAV.docx; footer return navigation preserved; operational overlay page text corrected. |
| Locked Master Operational Manual | Not modified. |
| Canonized Field Manual v1 baseline | Not modified. |
| Manual body | Preserved. No body rewrite, reordering, shortening, expansion, or summary operation was performed. |
| Body return links | Footer-based return navigation preserved from v3; no body-return paragraphs inserted. |
| Hyperlink method | Bookmark-based internal links from the front overlay only. |
| Page references | Operational overlay target page references were corrected to actual rendered target start pages in v4. Original Master TOC fields were not rebuilt. |
| Original TOC fields/bookmarks | Not recalculated or rebuilt. |
| Existing section breaks/page numbering/headers/footers | Not intentionally changed. |
End of FX6 Field-Use Navigational Guide. The Handbook operational body text begins in the following section with Part I - Project Control, Scope, and Operating Doctrine.
PART I — PROJECT CONTROL, SCOPE, AND OPERATING DOCTRINE
Chapter 1. Project Purpose, Scope, and Master-Handbook Standard
1.1 Purpose of the Complete Project Master Handbook
This Complete Project Master Handbook preserves the full Sony FX6 production system developed for Cine EI shooting using RØDE Wireless audio, muted cinematic color, disciplined exposure practices, external control workflows, monitoring/LUT management, lighting strategy, file naming, slating, clip logging, offload integrity, and Resolve/Premiere post-production workflow.
The purpose is not merely to create a short camera settings sheet. The purpose is to preserve the complete operating system for the camera and related production workflow so the same proven configuration can be recreated, checked, tested, used, and handed off without losing critical details.
This handbook is designed to answer not only what setting to use, but also:
why the setting exists,
what problem it solved,
what mistake it prevents,
what physical switch must match the menu setting,
what must be checked with headphones or meters,
what is saved by FX6 files and what is not,
what must be logged in the field,
and what must be preserved for post-production.
The project began with practical FX6 audio setup questions and grew into a larger Cine EI production workflow. The complete scope now includes audio, camera controls, monitoring, lighting, file management, slate/logging procedure, card offload, and editing workflow. All of those areas are part of the working system and must remain together.
This handbook is therefore a complete master reference for the user’s FX6 operating approach, not a general article about the FX6 and not a generic filmmaking guide.
1.2 Why this is not a condensed field guide
A field guide is intentionally short. It gives quick reminders. This complete project master handbook preserves the full operating logic. Separate selected topical FX6 Field Guides have been extracted from this source handbook for operational field use.
A condensed field guide might say:
Set RØDE to 0 dB, INPUT1 to MIC, CH1 dial 7, CH2 dial 5.
That is useful in the field, but it is incomplete because it does not preserve:
the discovery that INPUT1 has a center MIC position,
the reason LINE was wrong,
the reason MIC+48V must not be used with the RØDE receiver,
the difference between RØDE gain and FX6 channel dial,
the fact that headphone volume does not change recording level,
the safety-track logic for CH1/CH2,
and the later conflict between the one-transmitter safety-track workflow and the two-transmitter split-track workflow.
This handbook must preserve those distinctions because they prevent real production failures.
A condensed field guide might also say:
Use A001_C0001 as a unique clip ID.
That is useful, but incomplete unless the handbook also preserves:
why camera filenames repeat,
why camera originals should not be renamed casually,
why physical card IDs are not the same as reel IDs,
why long filenames are dangerous,
why full card structure should be copied,
why arbitrary 100GB splits are risky,
and how a verbal slate, paper field log, Excel log, and Resolve/Premiere bin structure work together.
Therefore, this handbook treats the FX6 workflow as a linked production system. Audio settings, camera settings, LUT settings, card settings, and post-production media organization are not isolated topics. They affect one another.
1.3 Covered production types: actor reels, features, documentaries
This handbook supports three primary production use cases: actor reels, feature-style scenes, and documentaries.
| Production Type | Main Objective | Primary Risk | System Priority |
|---|---|---|---|
| Actor reels | Sell performance clearly | Over-stylizing or hiding the actor | Clean face, sharp eyes, clean dialogue |
| Feature scenes | Create repeatable cinematic grammar | Inconsistent coverage or lighting drift | Controlled look, continuity, coverage |
| Documentaries | Capture credible real people and events | Bad audio, uncontrolled light, missed moments | Reliability, speed, truthfulness |
For actor reels, the camera system should never overpower the performer. The muted-color style should make the actor look cinematic but still emotionally readable. Skin should remain alive, eyes sharp, dialogue clean, and framing supportive.
For feature scenes, the system must support repeatability. Matching coverage matters. If one angle is soft, another is flat, a third is over-LUT’d, and audio changes between takes, the scene will not cut professionally.
For documentaries, reliability matters. A documentary interview can survive a less stylized image more easily than it can survive distorted audio, unusable focus, bad file management, or missing clips.
The same foundation applies to all three:
Cine EI discipline,
manual white balance,
controlled monitoring,
exposure tools,
clean audio,
careful file management,
and verified offload.
The difference is emphasis.
1.4 Project-specific equipment baseline
This handbook is built around the equipment and workflow actually discussed and developed in the project.
| Category | Project-Specific Baseline |
|---|---|
| Camera | Sony FX6 |
| Primary camera mode | Cine EI |
| Color/gamma target | S-Gamut3.Cine / S-Log3 |
| Primary audio system | RØDE Wireless GO-style transmitter/receiver workflow |
| One-transmitter camera input | FX6 INPUT1 |
| One-transmitter routing | CH1 and CH2 both sourced from INPUT1 MIC |
| One-transmitter final gain | RØDE 0 dB, CH1 dial 7, CH2 dial 5, Reference -30 dB |
| Two-transmitter method | RØDE receiver in Split mode |
| Two-transmitter cable | Cable Techniques 3.5 mm TRS stereo male to dual XLR-3M male |
| Two-transmitter routing | Red XLR to INPUT1, Blue XLR to INPUT2 |
| Headphones | Sony MDR-7506 |
| Optional boom expansion | Sony XLR-K3M / XLR-K2M Multi Interface Shoe adapter |
| External monitor discussed | Elvid RigVision |
| Post tools discussed | DaVinci Resolve and Adobe Premiere Pro |
| File-log deliverables | Excel/XLSX and Word/DOCX clip log formats |
The handbook avoids treating unverified gear as if it were already installed. For example, the boom mic workflow is preserved as a professional integration concept using the Sony shoe-mounted XLR adapter, but the exact boom mic model and its phantom-power requirement must still be confirmed before use.
Likewise, onboard transmitter recording depends on the exact RØDE model. Wireless GO II / Wireless PRO / Wireless GO Gen 3 support onboard recording; the original Wireless GO likely does not support the same onboard-recording workflow. That model dependency is part of the working instruction.
1.5 What “Netflix-type muted color” means in this project
“Netflix-type muted color” in this project means a controlled, restrained, polished cinematic image. It is not a technical preset. It is not just a LUT. It is not underexposure. It is a combined production approach involving camera capture, lighting, production design, monitoring, and grading.
A proper muted cinematic image has:
| Image Element | Desired Result |
|---|---|
| Skin tone | Natural, readable, alive |
| Contrast | Shaped, not flat |
| Shadows | Rich but not crushed |
| Highlights | Controlled, not careless |
| Color palette | Restrained and intentional |
| Background | Supportive, not distracting |
| Wardrobe | Muted, texture-friendly, not loud |
| Practical lights | Controlled and motivated |
| Exposure | Clean enough to grade |
| LUT | Monitoring aid, not a rescue device |
| Grade | Subtle, not gimmicky |
In this system, the muted look should be built in layers:
Cine EI / S-Log3 capture for a gradable image.
Manual white balance for color consistency.
Clean exposure to avoid muddy shadows.
Selective lighting to shape the face and background.
Negative fill to create contrast and mood.
Muted production design to reduce color chaos.
Controlled LUT monitoring to preview the intended direction.
Careful grading to finish the image without killing skin.
A muted image should still feel alive. The subject should not look gray, dead, noisy, or hidden.
1.6 What the muted look is not
The muted look is not achieved by simply making the image dark.
A bad muted look often comes from:
| Bad Practice | Result |
|---|---|
| Underexposing S-Log3 | Muddy shadows, noise, weak skin |
| Crushing blacks | Lost detail, cheap-looking contrast |
| Over-desaturating | Dead faces, lifeless frame |
| Random LUTs | Unpredictable contrast and color |
| Mixed room lighting | Sickly skin and inconsistent color |
| Flat overhead lighting | Video look, no shape |
| Ignoring wardrobe/background | Bright distractions fight the grade |
| Over-dark actor reels | Performance becomes unreadable |
| Over-stylized documentary | Credibility suffers |
The muted style should not hide the actor’s eyes, destroy skin tone, or make the scene look like the camera was simply underexposed.
The correct principle is:
Make the world restrained. Keep the person alive.
That means the background, wardrobe, and palette can be subdued, but the face must still carry emotion.
1.7 Core operating rule: expose cleanly, light selectively, monitor accurately, grade carefully
The central operating rule for this project is:
Expose cleanly. Light selectively. Monitor accurately. Grade carefully.
Each part of that rule has a practical meaning.
| Rule | Practical Meaning |
|---|---|
| Expose cleanly | Do not starve S-Log3; keep skin and important shadows usable |
| Light selectively | Shape the subject with key, negative fill, background control |
| Monitor accurately | Use LUTs for viewing but waveform/zebras/meters/headphones for truth |
| Grade carefully | Preserve skin tone and avoid heavy-handed stylization |
The wrong method is to underexpose in-camera and hope the image becomes moody.
The correct method is to capture a clean log image, then create mood through lighting ratio, controlled background, restrained palette, and grading.
For actor reels, this is especially important because the audience is judging the actor. The camera style should not make the actor difficult to see.
For feature scenes, it matters because shots must cut together.
For documentaries, it matters because credibility and intelligibility are more important than a forced “look.”
1.8 Master control hierarchy
The FX6 should be operated by control function. Each control has a job. Problems happen when one control is used to do another control’s job.
The hierarchy is:
| Priority | Control | Main Job |
|---|---|---|
| 1 | Shutter | Motion rendering |
| 2 | Aperture | Depth of field and lens character |
| 3 | ND | Exposure control after shutter/aperture choice |
| 4 | White balance | Color consistency |
| 5 | EI | Exposure-rating / monitoring decision |
| 6 | LUT / MLUT | Viewing reference |
| 7 | Lighting / production design | Actual image style |
| 8 | Audio | Dialogue credibility |
| 9 | Media / logging | Post-production survival |
This hierarchy prevents common mistakes:
raising shutter just because the image is bright,
changing aperture constantly and losing depth/focus consistency,
using white balance to fake a look,
assuming a LUT fixes lighting,
relying on camera filenames alone,
or trusting headphones without watching meters.
1.8.1 Shutter = motion
Shutter controls motion blur. It should normally be set according to frame rate and left alone.
Normal cinematic values:
| Frame Rate | Normal Shutter |
|---|---|
| 23.98 / 24p | 1/48 or 180° |
| 29.97 / 30p | 1/60 or 180° |
| 59.94 / 60p | 1/120 or 180° |
Shutter should not be the first tool for exposure. If the image is too bright outdoors, use ND. If the image is too dark indoors, add light, open aperture, or use the correct base ISO strategy.
Change shutter only for a specific reason: flicker control, stylized motion, or action sharpness.
1.8.2 Aperture = depth and lens character
Aperture controls depth of field, subject isolation, focus difficulty, and lens feel.
Practical starting points:
| Scene Type | Aperture Starting Point |
|---|---|
| Single actor close-up | f/2.8–f/4 |
| Interview | around f/4 |
| Two-person dialogue | f/4–f/5.6 |
| Walk-and-talk | f/4–f/5.6 |
| Wide scene | f/5.6–f/8 |
A very shallow aperture can look cinematic, but it can also ruin a take if eyes drift out of focus. For two people, f/4–f/5.6 is often safer than f/2.0.
1.8.3 ND = exposure control
ND is the primary brightness-control tool after shutter and aperture are chosen.
Correct order:
Choose frame rate.
Set shutter.
Choose aperture.
Set white balance.
Use ND to land exposure.
Verify with waveform/zebras.
Indoor baseline:
ND Clear unless the scene is too bright.
Outdoor baseline:
Variable ND On.
ND lets the operator preserve cinematic shutter and selected aperture in changing or bright light.
1.8.4 White balance = color consistency
White balance is for stability and consistency. It should not wander during controlled scenes.
Preferred workflow:
| WB Position | Use |
|---|---|
| A | Main custom setup |
| B | Alternate lighting condition |
| Preset | Fixed Kelvin fallback |
ATW should usually be avoided for actor reels and features because it can shift during a take. Manual white balance protects continuity.
1.8.5 EI = exposure-rating/monitoring decision
In Cine EI, EI is not used like ordinary gain. It affects how the operator rates and monitors the image.
Lower EI encourages brighter exposure and can help shadows. Higher EI encourages darker exposure and can protect highlights, but can increase shadow noise if exposure is starved.
EI should be changed only deliberately.
1.8.6 LUT/MLUT = viewing reference
The LUT or MLUT is a viewing transform. It helps the operator see a normalized or preferred preview instead of flat S-Log3.
Preferred logic:
| Destination | Preferred Setting |
|---|---|
| FX6 viewfinder / LCD | MLUT On if desired |
| SDI/HDMI monitor | MLUT On if monitor needs normal image |
| Internal recording | MLUT Off for clean S-Log3 |
A LUT is not a lighting substitute. It should not be used to hide bad exposure.
1.8.7 Lighting and production design = actual look
The actual muted cinematic look comes from:
soft directional light,
negative fill,
controlled windows,
dimmed practicals,
subdued wardrobe,
non-distracting backgrounds,
lens choice,
and final grading.
Camera settings support the look, but they do not create the look by themselves.
1.8.8 Audio = production credibility
Audio quality determines whether the footage feels professional. Bad audio can ruin good picture.
The FX6 audio system must be verified with:
correct physical input switches,
correct menu routing,
proper RØDE gain,
safe meter levels,
headphones,
room-noise checks,
and test recording.
The project’s core audio lesson is that meters and headphones answer different questions:
| Tool | Reveals |
|---|---|
| Meter | Level and clipping risk |
| Headphones | Noise, rub, room, distortion, bleed |
| Playback | Actual recorded result |
1.8.9 Media/logging = post-production survival
The recording is not safe merely because it exists on a card. The project workflow requires:
unique reel IDs,
physical card IDs,
full-card offload,
two verified backups,
clip logs,
slates,
short filenames,
and preserved metadata/folder structure.
The file-management master rule is:
Do not rely on camera filenames alone.
Use reel identity and unique clip IDs such as:
A001_C0001
Chapter 2. Project-Specific Proven Settings and Non-Negotiable Warnings
2.1 Proven one-transmitter audio baseline
The proven one-transmitter baseline is the final working configuration for one RØDE transmitter and one RØDE receiver feeding FX6 INPUT1, with CH1 as the main dialogue channel and CH2 as a lower safety copy.
| Item | Final Proven Setting |
|---|---|
| RØDE receiver physical mounting | FX6 shoe acceptable for mounting only |
| Actual audio path | RØDE 3.5 mm output to FX6 INPUT1 |
| FX6 INPUT1 physical switch | MIC, center position |
| Phantom power | Off / do not use MIC+48V |
| FX6 Reference | -30 dB |
| RØDE receiver output | 0 dB |
| CH1 Source | INPUT1 MIC |
| CH2 Source | INPUT1 MIC |
| CH1 dial | 7 |
| CH2 dial | 5 |
| CH1 purpose | Main dialogue |
| CH2 purpose | Lower safety copy |
| Normal voice target | -12 to -18 dB |
| Loud/shout target | around -10 dB |
| Clipping limit | avoid 0/red |
This baseline was reached after troubleshooting the FX6 input switch, RØDE receiver gain, meter interpretation, headphone monitoring, and room-noise behavior.
The core one-transmitter concept is:
One mic signal, two camera channels, two levels.
That means CH2 is not a second person. It is not a different microphone. It is the same microphone recorded lower.
2.2 Proven two-transmitter split-track baseline
The proven two-transmitter baseline uses two RØDE transmitters and one RØDE receiver in Split mode. The receiver’s left/right output is split into FX6 INPUT1 and INPUT2 using the Cable Techniques breakout cable.
| Item | Final Proven / Required Setting |
|---|---|
| RØDE receiver mode | Split mode |
| Cable type | 3.5 mm TRS stereo male to dual XLR-3M male |
| Cable model discussed | Cable Techniques RØDE Wireless GO II-style Y cable |
| Red XLR | FX6 INPUT1 |
| Blue XLR | FX6 INPUT2 |
| FX6 INPUT1 physical switch | MIC |
| FX6 INPUT2 physical switch | MIC |
| Phantom power | Off for RØDE |
| CH1 Input Select | INPUT1 |
| CH2 Input Select | INPUT2 |
| INPUT1 MIC Reference | -30 dB |
| INPUT2 MIC Reference | -30 dB |
| CH1 dial | start around 7, adjust per person |
| CH2 dial | start around 7, adjust per person |
In this workflow:
| Channel | Source |
|---|---|
| CH1 | TX1 / Person 1 |
| CH2 | TX2 / Person 2 |
The important operational difference from the one-transmitter workflow is that CH2 is no longer a lower safety copy. In split mode, CH2 is the second person’s main track.
2.3 Proven boom-addition concept (Ignore this 2.3 section—Refer to FX6 AUDIO FIELD SETUP GUIDE instead).
When two RØDE transmitters are split to INPUT1 and INPUT2, both FX6 handle XLR inputs are already occupied. To add a boom as a third separate source while preserving the two lavs separately, the professional solution is a Sony XLR-K3M or XLR-K2M Multi Interface Shoe adapter.
The professional three-track layout is:
| Channel | Source | Physical Path |
|---|---|---|
| CH1 | RØDE TX1 | Red XLR to FX6 INPUT1 |
| CH2 | RØDE TX2 | Blue XLR to FX6 INPUT2 |
| CH3 | Boom mic | Sony XLR-K3M/K2M via Shoe CH1 |
| CH4 | Off or optional second shoe input | Shoe CH2 if used |
The boom mic plugs into the adapter’s INPUT1. The adapter plugs into the FX6 Multi Interface Shoe. The FX6 channel concept is:
| FX6 Channel | Source |
|---|---|
| CH1 | INPUT1 |
| CH2 | INPUT2 |
| CH3 | Shoe CH1 |
| CH4 | Off or Shoe CH2 |
The lower-cost alternate is:
| Channel | Source |
|---|---|
| CH1 | RØDE receiver in Merged mode, both lavs baked together |
| CH2 | Boom mic |
That lower-cost method is usable, but sacrifices separate lav control.
2.4 Proven Cine EI monitoring logic
The project established an important distinction:
S-Gamut3.Cine/S-Log3 does not automatically mean the external monitor sees a LUT.
The camera capture setting, monitor LUT output setting, and internal recording LUT setting are separate.
Preferred monitoring/recording logic:
| Destination / Function | Preferred Setting |
|---|---|
| Camera color/gamma | S-Gamut3.Cine / S-Log3 |
| VF/Proxy/Stream MLUT | On if operator wants normalized preview |
| SDI/HDMI MLUT | On if external monitor should see LUT-applied image |
| Internal Rec MLUT | Off for clean S-Log3 recording |
| External monitor LUT | Off/not needed if FX6 sends MLUT |
| Elvid RigVision | Can display FX6 LUT-applied output, even if it cannot import LUTs |
This prevents two major mistakes:
Thinking S-Log3 automatically produces a normal-looking monitor image.
Applying two LUTs: one from the FX6 and another in the monitor.
2.5 Proven file-management logic
The project’s file-management logic is built around the fact that camera filenames can repeat.
A camera may create filenames such as:
C0001.MXF
That same filename can appear on another card or another shoot. Therefore, camera filenames are not enough.
The safe system is:
| Identity Type | Example | Purpose |
|---|---|---|
| Physical card ID | CFE-01 | Identifies reusable media card |
| Reel ID | A001 | Identifies this card/offload instance |
| Project code | NCAR | Identifies project |
| Reel folder | 20260515_NCAR_FX6_A001 | Identifies full card copy |
| Unique Clip ID | A001_C0001 | Identifies clip safely across cards |
| Clip log description | Indoor action scene | Describes content without long filename |
The file-management rules are:
Keep camera originals unchanged.
Do not dump multiple cards into one flat folder.
Do not rely on C0001.MXF alone.
Do not put long descriptions into filenames.
Use the log for descriptions.
Copy full card structure.
Verify before formatting.
Make a second backup.
2.6 Non-negotiable warnings
The following warnings are project-level rules.
2.6.1 Do not use LINE for RØDE receiver
Do not set FX6 INPUT1 or INPUT2 to LINE when receiving the RØDE receiver signal in this setup.
LINE is too insensitive for the RØDE receiver output as used here. It can produce weak or missing meter response.
Correct:
RØDE receiver → FX6 input set to MIC
Incorrect:
RØDE receiver → FX6 input set to LINE
2.6.2 Do not use MIC+48V for RØDE receiver
Do not use phantom power with the RØDE receiver.
Correct:
| Source | FX6 Input Setting |
|---|---|
| RØDE receiver | MIC |
| Phantom-powered boom | MIC+48V only on boom input |
| Battery boom | MIC |
| Dynamic mic | MIC |
| Mixer feed | LINE |
Phantom power may be appropriate for a boom mic that requires it, but only on that boom input. It must not be sent to the RØDE receiver.
2.6.3 Do not assume S-Gamut3.Cine/S-Log3 automatically sends a LUT to the monitor
S-Gamut3.Cine/S-Log3 is the recording color/gamma. It does not by itself guarantee that the external monitor receives a LUT-applied image.
To send a LUT-applied image to the external monitor, the FX6 SDI/HDMI MLUT output must be enabled.
2.6.4 Do not double-LUT
If the FX6 sends a LUT-applied image to the monitor, the monitor should not also apply its own LUT.
Double-LUT can make the image too contrasty, too saturated, or technically misleading.
For the Elvid RigVision monitor discussed in the project, direct LUT import does not appear available, so the preferred solution is to let the FX6 apply the MLUT to the SDI/HDMI output.
2.6.5 Do not rename camera originals casually
Camera originals should remain untouched unless there is a controlled duplicate/working-copy workflow.
Safe practice:
preserve the full card copy,
use reel folder names,
use unique clip IDs in the log,
rename only working copies if absolutely necessary.
2.6.6 Do not split camera-original folders arbitrarily
Do not split a 400GB FX6 card copy into arbitrary 100GB editing folders by dragging pieces around.
That can separate media from related metadata and create relinking or integrity problems.
Safer methods:
| Need | Safer Method |
|---|---|
| Smaller storage chunks | Split archive volumes of full card folder |
| Easier future workflow | Offload smaller reels, 80–160GB target |
| Faster editing | Use proxies/transcodes |
| Emergency splitting | Preserve untouched full-card master first |
2.6.7 Do not rely on camera filenames alone
Camera filenames such as C0001.MXF can repeat.
Use unique clip IDs:
| Reel | Camera File | Unique Clip ID |
|---|---|---|
| A001 | C0001.MXF | A001_C0001 |
| A002 | C0001.MXF | A002_C0001 |
The reel ID prevents duplicate-name confusion.
PART II — FX6 + RØDE AUDIO SYSTEM
Chapter 3. One-Transmitter RØDE Wireless GO + FX6 Baseline(For all FX6 Audio, Refer to FX6 AUDIO FIELD SETUP GUIDE Ver 1.0) instead.
3.1 Original one-transmitter use case
The original working audio configuration was for one RØDE transmitter, one RØDE receiver, and one person speaking. The purpose was to get clean dialogue into the Sony FX6 while also preserving a lower-level safety copy in the camera.
The final one-transmitter workflow is:
RØDE transmitter worn by subject
↓ wireless transmission
RØDE receiver
↓ 3.5 mm audio output
3.5 mm-to-XLR cable/adapter
↓
FX6 INPUT1
↓
CH1 and CH2 both sourced from INPUT1 MIC
This setup is appropriate for:
one-person actor reel dialogue,
solo documentary interview,
one-person narration,
single-subject field recording,
a controlled monologue,
one lav mic recorded with a lower safety copy.
The key design is that the same RØDE signal is recorded to two FX6 channels at two different levels.
| Channel | Source | Dial Setting | Purpose |
|---|---|---|---|
| CH1 | INPUT1 MIC | 7 | Main dialogue |
| CH2 | INPUT1 MIC | 5 | Lower safety copy |
CH2 is not a second person. CH2 is not a second microphone. CH2 is a lower recording of the same mic in case the main track gets too hot.
This one-transmitter setup is the safest simple setup for one person because it provides a built-in in-camera safety track without additional hardware.
3.2 RØDE receiver mounted on shoe: mounting only, no audio pass-through
The RØDE receiver may be mounted on the FX6 shoe for convenience, but in this project workflow the shoe is only a physical mounting point for the RØDE receiver.
The key rule is:
The shoe does not carry the RØDE receiver’s audio into the FX6 in this setup.
The audio must travel through the receiver’s 3.5 mm output cable.
| Component | Job |
|---|---|
| FX6 shoe | Holds the RØDE receiver physically |
| RØDE receiver 3.5 mm output | Sends the audio signal |
| 3.5 mm-to-XLR cable/adapter | Carries audio to camera |
| FX6 INPUT1 | Receives the audio |
| CH1 / CH2 | Records the routed audio |
If the RØDE receiver is mounted on the camera but no audio cable is connected to the FX6 input, the camera will not record the RØDE audio.
This distinction matters because a receiver can appear “installed” on the camera while the camera is actually receiving no audio from it.
3.3 Required audio path: RØDE 3.5 mm output to FX6 INPUT1
The one-transmitter audio path is:
RØDE transmitter
↓
RØDE receiver
↓ 3.5 mm output
3.5 mm-to-XLR cable/adapter
↓
FX6 INPUT1
↓
CH1 / CH2 recording
The field rule is:
Mounting is not audio. Cable is audio.
The RØDE receiver’s 3.5 mm output must be connected to the FX6 audio input. For the one-transmitter baseline, the target input is FX6 INPUT1.
3.4 FX6 INPUT1 physical switch discovery
The decisive troubleshooting discovery was the FX6 INPUT1 physical switch position.
The user originally saw the physical input options as LINE and MIC+48V, but the correct working position was the center MIC position. Once the input was set to MIC, the FX6 meters responded properly.
The final working rule is:
FX6 INPUT1 physical switch = MIC
3.4.1 LINE position and why it is wrong
Do not use LINE for the RØDE receiver in this setup.
LINE expects a hotter line-level signal. The RØDE receiver signal, as used in this project, belongs on a mic-level input.
Using LINE can cause:
little or no meter movement,
apparently missing audio,
weak recorded level,
excessive need to raise the FX6 dial,
confusion that the RØDE system is not working.
Correction:
Move the FX6 INPUT1 physical switch to MIC.
3.4.2 Center MIC position and why it fixed the meter problem
The center MIC position on the FX6 INPUT1 physical switch was the correct setting. This was the practical discovery that fixed the “no audio meter movement” problem.
The physical switch logic for the RØDE receiver is:
| FX6 INPUT1 Switch Position | Use With RØDE Receiver? | Reason |
|---|---|---|
| LINE | No | Wrong input level |
| MIC | Yes | Correct mic-level input |
| MIC+48V | No | Phantom power unnecessary and inappropriate |
The final working position is:
MIC
3.4.3 MIC+48V position and phantom-power warning
Do not use MIC+48V with the RØDE receiver.
MIC+48V supplies phantom power. The RØDE receiver is battery-powered and does not require phantom power. Phantom power is for microphones that require it, such as certain condenser or shotgun boom microphones, and only when connected to the appropriate input.
The warning is absolute in this setup:
Never send phantom power to the RØDE receiver.
Correct:
RØDE receiver → FX6 INPUT1 set to MIC
Incorrect:
RØDE receiver → FX6 INPUT1 set to MIC+48V
If a boom mic is later added and requires phantom power, phantom power may be applied only to the boom input, not the RØDE receiver inputs.
3.5 Final one-transmitter FX6 routing
The final one-transmitter routing is:
| FX6 Item | Setting |
|---|---|
| INPUT1 physical switch | MIC |
| CH1 Source | INPUT1 MIC |
| CH2 Source | INPUT1 MIC |
| Reference | -30 dB |
| CH1 dial | 7 |
| CH2 dial | 5 |
This is the saved baseline for one RØDE transmitter and one receiver.
3.5.1 CH1 Source = INPUT1 MIC
CH1 is assigned to INPUT1 MIC.
CH1 is the main dialogue channel. It should carry the best normal recording level.
The CH1 target is:
strong enough for clean dialogue,
not so hot that loud words clip,
normal speech around -12 to -18 dB,
shout/loud speech around -10 dB,
never hitting 0/red.
3.5.2 CH2 Source = INPUT1 MIC
CH2 is also assigned to INPUT1 MIC.
This sends the same RØDE receiver signal to CH2. CH2 is then recorded lower by using the CH2 physical dial at a lower setting.
The purpose of CH2 is:
lower safety copy of the same mic
CH2 should not be interpreted as a second mic or second person in this one-transmitter baseline.
3.6 Reference level: -30 dB
The final saved FX6 audio reference setting is:
Reference = -30 dB
This was tested with:
RØDE receiver output at 0 dB,
FX6 INPUT1 switch at MIC,
CH1 dial at 7,
CH2 dial at 5.
The -30 dB reference is part of the proven baseline. It should not be changed casually.
Important distinction:
| Control | What It Does |
|---|---|
| RØDE receiver output | Controls signal leaving receiver |
| FX6 MIC Reference | Controls camera input sensitivity behavior |
| CH1/CH2 dials | Set recorded channel levels |
| FX6 headphone volume | Changes monitoring loudness only |
If the RØDE output is wrong, changing the FX6 dial alone may not solve the gain-stage problem. The system must be checked from transmitter to receiver to FX6 input to channel dials.
3.7 Final RØDE gain: 0 dB / -0
The final saved RØDE receiver output is:
0 dB
The user initially referred to this as “-0,” but the correct technical term is 0 dB.
RØDE gain interpretation in this project:
| RØDE Gain Display | Practical Meaning |
|---|---|
| 0 dB | Strongest / loudest output |
| -3 dB | Slightly reduced output |
| -12 dB | Much quieter |
| -30 dB | Very low output |
The final 0 dB setting allowed the FX6 channel dials to sit at practical positions rather than being pushed too high.
3.8 Final FX6 dials: CH1=7, CH2=5
The final dial positions are:
| Channel | Dial | Role |
|---|---|---|
| CH1 | 7 | Main dialogue |
| CH2 | 5 | Lower safety copy |
These settings were confirmed by test behavior:
| Voice Test | Expected Meter Result |
|---|---|
| Normal speech | approximately -12 to -18 dB |
| Loud speech / shout | approximately -10 dB |
| Clipping | avoided |
The system is designed to leave headroom.
3.9 Main track and safety-track logic
The one-transmitter baseline records one mic to two camera channels.
| Channel | Signal | Level | Use |
|---|---|---|---|
| CH1 | RØDE via INPUT1 | Higher | Main dialogue |
| CH2 | Same RØDE via INPUT1 | Lower | Safety backup |
If CH1 is too hot during a sudden shout or laugh, CH2 may remain usable.
The safety track is useful only if CH2 is actually set lower. If CH1 and CH2 are both routed to INPUT1 but both dials are set similarly, the safety benefit is reduced or lost.
3.10 Target meter levels
3.10.1 Normal speech: -12 to -18 dB
Normal dialogue should land around:
-12 to -18 dB
This is strong enough for editing while leaving headroom.
3.10.2 Loud speech/shout: around -10 dB
A shout around:
-10 dB
is safe. It leaves room before clipping.
3.10.3 0/red as clipping ceiling
The 0/red area on the FX6 meter is the clipping ceiling. It is not the desired operating point.
Field rule:
Normal voice around -12 to -18. Loud voice around -10. Never 0/red.
3.11 Alternate tested setting: RØDE -3 dB / CH1 around 8
An earlier workable setting was:
| Item | Earlier Workable Setting |
|---|---|
| RØDE receiver output | -3 dB |
| FX6 CH1 dial | about 8 |
| Normal speech | about -12 to -18 dB |
| Shout | about -10 dB |
This proved the system could work at -3 dB, but the final preference became:
| Item | Final Preference |
|---|---|
| RØDE receiver output | 0 dB |
| FX6 CH1 dial | 7 |
| FX6 CH2 dial | 5 |
| Reference | -30 dB |
The final setup kept the RØDE output strong and the FX6 dials in a practical range.
3.12 When to consider -40 dB camera reference
If the FX6 dial must be turned all the way to 10 and the level is still weak, first check the RØDE output. The correct first move is to raise the RØDE output toward 0 dB.
Only after the RØDE receiver is correctly set should the FX6 MIC Reference be reconsidered.
Possible branch:
| Situation | Action |
|---|---|
| RØDE output is low | Raise RØDE toward 0 dB |
| RØDE already 0 dB, FX6 still too low | Consider changing Reference from -30 dB to -40 dB and retest |
| Audio too hot | Lower CH1/CH2 dial or reduce RØDE output |
| Headphones too loud but meters good | Lower headphone volume only |
The saved baseline remains:
Reference = -30 dB
3.13 One-transmitter quick setup table
| Step | Setting / Action |
|---|---|
| Mount receiver | On FX6 shoe if desired |
| Connect audio | RØDE 3.5 mm output to FX6 INPUT1 |
| INPUT1 physical switch | MIC |
| Phantom power | Off / do not use MIC+48V |
| RØDE receiver output | 0 dB |
| FX6 Reference | -30 dB |
| CH1 Source | INPUT1 MIC |
| CH2 Source | INPUT1 MIC |
| CH1 dial | 7 |
| CH2 dial | 5 |
| Headphones | MDR-7506 in FX6 headphone jack |
| Normal speech target | -12 to -18 dB |
| Loud/shout target | around -10 dB |
| Clipping | never 0/red |
3.14 One-transmitter troubleshooting table
| Problem | Likely Cause | Correction |
|---|---|---|
| No meter movement | INPUT1 not set to MIC | Move INPUT1 switch to center MIC |
| Audio very weak | RØDE gain too low | Raise RØDE output toward 0 dB |
| FX6 dial at 10 but still low | Gain staging too weak | Raise RØDE first; consider -40 dB Reference only after retest |
| Audio clips | Too much gain | Lower CH1 dial or reduce RØDE output |
| CH2 is not safer than CH1 | CH2 dial not lower | Set CH2 lower, around 5 |
| Headphones painfully loud | Monitor volume high | Lower FX6 headphone volume |
| Recording still noisy after lowering headphones | Noise is in room/mic | Fix room noise or mic placement |
| Breathing loud | Mic too high | Move mic 6–8 inches below chin |
| TV audible | Room bleed | Turn off TV, close doors, move subject |
| Clothing noise | Lav/transmitter rubbing | Reposition mic, secure clothing |
Chapter 4. RØDE Gain Testing and Button Operation
4.1 Why RØDE receiver output matters
The RØDE receiver output determines how strong the signal is before it reaches the FX6. It is the first major gain point after the transmitter/receiver system.
If the RØDE output is too low, the FX6 dials may have to be raised too high. If the RØDE output is too high, the camera may record too hot. The project found a stable balance:
RØDE 0 dB → FX6 INPUT1 MIC → Reference -30 dB → CH1 dial 7 / CH2 dial 5
This produced usable dialogue levels without clipping.
4.2 RØDE gain values tested: -30, -12, -3, 0 dB
The project tested or encountered several RØDE receiver output values.
| RØDE Gain | What Happened / Meaning |
|---|---|
| -30 dB | Very quiet; caused confusion because level was too low |
| -12 dB | Lower than desired for final workflow |
| -3 dB | Workable with CH1 dial around 8 |
| 0 dB | Final preferred output |
The user discovered the receiver had been cycled down to -30 dB, then worked back toward the correct output.
The final target is:
0 dB
4.3 Meaning of more negative RØDE gain numbers
The RØDE output scale is easy to misread.
More negative equals quieter.
| Display | Output Strength |
|---|---|
| 0 dB | Maximum / strongest |
| -3 dB | Slight reduction |
| -12 dB | Significant reduction |
| -30 dB | Very quiet |
Field rule:
If the FX6 level is too low, move the RØDE output toward 0 dB, not toward -30 dB.
4.4 Correct term: 0 dB, not “-0”
The correct term for the final RØDE output setting is:
0 dB
The user’s “-0” reference means the same intended final setting, but the handbook uses the correct label: 0 dB.
4.5 Final gain choice and reason
The final gain choice is:
RØDE receiver output = 0 dB
Reason:
It allowed FX6 CH1 dial around 7.
It allowed FX6 CH2 dial around 5 for safety.
Normal speech landed around -12 to -18 dB.
Shouting landed around -10 dB.
The signal had enough strength without clipping.
The test result that locked the baseline was:
| Test | Result |
|---|---|
| RØDE 0 dB + CH1 dial 7 | Normal speech -12 to -18 dB |
| Loud/shout | around -10 dB |
| CH2 dial 5 | Lower safety copy |
4.6 RØDE button operation
The RØDE gain adjustment procedure must be preserved because it solved a practical field problem.
4.6.1 Press left button to show gain
Press the left button on the RØDE receiver to bring up the gain number.
Do this first. If the gain number is not visible, the next button press may not do what the operator expects.
4.6.2 Briefly press right button to change/cycle gain
After the gain number is visible, briefly press the right button to change or cycle the gain value.
Repeat until the desired gain appears.
Target:
0 dB
4.6.3 Avoid holding right button
Avoid holding the right button. Holding may trigger other receiver behavior depending on the exact RØDE model.
Use short, deliberate presses.
4.7 If RØDE becomes stuck at low output
If the RØDE receiver appears stuck at a low value such as -30 dB:
Stop before recording.
Power on the RØDE receiver.
Press the left button to bring up the gain number.
Briefly press the right button to cycle/change the value.
Repeat until 0 dB is reached.
Confirm FX6 INPUT1 is set to MIC.
Confirm FX6 Reference is -30 dB.
Confirm CH1 dial is around 7.
Speak normally and watch meter.
Shout or speak loudly and confirm it does not hit 0/red.
Do not compensate for a stuck -30 dB receiver by blindly turning the FX6 dial all the way up. Fix the receiver output first.
4.8 Gain staging checklist
| Check | Correct State |
|---|---|
| RØDE receiver output | 0 dB |
| FX6 INPUT1 switch | MIC |
| Phantom power | Off |
| FX6 Reference | -30 dB |
| CH1 Source | INPUT1 MIC |
| CH2 Source | INPUT1 MIC for safety-copy mode |
| CH1 dial | 7 |
| CH2 dial | 5 |
| Normal speech | -12 to -18 dB |
| Loud speech | around -10 dB |
| Clipping | never 0/red |
| Headphone volume | comfortable; does not affect recording |
Chapter 5. FX6 Headphone Monitoring and Room-Noise Control
5.1 MDR-7506 suitability for FX6 monitoring
The Sony MDR-7506 headphones are suitable for FX6 monitoring. They are professional-style monitoring headphones and are revealing enough to expose audio problems that may not be obvious from meters alone.
They are useful for detecting:
breathing noise,
TV bleed,
room tone,
HVAC rumble,
clothing rub,
distortion,
wireless hits,
cable movement,
hum,
handling noise,
and excessive room echo.
The project specifically used the MDR-7506 to identify that the mic was sensitive enough to hear breathing and a TV in another room.
That was not a failure of the headphones. It was the headphones doing their job.
5.2 MDR-7506 volume-control expectation
The MDR-7506 normally does not have its own built-in volume control. Monitoring volume is controlled by the FX6 headphone volume setting.
The headphone volume affects only how loud the operator hears the audio.
It does not change:
the RØDE receiver output,
the FX6 channel recording level,
the recorded file,
the amount of TV picked up by the microphone,
or the amount of breathing picked up by the microphone.
5.3 FX6 headphone volume versus recorded level
The project included a test where headphone volume was reduced from 50 to 35. The monitoring level became more comfortable, but the TV remained audible.
That result is expected.
| Change | What It Affects |
|---|---|
| Lower FX6 headphone volume | Headphone loudness only |
| Lower CH1/CH2 dial | Recorded level |
| Lower RØDE output | Signal into camera |
| Move mic / fix room | Actual recorded noise balance |
If background noise is in the microphone, lowering headphone volume does not remove it from the recording.
5.4 Meter levels versus headphone perception
Meters and headphones serve different jobs.
| Tool | Primary Job | Limitation |
|---|---|---|
| FX6 meter | Shows recording level and clipping risk | Does not reveal sound quality |
| MDR-7506 headphones | Reveal noise, rub, bleed, distortion | Do not show exact meter level |
| Playback test | Confirms actual recorded result | Takes time, but prevents mistakes |
Use all three when practical:
Watch meter for safe level.
Listen with headphones for quality.
Record and review test clip before serious work.
5.5 Breathing noise diagnosis
If breathing is prominent in the headphones, the mic is probably too close to the breath path or too high on the chest.
Corrective actions:
Move the RØDE mic/lav lower.
Aim for roughly 6–8 inches below the chin.
Avoid placing it directly under the mouth or nose.
Angle or position it to avoid breath blasts.
Use foam windscreen if available.
Listen again with MDR-7506 headphones.
Record a short test and play it back.
Do not solve breathing noise by lowering recording level unless the voice is also too loud. Lowering recording level reduces voice and noise together.
5.6 TV bleed diagnosis
If a TV in another room is audible in the headphones, it may be audible in the recording.
Steps:
Stop before serious recording.
Listen during room silence.
Watch whether the FX6 meters move when no one is speaking.
Turn off the TV if possible.
If not possible, lower the TV volume substantially.
Close doors between the set and TV.
Move the subject farther from the noise.
Recheck headphones.
Record a test and play it back.
Do not assume that because the speaker is louder than the TV, the TV will disappear. Lavs and small transmitters can pick up surprising background detail in quiet rooms.
5.7 HVAC and room tone diagnosis
HVAC noise can appear as low rumble, hiss, or steady air wash. It may not seem bothersome in person, but headphones and microphones reveal it.
If possible:
turn off HVAC briefly during takes,
avoid placing subject near vents,
avoid pointing mic toward vents,
close doors,
record room tone.
If HVAC cannot be turned off, keep dialogue strong and consistent and record room tone for post.
5.8 Clothing rub diagnosis
Clothing rub is one of the most common lav problems. It may occur when the mic, transmitter, cable, shirt, jacket, collar, necklace, or hair touches or moves.
Symptoms:
scratchy sound,
thumps,
intermittent muffled noise,
rustling during body movement,
noise only when the person turns or gestures.
Corrections:
Reposition the mic away from fabric movement.
Secure loose clothing.
Avoid collars and jacket edges.
Keep mic away from necklaces.
Test the actor’s actual movement.
Listen again in headphones.
5.9 Mic placement correction: 6–8 inches below chin
The practical placement target is:
6–8 inches below the chin
This gives a balance of voice clarity and reduced breath noise.
Placement guide:
| Problem | Adjustment |
|---|---|
| Breathing too loud | Move mic lower |
| Voice too weak | Move mic slightly higher |
| Clothing rub | Move away from fabric contact |
| Harsh plosives | Move off direct mouth path |
| Room too loud | Move mic closer if possible and quiet the room |
Placement must be tested with the person speaking normally and moving as they will during the take.
5.10 Foam windscreen use
Use a foam windscreen when available.
It helps with:
breath noise,
light air movement,
minor plosives,
exterior light breeze.
For exterior wind, a simple foam windscreen may not be enough. More serious wind protection may be needed, but the project baseline specifically preserves the foam windscreen as the simple first corrective step.
5.11 Why not to lower recording level to hide room noise
Lowering recording level does not improve the signal-to-noise relationship. It lowers the voice and background noise together.
Bad fix:
Lower CH1 until the room sounds quieter.
Correct fix:
Make the room quieter, place the mic better, then keep the voice at a proper recording level.
If the room is noisy and the voice is recorded too low, post-production becomes harder because the editor must raise both the voice and the noise.
5.12 Room-noise cleanup checklist
Use this checklist before important dialogue:
| Check | Action |
|---|---|
| TV | Turn off, lower, or isolate |
| Doors | Close between set and noise |
| HVAC | Reduce or turn off if practical |
| Appliances | Check refrigerator, fans, hum |
| Phones | Silence notifications |
| Computers | Check fan noise |
| Clothing | Check rub |
| Breathing | Move mic lower if needed |
| Headphones | Listen before rolling |
| Meters | Watch during silence |
| Test clip | Record and play back |
The goal is not a perfectly silent world. The goal is clean, controllable dialogue.
5.13 Room tone recording procedure
Record 20–30 seconds of room tone for each setup.
Room tone should be recorded with:
same room,
same microphone position,
same camera audio settings,
same background condition,
same HVAC condition if it remains on,
everyone silent.
Room tone helps post-production because it gives the editor a clean sample of the actual room sound to smooth cuts or assist noise reduction.
Chapter 6. Dual RØDE Transmitter / One Receiver Split-Track System
6.1 Why the one-XLR setup is insufficient for separate tracks
The original one-transmitter setup feeds the RØDE receiver into one FX6 XLR input, usually INPUT1. That is correct for one person. It is also usable if two transmitters are already mixed together inside the RØDE receiver and the operator only wants one combined two-person track.
But it is not sufficient when the goal is to record two people separately.
A single FX6 XLR input is effectively one camera audio input. If two RØDE transmitters are combined before entering that one input, the FX6 cannot later separate interviewer and interviewee cleanly. Both voices are baked together.
That means this setup:
TX1 + TX2
↓
RØDE receiver in Merged mode
↓
one 3.5 mm-to-XLR cable
↓
FX6 INPUT1
may record both people, but it does not give independent control of each person in post.
The correct two-person objective is:
| Person | RØDE Transmitter | FX6 Channel | Post-Production Benefit |
|---|---|---|---|
| Person 1 / interviewer | TX1 | CH1 | Can raise/lower Person 1 separately |
| Person 2 / interviewee | TX2 | CH2 | Can raise/lower Person 2 separately |
Separate channels matter because one person may speak louder, turn their head, laugh, interrupt, rustle clothing, or be recorded in a different acoustic position. If both people are merged before the camera, those differences are harder to repair.
The governing rule is:
One XLR input can capture a mixed two-person signal, but two isolated people require two camera input channels.
6.2 Two-person interview objective
The two-transmitter setup is for interviews, two-person dialogue, two-actor scenes, documentary conversations, and any situation where two people each wear one RØDE transmitter.
The objective is:
TX1 → FX6 CH1
TX2 → FX6 CH2
This produces separate tracks inside the FX6 recording.
A proper two-person split-track setup gives the editor:
independent level control,
independent noise repair,
cleaner dialogue balancing,
better ability to mute one person’s clothing rub,
better ability to favor interviewer or interviewee,
better control when people overlap,
more professional dialogue handling.
The desired camera result is:
| FX6 Audio Channel | Desired Source |
|---|---|
| CH1 | TX1 / Person 1 |
| CH2 | TX2 / Person 2 |
The exact person assignment is flexible. TX1 can be interviewer or interviewee, but it must be documented and tested.
A practical field assignment is:
| Role | Transmitter | Camera Channel |
|---|---|---|
| Interviewer | TX1 | CH1 |
| Interviewee | TX2 | CH2 |
For narrative work:
| Role | Transmitter | Camera Channel |
|---|---|---|
| Actor 1 | TX1 | CH1 |
| Actor 2 | TX2 | CH2 |
The project rule is:
Do not assume both transmitters are separate just because both people are wearing RØDE transmitters. Separation depends on receiver mode, cable type, FX6 input routing, and post inspection.
6.3 RØDE Merged mode versus Split mode
The RØDE receiver can operate conceptually in two relevant modes for this workflow: Merged and Split.
| RØDE Receiver Mode | What It Does | FX6 Result | When to Use |
|---|---|---|---|
| Merged | Combines TX1 and TX2 | Both people mixed together | Simple recording, no separate control |
| Split | Sends TX1 and TX2 separately left/right | One person to CH1, one person to CH2 if correctly cabled | Professional two-person split workflow |
For two separate FX6 channels, the receiver must be in:
Split mode
If the receiver is in Merged mode, both transmitters may appear together. The FX6 may still show audio on both meters depending on routing, but that does not prove true separation.
Merged mode is not “wrong” in every situation. It is useful when the operator deliberately wants a combined lav mix, such as the lower-cost boom setup where merged lavs go to INPUT1 and a boom goes to INPUT2. But Merged mode is wrong when the goal is to isolate interviewer and interviewee on separate channels.
The field test is simple:
| Test | Correct Split Result |
|---|---|
| Speak into TX1 only | CH1 moves; CH2 mostly quiet |
| Speak into TX2 only | CH2 moves; CH1 mostly quiet |
| Speak into both | CH1 and CH2 move independently |
If TX1 makes both CH1 and CH2 move equally, the system is probably not split correctly.
6.4 Correct signal path overview
The correct two-transmitter signal path is:
RØDE TX1 + RØDE TX2
↓
RØDE receiver set to Split mode
↓
Receiver 3.5 mm TRS stereo output
↓
Cable Techniques 3.5 mm TRS stereo male to dual XLR-3M male breakout cable
↓
Red XLR → FX6 INPUT1 → CH1
Blue XLR → FX6 INPUT2 → CH2
This path must remain intact from transmitter to receiver to cable to FX6 menu routing.
The complete split-track chain has five required elements:
| Required Element | Correct State |
|---|---|
| Two transmitters | TX1 and TX2 active and assigned |
| RØDE receiver | Split mode |
| Cable | True 3.5 mm TRS stereo-to-dual-XLR breakout |
| FX6 physical inputs | INPUT1 MIC, INPUT2 MIC |
| FX6 channel routing | CH1=INPUT1, CH2=INPUT2 |
If any one of these is wrong, the result may be merged, silent, weak, duplicated, or unusable.
6.5 Cable Techniques 3.5 mm TRS stereo male to dual XLR-3M male cable
The required cable is a true stereo breakout cable:
3.5 mm TRS stereo male to dual XLR-3M male
The specific cable type discussed and purchased in the project was the Cable Techniques RØDE Wireless GO II-style “Y” cable, identified in the project as:
Cable Techniques CT-GO2-YX3M-15 / RØDE Wireless GO II “Y” to 2 XLR-3M low-profile cable
The important specifications are:
| Cable Feature | Required |
|---|---|
| Receiver end | 3.5 mm TRS stereo male |
| Camera ends | Two XLR-3M male plugs |
| Function | Breaks receiver left/right into two FX6 XLR inputs |
| Use | Two RØDE transmitters into one receiver, separated to FX6 INPUT1/INPUT2 |
The cable is not merely “a cable that fits.” It must be wired to preserve the left and right channels separately.
6.5.1 Cable purpose
The cable’s purpose is to take the RØDE receiver’s stereo output and split it into two physical XLR feeds.
In the split workflow:
| RØDE Receiver Output | Cable Side | FX6 Input | Camera Channel |
|---|---|---|---|
| Left / Tip | Red XLR | INPUT1 | CH1 |
| Right / Ring | Blue XLR | INPUT2 | CH2 |
The 3.5 mm TRS output carries separate left and right audio when the receiver is in Split mode. The breakout cable sends those two sides to separate XLR plugs.
Without this cable, the FX6 cannot receive two separate RØDE transmitter channels through its two XLR inputs.
6.5.2 Why this is not a generic splitter
Do not use an ordinary headphone splitter.
A headphone splitter is usually designed to duplicate a stereo headphone feed to two listeners. That is not the same as properly breaking out left and right into separate camera inputs.
Avoid these for the two-transmitter FX6 split-track workflow:
| Item | Why to Avoid |
|---|---|
| Ordinary headphone splitter | May duplicate/collapse signal instead of separating L/R |
| Random 3.5 mm Y-cable | Wiring may be wrong |
| Single 3.5 mm-to-XLR cable | Feeds only one FX6 input |
| Dual XLR female cable | Wrong connector sex for FX6 inputs |
| RØDE SC11 | Not the correct FX6 XLR breakout job |
| Passive adapter chain | More failure points and possible wrong wiring |
The required cable is:
3.5 mm TRS stereo male to dual XLR-3M male
The key words are:
TRS,
stereo,
dual XLR-3M male,
left/right breakout,
not a headphone splitter.
6.5.3 Cable durability / “flimsy” concern
The Cable Techniques cable may look lighter than a heavy stage cable. That does not automatically mean it is wrong. It is a camera breakout cable intended for lightweight rigging.
But it should be treated carefully because it is a critical signal path.
Field handling rules:
Do not yank it from the receiver.
Do not let it hang with tension from the RØDE receiver jack.
Do not bend it sharply at the 3.5 mm plug.
Do not step on it.
Do not pull the FX6 XLR ends under tension.
Coil it gently.
Test it before an important shoot.
Keep it in the camera/audio kit as a dedicated cable.
Consider carrying a backup cable if the workflow becomes production-critical.
The cable is small, but its job is major. If it fails, the two-transmitter split workflow fails.
6.5.4 Shorter-cable consideration
A shorter cable can reduce clutter on the FX6 rig. However, the first requirement is correct wiring, not just shorter length.
A short replacement cable must still be:
| Requirement | Must Match |
|---|---|
| Receiver connector | 3.5 mm TRS stereo male |
| Camera connectors | Two XLR-3M male |
| Channel function | Left and right separated |
| Intended use | Wireless receiver stereo out to two camera XLR inputs |
Do not choose a shorter cable if it changes the wiring function. A wrong short cable is worse than a slightly long correct cable.
6.6 Red XLR to INPUT1
For the Cable Techniques cable preserved in this workflow:
Red XLR → FX6 INPUT1
This becomes the CH1 side when CH1 is set to INPUT1.
The intended routing is:
| Cable Plug | FX6 Input | FX6 Channel |
|---|---|---|
| Red XLR | INPUT1 | CH1 |
If TX1 is assigned to the left side of the RØDE receiver, the blue XLR should carry TX1 to CH1.
6.7 Blue XLR to INPUT2
For the same cable:
Blue XLR → FX6 INPUT2
This becomes the CH2 side when CH2 is set to INPUT2.
The intended routing is:
| Cable Plug | FX6 Input | FX6 Channel |
|---|---|---|
| Blue XLR | INPUT2 | CH2 |
If the two people appear reversed, this is not necessarily a failure. It may simply mean the transmitter assignment or receiver side is reversed.
Correction options:
Swap the Red/Blue XLR plugs.
Relabel TX1/TX2 assignments.
Keep the routing but document which person is on which channel.
The safest method is to test and slate:
“TX1 is interviewer on CH1. TX2 is interviewee on CH2.”
6.8 FX6 physical input settings
The FX6 physical input switches must match the RØDE receiver signal.
6.8.1 INPUT1 = MIC
Set FX6 INPUT1 physical switch to:
MIC
Do not use LINE.
Do not use MIC+48V.
6.8.2 INPUT2 = MIC
Set FX6 INPUT2 physical switch to:
MIC
Do not use LINE.
Do not use MIC+48V.
6.8.3 Phantom power off
Phantom power must be off for both RØDE receiver feeds.
Correct:
| FX6 Input | Source | Physical Switch |
|---|---|---|
| INPUT1 | RØDE left / TX1 | MIC |
| INPUT2 | RØDE right / TX2 | MIC |
Incorrect:
| FX6 Input | Wrong Setting | Problem |
|---|---|---|
| INPUT1 | LINE | wrong sensitivity |
| INPUT2 | LINE | wrong sensitivity |
| INPUT1 | MIC+48V | sends phantom power to RØDE |
| INPUT2 | MIC+48V | sends phantom power to RØDE |
The later boom setup may use phantom power on the boom adapter input if the boom mic requires it. That does not change the RØDE rule: no phantom power to RØDE receiver outputs.
6.9 FX6 menu settings
Once the cable is physically routed, the FX6 channels must be assigned correctly in the audio menu.
6.9.1 CH1 Input Select = INPUT1
Set:
CH1 Input Select = INPUT1
This makes CH1 record the blue XLR / INPUT1 side.
6.9.2 CH2 Input Select = INPUT2
Set:
CH2 Input Select = INPUT2
This makes CH2 record the red XLR / INPUT2 side.
This is the critical menu change from the one-transmitter safety-track workflow. In the one-transmitter setup, CH2 was also INPUT1. In the two-transmitter split setup, CH2 must be INPUT2.
| Workflow | CH1 | CH2 |
|---|---|---|
| One-transmitter safety | INPUT1 | INPUT1 |
| Two-transmitter split | INPUT1 | INPUT2 |
6.9.3 INPUT1 MIC Reference = -30 dB
Set INPUT1 MIC Reference to:
-30 dB
This matches the saved RØDE gain-staging logic.
6.9.4 INPUT2 MIC Reference = -30 dB
Set INPUT2 MIC Reference to:
-30 dB
Both RØDE sides should start from the same reference baseline.
6.10 Starting dial values
For two-transmitter split mode, start with:
| Channel | Starting Dial |
|---|---|
| CH1 | 7 |
| CH2 | 7 |
Then adjust per speaker.
This is different from the one-transmitter safety-copy workflow.
In one-transmitter safety mode:
| Channel | Dial | Purpose |
|---|---|---|
| CH1 | 7 | Main |
| CH2 | 5 | Lower safety |
In two-transmitter split mode:
| Channel | Dial | Purpose |
|---|---|---|
| CH1 | around 7 | Person 1 main |
| CH2 | around 7 | Person 2 main |
If Person 2 is louder, lower CH2. If Person 1 is quieter, adjust CH1. In split mode, each channel is a main source for a different person.
Target levels remain:
| Speech Type | Target |
|---|---|
| Normal speech | -12 to -18 dB |
| Loud words | roughly -12 to -8 dB |
| Shout/laugh | below 0/red; around -10 is safe |
6.11 TX1/TX2 channel test procedure
This test must be done after installing the Cable Techniques cable and setting the RØDE receiver to Split mode.
Step 1 — Test TX1 alone
Turn on TX1.
Turn off TX2 or keep TX2 silent.
Speak into TX1.
Watch FX6 meters.
Confirm CH1 moves strongly.
Confirm CH2 stays mostly quiet.
Expected result:
| Speaker | CH1 | CH2 |
|---|---|---|
| TX1 only | Moves | Mostly quiet |
Step 2 — Test TX2 alone
Turn on TX2.
Keep TX1 silent.
Speak into TX2.
Watch FX6 meters.
Confirm CH2 moves strongly.
Confirm CH1 stays mostly quiet.
Expected result:
| Speaker | CH1 | CH2 |
|---|---|---|
| TX2 only | Mostly quiet | Moves |
Step 3 — Test both transmitters
Have Person 1 speak.
Have Person 2 speak.
Have both speak briefly.
Confirm each channel responds independently.
Listen through MDR-7506 headphones.
Record a short test.
Play back the test before serious recording.
Final expected split result:
| Test | Correct Result |
|---|---|
| TX1 only | CH1 moves |
| TX2 only | CH2 moves |
| Both | both move independently |
| Headphones | each person clean |
| Playback | separation confirmed |
6.12 What to do if both channels move equally
If both channels move equally when only one transmitter is active, the system is probably not truly split.
Check in this order:
Is the RØDE receiver in Split mode?
Is the Cable Techniques stereo breakout cable installed?
Is Red XLR in INPUT1?
Is Blue XLR in INPUT2?
Is CH1 set to INPUT1?
Is CH2 set to INPUT2?
Are both physical input switches set to MIC?
Is any headphone splitter or wrong adapter being used?
Is the receiver output being collapsed or duplicated before the FX6?
Common causes:
| Symptom | Likely Cause |
|---|---|
| TX1 moves both meters equally | Receiver in Merged mode or wrong cable |
| TX2 moves both meters equally | Receiver in Merged mode or wrong cable |
| CH1 and CH2 identical waveforms | Merged, duplicated, or dual-mono recording |
| CH2 duplicates CH1 | CH2 still set to INPUT1 |
| Only one side records | cable/input/routing problem |
Do not proceed with a two-person interview until the TX1/TX2 solo test proves separation.
6.13 What to do if one channel is missing or thin
If one channel is missing, weak, thin, phasey, or strange:
Confirm the transmitter is turned on.
Confirm the receiver sees the transmitter.
Confirm RØDE receiver is in Split mode.
Confirm Red XLR is fully seated in INPUT1.
Confirm Blue XLR is fully seated in INPUT2.
Confirm INPUT1 and INPUT2 switches are MIC.
Confirm CH1=INPUT1 and CH2=INPUT2.
Swap Red and Blue XLR plugs temporarily.
See whether the problem follows the cable side or stays with the camera input.
Remove extra adapters.
Retest with each transmitter alone.
Record and play back a test.
Diagnostic table:
| Problem | Likely Area |
|---|---|
| CH1 missing | TX1, Red cable side, INPUT1, CH1 routing |
| CH2 missing | TX2, Blue cable side, INPUT2, CH2 routing |
| One side thin | cable wiring, adapter problem, bad connection |
| Both mixed | receiver mode or wrong cable |
| No audio at all | physical input switch, receiver output, cable connection |
A thin or phasey sound is a warning sign. Do not ignore it.
6.14 Split-track verification checklist
Before using the dual-transmitter setup for real production, complete this checklist.
| Verification Item | Correct State |
|---|---|
| RØDE receiver | Split mode |
| Cable | Cable Techniques 3.5 mm TRS stereo to dual XLR-3M |
| Red XLR | INPUT1 |
| Blue XLR | INPUT2 |
| INPUT1 switch | MIC |
| INPUT2 switch | MIC |
| Phantom power | Off for RØDE |
| CH1 Input Select | INPUT1 |
| CH2 Input Select | INPUT2 |
| INPUT1 Reference | -30 dB |
| INPUT2 Reference | -30 dB |
| CH1 dial | start around 7 |
| CH2 dial | start around 7 |
| TX1 only test | CH1 moves |
| TX2 only test | CH2 moves |
| Headphone check | clean audio |
| Short test recording | reviewed before shoot |
Field rule:
Do not trust the screen alone. Test TX1 alone, TX2 alone, both together, then play back.
Chapter 7. Permanent Split Setup for One or Two Transmitters
7.1 Why a permanent split setup is easier
The project reached a practical conclusion: the easiest long-term workflow is to leave the FX6 in the two-transmitter split configuration most of the time.
That means leaving the camera set as:
| Channel | Source |
|---|---|
| CH1 | INPUT1 |
| CH2 | INPUT2 |
with the Cable Techniques cable installed as:
| Cable Plug | FX6 Input |
|---|---|
| Red XLR | INPUT1 |
| Blue XLR | INPUT2 |
This simplifies field operation because the camera is always ready for two transmitters. The operator does not have to repeatedly switch CH2 between INPUT1 and INPUT2 depending on whether one or two people are being recorded.
The main benefit is avoiding this common failure:
You shoot one person with CH2 as safety.
Later you add a second transmitter.
You forget to change CH2 from INPUT1 to INPUT2.
Both camera channels record the same person, and the second person is missing or only mixed elsewhere.
Permanent split mode prevents that.
The tradeoff is that a one-person shoot no longer automatically records a lower CH2 safety copy.
7.2 Permanent split settings table
The permanent split baseline is:
| Item | Setting |
|---|---|
| RØDE receiver | Split mode |
| Cable | Cable Techniques 3.5 mm TRS stereo to dual XLR-3M |
| Red XLR | FX6 INPUT1 |
| Blue XLR | FX6 INPUT2 |
| INPUT1 physical switch | MIC |
| INPUT2 physical switch | MIC |
| Phantom power | Off for RØDE receiver |
| CH1 Input Select | INPUT1 |
| CH2 Input Select | INPUT2 |
| INPUT1 MIC Reference | -30 dB |
| INPUT2 MIC Reference | -30 dB |
| CH1 dial | start around 7 |
| CH2 dial | start around 7 |
| Headphones | MDR-7506 |
| Test | TX1 only / TX2 only |
This setup works for both:
two-transmitter recording,
one-transmitter recording using TX1 only.
The difference is what happens to CH2 when TX2 is not active.
7.3 Two-transmitter operation
For two transmitters, permanent split mode is exactly what is needed.
7.3.1 CH1 = TX1 / Person 1
With Red XLR into INPUT1 and CH1 assigned to INPUT1:
CH1 records TX1 / Person 1
This channel should be adjusted for the person wearing TX1.
7.3.2 CH2 = TX2 / Person 2
With Blue XLR into INPUT2 and CH2 assigned to INPUT2:
CH2 records TX2 / Person 2
This channel should be adjusted for the person wearing TX2.
Two-person dial rule:
| Channel | Set For |
|---|---|
| CH1 | Person 1’s actual voice |
| CH2 | Person 2’s actual voice |
Do not automatically set CH2 lower in split mode. CH2 is not safety in this mode. It is Person 2’s main audio.
7.4 One-transmitter operation while staying in split mode
Permanent split mode can still be used when only one person is recorded.
7.4.1 Use TX1 only
For one-person use, keep the system in split mode and use TX1.
This means:
| Item | State |
|---|---|
| TX1 | On / worn by subject |
| TX2 | Off or unused |
| CH1 | Active |
| CH2 | likely silent |
7.4.2 CH1 records solo mic
CH1 records the solo microphone.
In post, CH1 becomes the usable dialogue track.
7.4.3 CH2 likely silent
CH2 will likely be silent or mostly unused because TX2 is not active.
This is expected. It does not mean the system is broken.
The one-person split-mode result is:
| Channel | Result |
|---|---|
| CH1 | Solo mic |
| CH2 | Silent/unused |
The operator should not panic if CH2 is silent during one-person split-mode recording. The question is whether CH1 is clean, properly leveled, and centered in post.
7.5 What is lost: old CH2 safety-track copy
The tradeoff of permanent split mode is the loss of the old in-camera safety track when only one transmitter is used.
Old one-transmitter safety mode:
| Channel | Source | Purpose |
|---|---|---|
| CH1 | INPUT1 | Main dialogue |
| CH2 | INPUT1 | Lower safety copy |
Permanent split mode with one transmitter:
| Channel | Source | Purpose |
|---|---|---|
| CH1 | INPUT1 / TX1 | Solo mic |
| CH2 | INPUT2 / TX2 inactive | Silent/unused |
Therefore, all you lose in the simplified one-transmitter workflow is the FX6’s lower CH2 safety copy.
That is an acceptable tradeoff if simplicity and two-person readiness matter more.
It is not acceptable if the solo speaker is likely to shout, laugh loudly, or produce unpredictable peaks and no onboard transmitter recording is available.
7.6 When to switch back to one-transmitter safety mode
Switch back to the one-transmitter safety workflow when:
only one person is recording,
there is no need to be ready for two transmitters,
the speaker may shout or laugh,
the take is important,
and a lower safety copy is worth the menu change.
To switch back:
| FX6 Setting | One-Transmitter Safety Mode |
|---|---|
| CH1 Input Select | INPUT1 |
| CH2 Input Select | INPUT1 |
| CH1 dial | 7 |
| CH2 dial | 5 |
| INPUT1 switch | MIC |
| Reference | -30 dB |
This restores:
| Channel | Purpose |
|---|---|
| CH1 | Main |
| CH2 | Lower safety |
After the one-person safety shoot, if returning to normal two-transmitter readiness, reset:
| FX6 Setting | Permanent Split Mode |
|---|---|
| CH1 Input Select | INPUT1 |
| CH2 Input Select | INPUT2 |
| CH1 dial | per Person 1 |
| CH2 dial | per Person 2 |
| Cable | Red INPUT1 / Blue INPUT2 |
The danger is forgetting to switch back before a two-person shoot. That is why permanent split mode is preferred as the everyday baseline.
7.7 Editing solo CH1 as centered mono audio
When one person is recorded in permanent split mode, the useful audio is on CH1.
In editing:
Treat CH1 as the mono dialogue source.
Center it.
Do not leave it panned only to the left speaker.
Duplicate or fill to both sides only for playback balance if needed.
Do not confuse duplication with safety.
Important distinction:
| Post Action | What It Does |
|---|---|
| Center CH1 mono | Corrects playback position |
| Duplicate CH1 to both sides | Makes it play from both speakers |
| Use CH2 safety track | Only possible if CH2 was actually recorded lower |
| Onboard transmitter recording | Separate backup file if available |
Duplicating CH1 in post does not create a safety track. If CH1 clipped, the duplicated copy is also clipped.
7.8 Field decision table: split mode versus safety-copy mode
Use this decision table before a shoot.
| Shooting Situation | Recommended Setup | Reason |
|---|---|---|
| Two-person interview | Permanent split mode | CH1=TX1, CH2=TX2 |
| Two-person actor scene | Permanent split mode | Separate tracks |
| One-person quick recording | Permanent split mode using TX1 | Simplest |
| One-person critical performance with shouting | Safety-copy mode | CH2 lower backup |
| One-person quiet interview | Permanent split mode acceptable | CH1 alone likely fine |
| One person with onboard RØDE recording enabled | Permanent split mode acceptable | Onboard file can serve as backup |
| Two lavs plus boom, professional | Split mode + XLR-K3M/K2M | CH1/CH2 lavs, CH3 boom |
| Two lavs plus boom, no adapter | Merged lavs + boom | Sacrifices isolated lavs |
Permanent field rule:
Leave the camera in split mode most of the time. Use TX1 for one person, TX1/TX2 for two people. Switch to safety-copy mode only when deliberately needed.
Chapter 8. RØDE Onboard Transmitter Recording
8.1 What onboard transmitter recording means
Onboard transmitter recording means the RØDE transmitter itself records an internal audio file while it is also sending audio wirelessly to the receiver.
This creates two possible audio paths:
Path 1:
Transmitter → Receiver → FX6 recording
Path 2:
Transmitter → Internal transmitter recording
The internal transmitter recording is independent of the FX6 recording. It can function as backup audio if the wireless link, camera input, cable, channel routing, or camera gain fails.
This is especially valuable in the permanent split workflow because a one-transmitter shoot may not have the old CH2 safety copy.
8.2 Camera audio versus transmitter internal audio
| Audio Type | Recorded Where | Purpose |
|---|---|---|
| Camera audio | Inside FX6 video file | Main production audio |
| Transmitter internal audio | Inside RØDE transmitter | Backup / insurance audio |
Camera audio is convenient because it is already attached to the video clip. Onboard transmitter audio must be retrieved separately, named, backed up, and synced if used.
The tradeoff is:
| Camera Audio | Onboard Transmitter Audio |
|---|---|
| Already in clip | Separate retrieval required |
| Depends on wireless/cable/camera routing | Protected from camera routing mistakes |
| Can clip if camera gain wrong | May preserve cleaner backup depending on model/settings |
| Easier to edit immediately | Extra post step |
8.3 Which RØDE models support onboard recording
Onboard recording depends on the exact RØDE model.
The preserved project conclusion is:
| RØDE Model | Onboard Recording Status |
|---|---|
| Wireless GO II | Supports onboard recording |
| Wireless PRO | Supports onboard recording |
| Wireless GO Gen 3 | Supports onboard recording |
| Original Wireless GO | likely does not support the same onboard-recording workflow |
The operator must confirm the exact RØDE model before depending on onboard recording.
Do not assume onboard recording exists just because the unit is a RØDE Wireless GO-style device.
8.4 Backup mode versus Always mode
Common onboard recording concepts include Backup mode and Always mode.
| Mode | Practical Meaning | Advantage | Risk |
|---|---|---|---|
| Backup | Records as a safety/backup according to device configuration | Good field insurance | Must confirm it is enabled |
| Always | Records whenever transmitter is on | Maximum protection | More battery/storage use |
| Manual/button start | Operator starts recording manually | Controlled | Easy to forget |
For the user’s workflow, Backup mode is the practical default if available. Always mode is safest if the operator can manage battery life, storage, and file retrieval.
The key principle is:
An onboard recording that was not enabled, not running, or not retrieved is not a backup.
8.5 Why onboard recording replaces the lost FX6 safety track
In one-transmitter safety mode, the FX6 records:
| Channel | Source |
|---|---|
| CH1 | main mic |
| CH2 | same mic lower |
In permanent split mode with one transmitter, the FX6 records:
| Channel | Source |
|---|---|
| CH1 | TX1 solo mic |
| CH2 | silent/unused |
The lost item is the lower CH2 safety copy.
Onboard transmitter recording can replace that missing safety layer:
| Main Recording | Backup |
|---|---|
| FX6 CH1 | TX1 internal recording |
For two-person recording, the logic becomes:
| Person | FX6 Main | Onboard Backup |
|---|---|---|
| Person 1 | CH1 | TX1 internal file |
| Person 2 | CH2 | TX2 internal file |
This is why onboard recording matters in the simplified permanent split workflow.
8.6 RØDE safety channel versus onboard recording
The RØDE safety channel and onboard recording are different concepts.
| Feature | Meaning |
|---|---|
| RØDE safety channel | A lower-level duplicate in certain output workflows |
| Onboard transmitter recording | A separate internal file recorded in the transmitter |
For the FX6 split-track workflow, onboard transmitter recording is the more relevant backup concept because it can protect against camera-side routing or level mistakes.
A safety channel may be useful in certain merged workflows, but it is not the same as a separate transmitter file.
8.7 Shoot-day onboard recording checklist
Use this checklist before relying on onboard transmitter recording.
| Check | Action |
|---|---|
| Confirm model | Make sure exact RØDE model supports onboard recording |
| Enable recording | Use correct RØDE configuration method |
| Select mode | Backup or Always |
| Check battery | Transmitter battery charged |
| Check storage | Enough onboard memory |
| Confirm receiver link | Receiver sees transmitter |
| Confirm FX6 meters | Camera still receiving audio |
| Listen in headphones | No rub/noise/distortion |
| Test recording | Record short camera test |
| Verify file if possible | Confirm onboard file exists before serious work |
A practical field statement before rolling:
“Camera audio good. TX onboard backup enabled.”
8.8 Post-shoot file retrieval
After the shoot, onboard files must be retrieved before transmitters are cleared or reused.
Procedure:
Stop recording.
Power down only after confirming no recording is still needed.
Connect transmitter to computer using the appropriate RØDE workflow.
Export or copy internal recordings.
Place them in the project audio originals folder.
Rename or label them according to project/reel/transmitter.
Back them up.
Do not erase transmitter files until backup is confirmed.
Do not wait until weeks later to retrieve transmitter recordings. They can be forgotten, overwritten, or separated from the project context.
8.9 Folder and naming approach for transmitter recordings
Use a clear audio-originals structure.
Example:
PROJECT/
02_AUDIO_ORIGINALS/
20260515_RODE_TX1/
20260515_RODE_TX2/
ROOM_TONE/
Suggested naming patterns:
| File Type | Example |
|---|---|
| TX1 backup | A001_TX1_BACKUP_001.wav |
| TX2 backup | A001_TX2_BACKUP_001.wav |
| Interviewer backup | A001_INTERVIEWER_TX1_001.wav |
| Interviewee backup | A001_INTERVIEWEE_TX2_001.wav |
| Room tone | A001_ROOMTONE_INT_INTERVIEW_001.wav |
The exact extension depends on the RØDE export format. The important rule is that transmitter files should not remain as anonymous downloads with no project/reel/person identity.
8.10 Backup procedure for onboard recordings
Treat onboard recordings as production audio originals.
After retrieval:
Copy to the project audio originals folder.
Make a second backup.
Note the existence of the backup audio in the clip log.
Preserve the files until the final edit is complete.
Do not clear transmitter storage until files are backed up.
Clip log note example:
| Unique Clip ID | Audio Note |
|---|---|
| A001_C0001 | CH1 TX1 camera audio; TX1 onboard backup available |
| A001_C0002 | CH1 TX1 / CH2 TX2; both onboard backups copied |
The onboard recording is only useful if the editor knows it exists.
Chapter 9. Adding a Boom Mic to the Dual-RØDE Setup
9.1 Why both FX6 handle XLR inputs are already occupied
In the two-transmitter split-track workflow, both FX6 handle XLR inputs are already being used.
| FX6 Input | Source |
|---|---|
| INPUT1 | RØDE TX1 via Red XLR |
| INPUT2 | RØDE TX2 via Blue XLR |
That means there is no remaining handle XLR input for a boom mic if the goal is to keep TX1 and TX2 separate.
A boom mic can still be added, but not by simply plugging it into an already-used input.
The operator must choose between:
adding more input capability, or
sacrificing separate lav isolation.
9.2 Professional three-track solution overview
The professional solution is to add a Sony XLR-K3M or XLR-K2M through the FX6 Multi Interface Shoe.
This creates a three-track layout:
| Camera Channel | Source |
|---|---|
| CH1 | RØDE TX1 |
| CH2 | RØDE TX2 |
| CH3 | Boom mic |
| CH4 | Off or optional second shoe input |
This gives maximum post-production flexibility:
TX1 isolated,
TX2 isolated,
boom isolated.
The boom may provide:
more natural dialogue tone,
backup if a lav rubs,
backup if a lav transmitter fails,
better room/scene perspective,
cleaner sound if properly boomed,
more editorial choices.
This is the best method when audio quality and post flexibility matter.
9.3 Sony XLR-K3M / XLR-K2M adapter concept
The Sony XLR-K3M or XLR-K2M adapter adds additional XLR input capability through the camera’s Multi Interface Shoe.
In this workflow, it does not replace the Cable Techniques cable. It works alongside it.
Physical concept:
| Device | Connection |
|---|---|
| RØDE receiver split output | Cable Techniques cable to FX6 INPUT1/INPUT2 |
| Sony XLR-K3M/K2M | FX6 Multi Interface Shoe |
| Boom mic | Adapter INPUT1 |
| FX6 channels | CH1/CH2 lavs, CH3 boom |
This allows the FX6 to record more than the two handle XLR inputs alone.
9.4 Where the adapter plugs in: Multi Interface Shoe
The Sony XLR adapter plugs into the FX6 Multi Interface Shoe on the top/handle area.
It does not plug into:
FX6 INPUT1,
FX6 INPUT2,
the RØDE receiver,
the Cable Techniques split cable.
The adapter’s job is to provide an additional input path through the camera shoe.
Physical layout:
RØDE receiver
↓ Cable Techniques cable
Red XLR → FX6 INPUT1
Blue XLR → FX6 INPUT2
Boom mic
↓ XLR cable
Sony XLR-K3M/K2M INPUT1
↓ Multi Interface Shoe
FX6 CH3 / Shoe CH1
9.5 Boom mic into adapter INPUT1
Plug the boom mic into:
Sony XLR adapter INPUT1
The adapter input then feeds the FX6 through Shoe CH1, which should be assigned to CH3 in the camera’s audio routing concept.
The boom does not go into the Cable Techniques cable. The boom does not share the RØDE receiver. The boom has its own adapter input.
9.6 Professional channel layout
9.6.1 CH1 = RØDE TX1
CH1 records the first RØDE transmitter.
Typical use:
| CH1 | Person 1 / interviewer / actor 1 |
|---|
9.6.2 CH2 = RØDE TX2
CH2 records the second RØDE transmitter.
Typical use:
| CH2 | Person 2 / interviewee / actor 2 |
|---|
9.6.3 CH3 = boom mic via Shoe CH1
CH3 records the boom mic through the Sony XLR adapter.
Typical use:
| CH3 | Boom mic |
|---|
This gives the editor both close lav isolation and a more natural boom perspective.
9.6.4 CH4 = Off or Shoe CH2
CH4 can remain off unless a second source is connected to the adapter.
Possible CH4 uses later:
second boom,
plant mic,
room mic,
mixer feed,
additional source.
For the current project baseline, CH4 can remain Off unless deliberately needed.
9.7 FX6 CH3/CH4 menu concept
The menu concept is:
| FX6 Channel | Input Select |
|---|---|
| CH1 | INPUT1 |
| CH2 | INPUT2 |
| CH3 | Shoe CH1 |
| CH4 | Off or Shoe CH2 |
The exact displayed labels may depend on the FX6 menu state and the connected adapter, but the operating logic is:
Boom mic into adapter INPUT1 → Shoe CH1 → FX6 CH3
The operator should verify by:
speaking into TX1 and watching CH1,
speaking into TX2 and watching CH2,
speaking into boom and watching CH3,
confirming CH4 is off or unused unless needed,
recording a test and reviewing playback.
9.8 Phantom-power decision tree
The boom input setting depends on the type of microphone or source.
9.8.1 Phantom-powered shotgun/condenser
If the boom mic is a condenser or shotgun microphone that requires phantom power:
Adapter INPUT1 = MIC+48V
This applies phantom power only to the boom input on the adapter.
Do not confuse this with the RØDE inputs.
9.8.2 Battery-powered boom mic
If the boom mic powers itself with an internal battery:
Adapter INPUT1 = MIC
Do not use phantom power unless the mic specifically requires it.
9.8.3 Dynamic mic
If the boom/source is a dynamic microphone:
Adapter INPUT1 = MIC
Dynamic microphones do not require phantom power.
9.8.4 External mixer feed
If the source is a true line-level feed from an external mixer:
Adapter INPUT1 = LINE
Use LINE only for a true line-level source. Do not use LINE for the RØDE receiver baseline.
Phantom-power decision table:
| Source | Input Setting |
|---|---|
| Phantom-powered shotgun/condenser | MIC+48V on adapter input only |
| Battery-powered boom | MIC |
| Dynamic mic | MIC |
| External mixer line feed | LINE |
| RØDE receiver | MIC, never MIC+48V |
9.9 Warning: never send phantom power to RØDE receiver
The boom workflow does not change the RØDE rule.
The RØDE receiver inputs must remain:
| RØDE Path | FX6 Setting |
|---|---|
| Red XLR to INPUT1 | MIC |
| Blue XLR to INPUT2 | MIC |
Do not use MIC+48V on INPUT1 or INPUT2 when those inputs are receiving the RØDE receiver outputs.
A boom mic may receive phantom power only through the adapter input if that boom mic requires phantom power.
The safe separation is:
| Device | Phantom Power? |
|---|---|
| RØDE receiver | No |
| Phantom-powered boom | Yes, on boom adapter input only |
| Battery boom | No |
| Dynamic mic | No |
| Mixer feed | No phantom; use LINE if appropriate |
9.10 Lower-cost alternate: merged lavs plus boom
If the operator does not have a Sony XLR-K3M/K2M adapter, a lower-cost compromise is possible.
The compromise is:
set the RØDE receiver to Merged mode,
feed the merged lavs into FX6 INPUT1,
plug boom into FX6 INPUT2.
This gives two camera tracks:
| Channel | Source |
|---|---|
| CH1 | both RØDE lavs mixed together |
| CH2 | boom mic |
This can be useful, but it sacrifices separate control of the two lav transmitters.
9.10.1 RØDE receiver Merged mode into INPUT1
In this alternate workflow, the RØDE receiver combines TX1 and TX2 before sending audio to the FX6.
The result is:
TX1 + TX2 → one combined lav mix → INPUT1 → CH1
This is not a split lav workflow.
9.10.2 Boom into INPUT2
The boom mic goes into FX6 INPUT2.
The result is:
| FX6 Channel | Source |
|---|---|
| CH1 | Merged RØDE lavs |
| CH2 | Boom |
This gives the editor one lav mix and one boom track.
9.10.3 Tradeoff: two lavs baked together
The tradeoff is major:
| Professional Three-Track | Lower-Cost Alternate |
|---|---|
| CH1 TX1 isolated | CH1 both lavs merged |
| CH2 TX2 isolated | No separate TX1/TX2 control |
| CH3 boom isolated | CH2 boom |
| Maximum flexibility | Simpler but less flexible |
If one lav has clothing rub in the lower-cost merged setup, that rub may contaminate the combined lav track. If one person is too loud, adjusting the combined track affects both people.
Use the merged-lavs-plus-boom setup only when the adapter is unavailable and a boom track is still desired.
9.11 Why not to use a passive Y-cable
Do not combine the boom and RØDE receiver with a passive Y-cable.
A passive Y-cable is not a mixer. It can cause:
level loss,
impedance mismatch,
noise,
weak signal,
unpredictable routing,
phase problems,
gear interaction,
difficult troubleshooting.
Correct ways to combine multiple audio sources:
| Need | Correct Solution |
|---|---|
| Two separate RØDE lavs | RØDE Split + Cable Techniques dual XLR |
| Two separate lavs + boom | Add XLR-K3M/K2M adapter |
| Merged lavs + boom | RØDE Merged to INPUT1, boom to INPUT2 |
| More complex multi-mic setup | Proper mixer/recorder |
Do not build a professional audio system out of passive splitters.
9.12 Professional three-track versus simpler alternate decision table
| Production Need | Recommended Setup | Result |
|---|---|---|
| One person with safety | CH1/CH2 both INPUT1 | main + lower safety |
| One person, simplest permanent setup | TX1 only in split mode | CH1 solo, CH2 silent |
| Two people, separate lavs | RØDE Split + Cable Techniques | CH1 TX1, CH2 TX2 |
| Two people + boom, best method | Add XLR-K3M/K2M | CH1 TX1, CH2 TX2, CH3 boom |
| Two people + boom, no adapter | RØDE Merged + boom INPUT2 | CH1 merged lavs, CH2 boom |
| Maximum post flexibility | Professional three-track | isolated lavs + boom |
| Lowest gear complexity | Merged lavs + boom | less control |
Simple overview:
The lavs give close, reliable dialogue.
The boom gives more natural tone and backup.
The professional adapter setup gives the editor the most choices.
The lower-cost alternate works but bakes the two lavs together.
Final rule:
Use the Sony XLR-K3M/K2M adapter when you want two separate RØDE lavs plus a separate boom track.
PART III — CINE EI CAMERA OPERATION AND EXTERNAL CONTROLS
Chapter 10. White Balance External Controls
10.1 Manual white balance philosophy
White balance is a consistency tool. It tells the camera what color should be treated as neutral under the current light.
For this Cine EI muted-color workflow, white balance should be deliberate, stable, and repeatable. It should not drift during a take.
The preferred approach is:
Manual white balance using A, B, or Preset — not uncontrolled ATW for serious controlled scenes.
White balance should serve the scene by keeping skin and neutral objects consistent. It should not be abused as the main creative “muted look” tool. The muted look should come from lighting, production design, controlled color palette, LUT monitoring, and final grade.
White balance should protect:
skin tone,
shot-to-shot continuity,
grading consistency,
matching between angles,
matching between actor close-ups,
documentary credibility.
A scene can be warm or cool intentionally, but that choice should be locked, not drifting.
10.2 Why ATW should usually be avoided
ATW means Auto Tracing White / automatic white balance behavior. It can shift as the camera sees different colors, light sources, backgrounds, or subject movement.
ATW may be useful in emergency run-and-gun conditions, but it is usually wrong for controlled actor reels and feature scenes.
Risks of ATW:
| Risk | Result |
|---|---|
| Color shifts during take | Unprofessional change mid-shot |
| Different close-ups | Skin does not match |
| Background influence | Camera changes WB based on wall/wardrobe |
| Mixed light confusion | Skin becomes inconsistent |
| Grading difficulty | Shots require extra correction |
| Actor reel problem | Performer’s face changes color between takes |
For controlled scenes:
Do not let the camera chase color. Set color deliberately.
ATW can be considered only when:
documentary conditions are changing quickly,
the operator cannot pause to set WB,
the shot is informational more than cinematic,
and the risk of color drift is acceptable.
Even then, fixed white balance is usually preferable if time allows.
10.3 External WB switch positions
The FX6 provides external white balance selection positions such as A, B, and Preset. The project workflow uses them as practical memory positions.
| WB Position | Practical Use |
|---|---|
| A | Main custom white balance for current controlled scene |
| B | Alternate custom white balance for second lighting condition |
| Preset | Fixed Kelvin fallback |
The best approach is to assign these deliberately before shooting.
Example assignment:
| Position | Use Example |
|---|---|
| A | Interior key-light setup |
| B | Exterior shade/daylight setup |
| Preset | 5600K daylight or 3200K tungsten-style fallback |
10.3.1 A memory
Use A as the primary custom white balance memory for the current main setup.
Examples:
actor reel interior,
controlled interview,
feature dialogue scene,
staged close-up.
Procedure:
Set WB switch to A.
Place gray/white card at subject position.
Light the subject as intended.
Press WB SET.
Use A for all matching shots in that lighting setup.
A should not be changed randomly between takes. If A changes, note it for continuity.
10.3.2 B memory
Use B as a second custom white balance memory for an alternate lighting condition.
Examples:
exterior daylight,
open shade,
window-light setup,
second room,
alternate interview location.
A practical workflow is:
| Position | Use |
|---|---|
| A | Interior main scene |
| B | Exterior or alternate lighting |
This allows faster switching without recalculating WB each time.
10.3.3 Preset
Use Preset as a fixed Kelvin fallback.
Preset can be useful when:
the lighting source is known,
there is not time for custom WB,
the operator wants a fixed value,
exterior daylight is stable,
or a repeatable controlled value is preferred.
Examples:
| Lighting Condition | Possible Preset Concept |
|---|---|
| Daylight | 5600K-type value |
| Tungsten/warm interior | 3200K-type value |
| Mixed/creative | fixed deliberate value after testing |
The exact Kelvin choice depends on the scene and light sources. Do not assume one Preset works for every location.
10.4 Gray card / white card procedure
A gray card or white card gives the FX6 a neutral reference.
Preferred:
Neutral gray card
Acceptable:
Clean white card if not overexposed or colored
Procedure:
Finish rough lighting first.
Place the card where the subject’s face will be.
Make sure the card is lit by the same key light as the face.
Avoid colored spill from walls, wardrobe, practicals, or LEDs.
Fill enough of the frame for the camera to read it.
Avoid glare or overexposure.
Press WB SET for A or B.
Confirm the camera accepts the balance.
Remove the card and check skin through the monitoring LUT.
Important rule:
White balance at subject position under the actual light that matters.
Do not white balance on a random wall, table, ceiling, shirt, or object unless it is truly neutral and lit like the subject.
10.5 WB SET button procedure
The general procedure is:
Set the WB switch to A or B.
Place gray/white card at subject position.
Frame the card.
Press WB SET.
Wait for the camera to complete the balance.
Confirm the result.
Check face/skin through the monitoring LUT.
Do not change WB during the scene unless the lighting changes.
If the camera fails to set WB, check:
| Problem | Correction |
|---|---|
| Card too dark | Add light or expose card better |
| Card too bright | Reduce exposure / avoid glare |
| Card not filling enough frame | Move closer or zoom in |
| Colored light spill | Reposition card |
| Wrong WB memory selected | Confirm A or B |
| ATW still active | Disable ATW for controlled work |
10.6 Indoor custom WB setup
For controlled indoor shooting, use a custom white balance.
Recommended indoor approach:
| Step | Action |
|---|---|
| 1 | Turn off bad overhead/mixed lights if possible |
| 2 | Establish key light / practical motivation |
| 3 | Set camera to Cine EI / S-Log3 workflow |
| 4 | Select WB A |
| 5 | Place gray card at subject face position |
| 6 | Press WB SET |
| 7 | Check skin through LUT |
| 8 | Keep WB locked for matching coverage |
Indoor actor reel:
WB A = main scene balance.
Do not use ATW.
Keep the same WB for close-up and reverse if the lighting is intended to match.
If practical lamps are part of the scene, decide whether they are color accents or main source before setting WB.
Indoor documentary interview:
WB A = interview key-light setup.
If window light dominates, white balance for the actual face light.
If mixed light is ugly, fix the light before white balancing.
10.7 Outdoor custom WB setup
Outdoor white balance depends on sun, shade, clouds, time of day, and reflected color.
Recommended outdoor approach:
| Condition | WB Approach |
|---|---|
| Controlled exterior interview | Custom WB on B |
| Open shade | Custom WB preferred |
| Direct sun | Custom or fixed daylight after checking face |
| Fast documentary | Fixed daylight/preset if custom WB is too slow |
| Moving between sun/shade | Choose based on dominant face light or use controlled documentary compromise |
Outdoor actor/feature work should avoid ATW if continuity matters.
A practical A/B assignment:
| WB Position | Outdoor Use |
|---|---|
| A | Interior scene |
| B | Exterior daylight/open shade |
| Preset | fixed daylight fallback |
If the exterior scene moves between shade and sun, the operator must decide whether continuity or responsiveness matters more. For controlled scenes, choose one lighting condition and keep the subject in it.
10.8 Warm/cool intentional offsets
White balance can be intentionally warmed or cooled, but this should be subtle and deliberate.
| Desired Feeling | Possible White Balance Bias |
|---|---|
| Slight warmth | Set Kelvin slightly higher than neutral |
| Slight coolness | Set Kelvin slightly lower than neutral |
| Neutral interview | Custom balance accurately |
| Night practical mood | Let practicals remain warm while skin stays controlled |
Do not overdo WB offsets. Extreme shifts can make skin look unnatural and complicate grading.
The muted Netflix-type look should not be created mainly by making WB “wrong.” Use lighting and art direction first.
10.9 Why white balance should not be the muted-look tool
White balance is for color consistency. The muted look is built elsewhere.
Use these tools for muted color:
| Tool | Role |
|---|---|
| Wardrobe | Removes bright color distractions |
| Background | Controls palette |
| Lighting | Shapes contrast and mood |
| Negative fill | Adds depth |
| LUT/grade | Final restrained color |
| White balance | Keeps color stable |
If white balance is pushed too far for style, skin can become:
too blue,
too orange,
too green,
unhealthy,
hard to match,
hard to grade.
The correct rule is:
Mute the environment and grade carefully; do not destroy skin with white balance.
10.10 Filter White Memory considerations
Filter White Memory can relate white balance behavior to filter/ND conditions. For the project’s current field workflow, simplicity is preferred unless there is a deliberate reason to use advanced behavior.
Practical recommendation:
Keep white balance simple: A, B, Preset.
Use Filter White Memory only if:
a controlled test confirms why it is needed,
the operator understands exactly what changes,
the shoot requires different WB memory behavior by filter/ND state,
and it is documented.
For ordinary actor reels, feature-style scenes, and documentary interviews, simple locked manual WB is safer.
10.11 White balance checklist before recording
Before rolling on a serious take:
| Check | Required State |
|---|---|
| ATW | Off for controlled work |
| WB switch | A, B, or Preset deliberately chosen |
| Gray/white card | Used if practical |
| Card position | Subject face position |
| Key light | Final or close to final |
| Practical lights | Set before WB if they affect face |
| LUT monitor | Check skin through LUT |
| Continuity | Same WB for matching shots |
| Notes | Record if WB changes |
Field statement before rolling:
“White balance locked. ATW off. Skin checked.”
Chapter 11. ND External Controls
11.1 ND as exposure stabilizer
On the FX6, ND is one of the most important external exposure controls because it allows the operator to keep the chosen shutter and chosen aperture while controlling brightness.
For this Cine EI muted-color workflow, ND should be treated as an exposure stabilizer, not as the first creative decision.
The correct logic is:
Frame rate chosen
↓
Shutter set for motion
↓
Aperture chosen for depth/emotion/focus reliability
↓
White balance locked
↓
ND adjusted to land exposure
↓
Waveform/zebras checked
ND is especially important outdoors. Without ND, the operator may be tempted to:
raise shutter too high,
stop the lens down too far,
change aperture shot-to-shot,
or underexpose S-Log3.
All of those can damage the look.
The FX6 internal variable ND is a major advantage because it lets the operator hold a desired aperture while moving through changing light.
For a muted cinematic look, ND helps preserve:
| Creative Choice | ND Protects It By |
|---|---|
| 180° shutter motion | Avoiding high shutter as brightness fix |
| f/2.8–f/4 close-up look | Reducing light without stopping down |
| f/4–f/5.6 two-person safety | Keeping exposure consistent |
| S-Log3 exposure quality | Preventing accidental over/underexposure |
| Shot continuity | Reducing exposure jumps between angles |
The main rule is:
Choose shutter and aperture for the image. Use ND to control exposure.
11.2 Correct exposure-control order
The most reliable exposure order is:
Set frame rate.
Set shutter.
Choose aperture.
Set white balance.
Use ND to control brightness.
Verify exposure with waveform and zebras.
Record a test if the take matters.
This order prevents common mistakes.
Wrong order:
Image too bright
↓
Raise shutter
↓
Motion looks harsh
Wrong order:
Image too bright
↓
Stop lens way down
↓
Depth of field changes and background becomes distracting
Correct order:
Image too bright
↓
Keep shutter and aperture
↓
Increase ND
For Cine EI, this order is especially important because S-Log3 can look deceptively flat or forgiving on the LCD. The operator should not chase the monitor image by randomly changing controls.
Use the controls according to their jobs:
| Control | Primary Job |
|---|---|
| Shutter | Motion rendering |
| Aperture | Depth of field and lens character |
| ND | Brightness/exposure |
| White balance | Color consistency |
| EI | Exposure-rating / monitoring decision |
| LUT | Viewing reference |
| Waveform/zebras | Exposure truth |
11.3 ND PRESET / VARIABLE switch
The FX6 ND system can operate in preset steps or variable mode. For this muted Cine EI workflow, Variable ND is usually the most useful because it allows fine control without changing aperture.
Use Preset ND when:
you want quick fixed steps,
light conditions are stable,
you prefer simple repeatable ND positions,
or you are working fast and do not need fine tuning.
Use Variable ND when:
you want to hold a specific aperture,
you are outdoors,
light changes gradually,
you are balancing exposure precisely,
you are shooting actor reels or feature scenes where exposure continuity matters.
For most serious Cine EI actor reel, feature, and documentary setups:
Variable ND is preferred.
Preset ND is not wrong, but Variable ND gives more control.
11.4 ND FILTER POSITION buttons
The ND filter position controls whether the camera is in Clear or ND. The operator must know whether ND is actually engaged.
A common mistake is thinking ND is helping when the camera is still effectively clear, or thinking the image is dark because of exposure when ND is accidentally engaged.
Field check:
| Situation | ND Starting Point |
|---|---|
| Interior normal lighting | Clear |
| Interior dark/moody scene | Clear |
| Bright interior with large windows/lights | ND only if needed |
| Exterior daylight | Variable ND On |
| Exterior open shade | Variable ND likely still needed |
| Exterior walk-and-talk | Variable ND or Auto ND depending on movement |
Before recording, confirm:
Is ND Clear or On?
Is ND in Preset or Variable?
Is Auto ND on or off?
Is exposure being controlled intentionally?
11.5 ND VARIABLE dial
The ND VARIABLE dial is used to fine-adjust exposure when variable ND is active.
The best use is:
Choose aperture for the shot.
Keep shutter correct.
Turn Variable ND until waveform/zebras show proper exposure.
Do not change aperture just to chase brightness if the aperture is part of the shot design.
Example exterior actor close-up:
| Control | Choice |
|---|---|
| Frame rate | 24p |
| Shutter | 1/48 or 180° |
| Aperture | f/4 |
| ND | Variable ND adjusted until face/exposure is correct |
The ND dial lets the operator keep f/4 instead of stopping down to f/11 and losing the intended background separation.
11.6 ND VARIABLE AUTO button
Auto ND allows the camera to adjust ND automatically as light changes.
Auto ND can be useful, but it should not be the default for controlled cinematic scenes.
Use Auto ND for:
documentary walk-and-talks,
moving from shade to sun,
uncontrolled exterior coverage,
event-style shooting,
situations where manual ND adjustment would cause missed action.
Avoid Auto ND for:
actor reel scenes,
feature dialogue scenes,
locked interviews,
dramatic close-ups,
scenes where exposure shifts during the take would be distracting.
Auto ND is a practical tool, not a cinematic default. It may save a documentary shot, but it can also create visible exposure breathing in controlled work.
The operating rule is:
| Shooting Type | Auto ND Recommendation |
|---|---|
| Actor reel | Usually Off |
| Feature scene | Usually Off |
| Controlled interview | Usually Off |
| Documentary walk-and-talk | Can be useful |
| Fast outdoor coverage | Can be useful |
| Lighting changes mid-shot | Use only if manual adjustment is impractical |
11.7 Indoor ND workflow
Indoor ND should be handled carefully because interiors often need more light, not less.
11.7.1 Start with ND Clear
For indoor scenes, start with:
ND Clear
This is especially true for:
dramatic interiors,
actor reel close-ups,
interviews,
moody practical-light scenes,
night interiors,
low-light documentary rooms.
If the scene is already dim, ND will make the problem worse.
Indoor starting point:
| Control | Typical Starting Point |
|---|---|
| Base ISO | 800 if lit, 12800 if genuinely low light |
| Shutter | 180° / 1/48 at 24p |
| Aperture | f/2.8–f/4 solo, f/4–f/5.6 two-person |
| ND | Clear |
| WB | Custom A |
| LUT | Monitor On, Internal Rec Off |
| Exposure tool | Waveform/zebras |
The indoor rule:
Do not add ND unless the scene is too bright.
11.7.2 Use ND indoors only if too bright
There are indoor cases where ND is useful:
strong daylight through windows,
bright studio lights,
large LED panels,
high-output practicals,
shallow-depth actor close-up where f/2.8 must be preserved,
bright white set or reflective surfaces.
Example indoor bright-window interview:
| Problem | Correct Fix |
|---|---|
| Face properly lit but window too bright | Reframe/control window if possible |
| Whole scene too bright at chosen aperture | Add Variable ND |
| Need f/2.8 but lights too bright | Use ND rather than stopping down |
| Scene too dark | Do not use ND; add light/open aperture/use base ISO strategy |
Indoor ND should be intentional, not accidental.
11.8 Outdoor ND workflow
Outdoors, ND is usually essential.
11.8.1 Variable ND On
For exterior daylight shooting, start with:
Variable ND On
This allows the operator to hold:
180° shutter,
desired aperture,
consistent exposure,
clean S-Log3 capture.
Exterior daylight without ND can force bad compromises:
| Without ND | Problem |
|---|---|
| High shutter | harsh motion |
| f/11–f/16 | deep background, less cinematic separation |
| underexposure | noisy shadows |
| inconsistent aperture | coverage mismatch |
11.8.2 Hold aperture with ND
The outdoor sequence is:
Set frame rate.
Set shutter.
Choose aperture for look and focus.
Turn Variable ND On.
Adjust ND until exposure is correct.
Check waveform/zebras.
Record a test if needed.
Example exterior interview:
| Control | Setting |
|---|---|
| Frame rate | 24p |
| Shutter | 1/48 or 180° |
| Aperture | f/4–f/5.6 |
| Base ISO | 800 |
| ND | Variable On |
| WB | Custom B or fixed daylight |
| Exposure | Adjust ND, verify waveform |
Example exterior emotional close-up:
| Control | Setting |
|---|---|
| Lens | Longer focal length if available |
| Aperture | f/2.8–f/4 if focus allows |
| ND | Variable On |
| Light | Open shade or backlight preferred |
| Focus | Near eye, magnified |
| Audio | Wind protection |
11.9 Auto ND use cases
Auto ND is useful when exposure changes faster than the operator can manually correct without ruining the shot.
Use Auto ND when:
the subject walks from shade to sun,
documentary action cannot be stopped,
the operator is solo and managing audio/focus/framing,
a missed moment is worse than slight exposure adjustment,
or movement through changing light is unavoidable.
Avoid Auto ND when:
the shot is locked off,
exposure must stay emotionally stable,
lighting is controlled,
a visible auto-adjustment would distract,
or the scene will be cut with matching coverage.
Decision table:
| Situation | Manual ND | Auto ND |
|---|---|---|
| Actor close-up | Yes | No |
| Feature dialogue | Yes | No |
| Sit-down interview | Yes | No |
| Exterior documentary walk | Maybe | Yes if light changes |
| Outdoor event coverage | Maybe | Often useful |
| Moving from interior to exterior | Hard | Possibly useful |
If Auto ND is used, record a test and watch for visible exposure changes.
11.10 Why not to switch Clear/On while rolling
Avoid switching ND Clear/On during a serious take unless the shot is documentary and unavoidable.
Switching ND during a take may cause:
visible exposure jump,
operator distraction,
continuity problem,
take ruined by exposure change.
For controlled scenes, set ND before rolling.
For documentary work, if ND must change during recording, use the smoothest possible method and accept that the moment may matter more than perfect exposure continuity.
11.11 ND and white balance interaction
ND should not replace white balance. White balance should be set and locked based on the lighting. ND then controls exposure.
Correct order:
Set WB for light
↓
Use ND for exposure
Do not let changing ND cause random white balance changes. For controlled work, ATW should usually be off, so ND changes do not trigger color drift.
If using Filter White Memory or more advanced behavior, test it before relying on it. For the project’s normal workflow, keep WB simple:
A for primary setup,
B for alternate setup,
Preset for fallback.
11.12 Indoor/outdoor ND examples
Interior actor reel close-up
| Control | Setting |
|---|---|
| Base ISO | 800 if lit |
| Shutter | 1/48 or 180° at 24p |
| Aperture | f/2.8–f/4 |
| ND | Clear |
| WB | Custom A |
| Exposure correction | Adjust light, aperture, or ISO strategy before ND |
Interior bright window interview
| Control | Setting |
|---|---|
| Base ISO | 800 |
| Shutter | 180° |
| Aperture | f/4 |
| ND | Variable if needed |
| WB | Custom at subject face |
| Extra action | Control window if practical |
Exterior actor close-up
| Control | Setting |
|---|---|
| Base ISO | 800 |
| Shutter | 180° |
| Aperture | f/2.8–f/4 if focus allows |
| ND | Variable On |
| WB | Custom B / daylight |
| Exposure | ND dial + waveform |
Exterior two-person dialogue
| Control | Setting |
|---|---|
| Base ISO | 800 |
| Shutter | 180° |
| Aperture | f/4–f/5.6 |
| ND | Variable On |
| WB | Custom or fixed daylight |
| Focus | both people on plane |
Documentary walk-and-talk
| Control | Setting |
|---|---|
| Base ISO | 800 |
| Shutter | 180° |
| Aperture | f/4–f/5.6 |
| ND | Variable On |
| Auto ND | Consider if moving through changing light |
| Audio | wind/handling protection |
Final ND rule:
Inside: start Clear. Outside: expect Variable ND. In all cases, use ND to protect shutter and aperture.
Chapter 12. Shutter and Aperture External Controls
12.1 Shutter controls motion
Shutter controls how motion looks. It affects motion blur, movement smoothness, and the emotional feel of action.
For normal cinematic work, shutter should usually be set to a 180-degree shutter angle or equivalent shutter speed.
The common mistake is using shutter as a brightness control. That is not the correct normal workflow for this project.
Wrong:
Exterior is too bright
↓
Raise shutter to darken image
↓
Motion becomes harsh/staccato
Correct:
Exterior is too bright
↓
Keep shutter at 180°
↓
Use ND to reduce brightness
Shutter should be boring and correct unless there is a specific creative or technical reason to change it.
12.2 Aperture controls depth of field
Aperture controls how much of the image is in focus and how the lens renders depth.
Aperture affects:
background blur,
focus difficulty,
subject separation,
lens sharpness behavior,
emotional intimacy,
two-person focus safety,
exposure.
For this project, aperture should be chosen based on the scene and then protected with ND.
The basic principle:
Aperture is for depth and emotion. ND is for brightness.
12.3 Normal cinematic shutter values
12.3.1 24p = 1/48 or 180°
For 23.98p or 24p shooting, use:
1/48 or 180°
This is the standard cinematic motion baseline for actor reels and feature-style scenes.
Use this for:
actor monologues,
dialogue scenes,
interviews with cinematic feel,
feature-style coverage,
dramatic close-ups.
12.3.2 30p = 1/60 or 180°
For 29.97p or 30p shooting, use:
1/60 or 180°
This is appropriate when shooting 30p documentary or other 30p workflows.
12.3.3 60p = 1/120 or 180°
For 59.94p or 60p shooting, use:
1/120 or 180°
This is appropriate for 60p motion or material intended for slow motion, depending on the project plan.
12.4 When to change shutter
Change shutter only when there is a deliberate reason.
Legitimate reasons include:
| Reason | Example |
|---|---|
| Flicker control | Lights flicker at normal shutter |
| Stylized action | Sharper, more aggressive motion |
| Dream/blur effect | More motion blur intentionally |
| Sports/action clarity | Need crisper movement |
| Technical matching | Matching other footage/frame rate constraints |
If flicker is present, adjust shutter carefully and test. Do not randomly change shutter without checking motion and exposure.
12.5 When not to change shutter
Do not change shutter merely because:
the image is too bright,
the monitor looks washed out,
the background is bright,
the operator is avoiding ND,
or aperture was not planned.
For this workflow, shutter is not the normal exposure correction tool.
If the image is too bright:
Confirm ISO/Base ISO/EI.
Confirm aperture.
Use ND.
Control light if possible.
Protect highlights.
If the image is too dark:
Confirm ND is not accidentally on.
Open aperture if appropriate.
Add light.
Use proper base ISO strategy.
Do not simply slow shutter unless intentional.
12.6 Aperture selection by scene type
Aperture should serve the shot.
| Scene Type | Practical Aperture Range | Reason |
|---|---|---|
| Single actor close-up | f/2.8–f/4 | subject isolation while keeping eyes manageable |
| Dramatic close-up | f/2.8–f/4 | emotional intimacy |
| Sit-down interview | around f/4 | face sharp, background softened |
| Two-person dialogue | f/4–f/5.6 | both people more likely sharp |
| Walk-and-talk | f/4–f/5.6 | focus safety during movement |
| Wide establishing shot | f/5.6–f/8 | more environment in focus |
| Action/chase | f/4–f/8 depending movement | focus reliability |
The operator should not blindly choose the widest aperture. Very shallow focus can look attractive but can ruin performances if focus drifts.
12.7 Indoor aperture recommendations
Indoor actor reel single-person:
| Shot | Aperture |
|---|---|
| Close-up | f/2.8–f/4 |
| Medium shot | f/4 |
| Moving actor | f/4–f/5.6 if needed |
Indoor two-person dialogue:
| Shot | Aperture |
|---|---|
| Two-shot | f/4–f/5.6 |
| Over-the-shoulder | f/4 |
| Close-up | f/2.8–f/4 if focus can be held |
Indoor documentary interview:
| Shot | Aperture |
|---|---|
| Standard interview | f/4 |
| More background separation | f/2.8–f/4 |
| Unpredictable movement | f/4–f/5.6 |
The indoor rule:
Do not choose shallow aperture at the expense of sharp eyes and usable performance.
12.8 Outdoor aperture recommendations
Outdoors, the operator often has enough light, so aperture can be chosen for focus and look.
Useful exterior starting points:
| Exterior Situation | Aperture |
|---|---|
| Interview | f/4–f/5.6 |
| Emotional close-up | f/2.8–f/4 if focus allows |
| Two-person dialogue | f/4–f/5.6 |
| Walk-and-talk | f/4–f/5.6 |
| Action/chase | f/5.6–f/8 if focus is difficult |
| Wide landscape/context | f/5.6–f/8 |
Use Variable ND to hold the chosen aperture.
Outdoor mistake to avoid:
Do not let bright sun force the lens to f/11 or f/16 if the desired look is subject separation. Use ND.
12.9 Two-person aperture recommendations
Two-person scenes are where aperture discipline matters most.
If two people are not on the same focus plane, a very wide aperture may make one person soft. For dialogue, especially if both people need to be readable, use a safer aperture.
Recommended:
| Two-Person Situation | Aperture |
|---|---|
| Both seated, same plane | f/4 may work |
| Both moving slightly | f/4–f/5.6 |
| One foreground / one background | choose who is sharp or stop down |
| Documentary two-person interview | f/4–f/5.6 |
| Actor reel two-shot | f/4–f/5.6 unless focus is controlled |
If the artistic intention is for only one person to be sharp, a wider aperture can be used. But that must be intentional.
12.10 Manual iris versus auto iris
For controlled actor reels and feature scenes:
Manual iris is preferred.
Auto iris can shift exposure during a take. That may look amateur or cause continuity problems.
Manual iris is best for:
actor reels,
feature dialogue,
dramatic close-ups,
sit-down interviews,
controlled lighting,
repeatable coverage.
Auto iris may be considered for:
fast documentary coverage,
uncontrolled run-and-gun conditions,
events where missed exposure is worse than exposure shifting.
But for the project’s muted cinematic workflow:
Manual iris first. Auto iris only by deliberate exception.
12.11 Why ND should handle brightness after aperture is chosen
Once the aperture is chosen for the shot, ND should be used to correct brightness.
Example:
You choose f/4 because:
one person is sharp,
background has some softness,
lens looks good,
focus is manageable.
If the image is too bright outdoors, do not change to f/11 just to darken the image unless deeper focus is desired. Use ND.
Correct:
Aperture chosen for look
↓
ND adjusted for exposure
Wrong:
Image too bright
↓
Aperture closed without considering look
↓
Background becomes too sharp / scene changes
For shot matching, this is critical. If one angle is f/2.8 and another is f/8 only because exposure was handled inconsistently, the scene may not cut smoothly.
12.12 Indoor setup examples
Interior actor close-up
| Control | Setting |
|---|---|
| Frame rate | 24p |
| Shutter | 1/48 or 180° |
| Aperture | f/2.8–f/4 |
| ND | Clear |
| Base ISO | 800 if lit |
| WB | Custom A |
| Focus | near eye |
| Exposure check | waveform/zebras |
Operating note:
Do not underexpose the face to make the scene moody. Shape mood with negative fill and background control.
Interior two-person dialogue
| Control | Setting |
|---|---|
| Frame rate | 24p |
| Shutter | 1/48 or 180° |
| Aperture | f/4–f/5.6 |
| ND | Clear unless too bright |
| WB | Custom A |
| Focus | both subjects / primary speaker |
| Audio | two-transmitter split if both wearing lavs |
Operating note:
Keep the people on a similar focus plane when possible.
Interior documentary interview
| Control | Setting |
|---|---|
| Frame rate | 24p or documentary project frame rate |
| Shutter | 180° equivalent |
| Aperture | around f/4 |
| ND | Clear |
| WB | Custom A |
| Audio | lav plus boom if available |
| Test | record and review |
Operating note:
Interview sharpness and audio reliability matter more than extreme background blur.
12.13 Outdoor setup examples
Exterior actor close-up
| Control | Setting |
|---|---|
| Frame rate | 24p |
| Shutter | 1/48 or 180° |
| Aperture | f/2.8–f/4 if focus allows |
| ND | Variable On |
| WB | Custom B or fixed daylight |
| Focus | near eye with magnifier |
| Lighting | open shade/backlight preferred |
Exterior two-person dialogue
| Control | Setting |
|---|---|
| Frame rate | 24p |
| Shutter | 180° |
| Aperture | f/4–f/5.6 |
| ND | Variable On |
| WB | fixed/custom daylight |
| Focus | both on plane if possible |
| Audio | wind protection |
Exterior chase/action
| Control | Setting |
|---|---|
| Frame rate | project-dependent |
| Shutter | 180° unless action sharpness is deliberate |
| Aperture | f/5.6–f/8 if focus is difficult |
| ND | Variable On |
| Focus | pretest movement |
| Logging | slate/clip note essential |
Operating note:
For action, focus reliability may be more important than shallow depth of field.
Chapter 13. Focus External Controls
13.1 Focus as subject-attention control
Focus is not just technical sharpness. Focus directs attention. In actor reels and dramatic scenes, focus carries emotional meaning because the viewer looks where the image is sharp.
For close-ups, the face can tolerate some softness in hair or ears, but soft eyes weaken the shot. The near eye is the primary focus target.
For documentaries, focus also affects credibility. A slightly imperfect documentary image may be tolerated, but a soft interview face feels careless.
The focus rule for this project is:
Focus must serve the subject, not the monitor image alone.
Use magnification, peaking, AF tools, and rehearsal as needed, but confirm critical focus deliberately.
13.2 Manual focus
Manual focus is preferred for controlled work when the subject position is predictable.
Use manual focus for:
actor reel close-ups,
feature dialogue scenes,
controlled interviews,
rack focus,
tripod shots,
repeated marks,
scenes where AF might chase the wrong object.
Manual focus workflow:
Set aperture first.
Put subject in final position.
Use Focus Magnifier.
Focus on near eye.
Exit magnifier.
Reframe if needed.
Record a short test if the shot is critical.
Manual focus requires discipline. The operator must recheck focus after:
zooming,
changing aperture,
moving camera,
moving subject,
changing focal length,
changing camera distance.
13.3 Face/Eye AF
Face/Eye AF can be very useful with compatible lenses, especially for a solo operator.
Use Face/Eye AF for:
sit-down interviews,
solo operator documentary work,
slight subject movement,
walk-and-talks,
actor reel setups where movement is modest and AF is tested,
exterior work where manual screen visibility is difficult.
But Face/Eye AF is not magic. It must be tested in the actual scene.
Potential AF problems:
| Situation | Risk |
|---|---|
| Foreground object crosses frame | AF may jump |
| Subject turns away | AF may lose face/eye |
| Low light | AF may hunt |
| Backlight/silhouette | AF may struggle |
| Multiple faces | AF may choose wrong person |
| Actor moves behind objects | AF may shift |
| Reflections/glass | AF may be confused |
Use AF when it helps reliability. Avoid it when it creates uncertainty.
13.4 Push Auto Focus
Push Auto Focus is a useful hybrid tool. It allows the operator to work mostly manually but temporarily ask the camera to grab focus.
Use Push Auto Focus when:
manual focus is close but needs quick correction,
subject shifts slightly,
operator wants help before rolling,
documentary subject moves into position,
solo operator needs speed.
Push Auto Focus should be treated as a focus assist, not a substitute for checking focus.
Practical use:
Frame subject.
Press Push AF to acquire focus.
Confirm with magnifier if time allows.
Return to manual/hold if desired.
Roll.
13.5 Focus Magnifier
Focus Magnifier is one of the most important focus tools on the FX6.
Use it before:
close-ups,
interviews,
shallow depth of field,
rack focus,
long-lens shots,
important actor reel takes,
shots where the monitor is hard to judge.
Focus Magnifier workflow:
Subject in place
↓
Magnifier on
↓
Check near eye
↓
Adjust focus
↓
Magnifier off
↓
Frame and roll
Do not rely only on the full-screen image for critical focus, especially outdoors or at wide aperture.
13.6 Peaking
Peaking can help, but it is not proof.
Peaking may highlight:
eyelashes,
hair,
glasses frames,
high-contrast background edges,
clothing texture,
foreground objects.
It can make an image look “focused” while the eye itself is not truly sharp.
Use peaking as a guide. Confirm with magnifier.
Peaking is most useful when:
pulling focus manually,
working fast,
using monitor assistance,
shooting documentary movement.
Peaking is least reliable when:
the shot is low contrast,
the background has high-contrast detail,
the subject has glasses,
the lens is wide open,
the focus target is small.
13.7 Lens focus ring
Use the lens focus ring for manual focus. The behavior depends on the lens.
Some electronic lenses are focus-by-wire, meaning the focus ring does not behave like a mechanical cine lens. The response may depend on turn speed or camera/lens settings.
Operational rule:
Rehearse focus pulls with the actual lens.
Do not assume a focus ring will behave like a mechanical cinema lens unless it is one.
For repeatable focus pulls, mechanical cine-style lenses are easier. For still-camera electronic lenses, practice is essential.
13.8 Focus Hold button
If the lens or camera setup supports Focus Hold, it can be useful to prevent autofocus changes during a critical moment.
Use Focus Hold when:
AF is useful but you do not want it to jump,
the subject briefly turns away,
an object crosses in front,
focus has locked correctly and should not change,
the scene includes predictable interruptions.
This depends on lens support and assignment, so confirm the actual behavior before relying on it.
13.9 Indoor focus procedure
For controlled indoor scenes:
Set the final or near-final lighting.
Set frame rate and shutter.
Choose aperture.
Place subject in final position.
Set manual focus or AF mode.
Use Focus Magnifier.
Focus on near eye.
Confirm both eyes if depth of field allows.
Exit magnifier.
Record a short test if the take is important.
For actor reels, repeat this process for each close-up. Do not assume focus remains correct after changing framing.
Indoor focus risks:
| Risk | Prevention |
|---|---|
| Shallow depth of field | Stop down slightly or rehearse |
| Actor leans forward | Use mark or deeper aperture |
| Low light | Add light or use AF carefully |
| Reframing | Recheck focus |
| Zooming | Recheck focus |
13.10 Two-person focus strategy
Two-person scenes require a focus plan.
Questions to answer:
Should both people be sharp?
Is one person primary?
Are they on the same plane?
Will either person move?
Is the shot a two-shot or over-the-shoulder?
Is shallow focus part of the emotional design?
If both should be sharp, use:
f/4–f/5.6
and place them as close to the same focus plane as possible.
If only one should be sharp, that must be intentional and should support the scene.
Two-person guide:
| Shot | Focus Strategy |
|---|---|
| Two-shot, both important | Focus between / f/4–f/5.6 |
| OTS with speaker primary | Focus speaker’s near eye |
| Reaction close-up | Focus reacting actor’s near eye |
| Documentary two-person | Use deeper aperture for safety |
| Moving two-person | Stop down and/or use tested AF |
13.11 Outdoor focus procedure
Outdoors, focus is harder because the monitor may be difficult to see and subjects may move more.
Outdoor procedure:
Shade the monitor if possible.
Use Focus Magnifier.
Confirm near eye or focus target.
Use f/4–f/5.6 for safety when movement is expected.
Recheck after changing zoom/focal length.
Record a test if the scene is important.
For exterior actor close-ups, longer lenses and shallow depth of field look good but increase focus difficulty. Do not sacrifice the actor’s eyes for background blur.
13.12 Focus in bright sun
Bright sun can make the LCD or external monitor misleading. An image may appear sharp because it is high contrast, but the true focus may be off.
In bright sun:
use magnification,
use a hood/shade if possible,
use peaking only as secondary aid,
stop down slightly if focus is risky,
review test clips when possible,
avoid ultra-shallow focus unless controlled.
13.13 When to use autofocus
Use autofocus when it improves reliability.
Good uses:
| Situation | AF Usefulness |
|---|---|
| Solo operator interview | High |
| Documentary walk-and-talk | High |
| Subject moves slightly | High |
| Operator managing audio and framing | High |
| Bright exterior with compatible lens | Useful |
| Gimbal/handheld movement | Useful |
Autofocus is a tool. It should be tested, not assumed.
13.14 When to avoid autofocus
Avoid or be cautious with autofocus when:
doing a planned rack focus,
shooting through foreground objects,
shooting through glass,
subject turns away repeatedly,
there are multiple faces and only one matters,
lighting is very low,
the scene is emotionally precise,
the lens is manual,
or AF hunting would ruin the take.
Feature-style scenes often benefit from manual focus because the focus intention is part of the storytelling.
13.15 Rack focus procedure
A rack focus is an intentional shift from one focus point to another.
Procedure:
Decide the storytelling purpose.
Mark Focus Point A.
Mark Focus Point B.
Set aperture deep enough to make the move controllable, or shallow enough if the effect is intended.
Rehearse the pull.
Check both endpoints with Focus Magnifier.
Practice at performance speed.
Record only when repeatable.
Rack focus should not be accidental. It should reveal, shift attention, or create emotional emphasis.
13.16 Near-eye rule
For close-ups, focus on the near eye.
This is especially important for:
actor reels,
emotional close-ups,
interviews,
long lens shots,
shallow depth of field.
If the far eye is sharp but the near eye is soft, the shot often feels wrong. If the near eye is sharp, minor softness elsewhere is usually more acceptable.
Field rule:
Close-up = near eye.
13.17 Focus checklist
Before recording:
| Check | Required State |
|---|---|
| Aperture | chosen for focus and look |
| Subject | in position |
| Focus mode | manual/AF selected deliberately |
| Magnifier | used for critical shots |
| Eye | near eye sharp |
| Two-person | focus plane considered |
| Movement | rehearsed |
| Zoom | focus rechecked after zoom |
| Bright sun | monitor visibility handled |
| Test | recorded if critical |
Field statement:
“Focus checked. Near eye sharp.”
Chapter 14. Zoom Controls, Push-Ins, Pull-Outs, and Emotional Close-Ups
14.1 Zoom as framing control, not exposure control
Zoom changes framing and focal length. It should not be used as an exposure solution.
The operator should not zoom just because:
the shot feels boring,
the camera is too far away,
framing was not planned,
a close-up was forgotten,
or the image needs “emotion.”
Zoom is a powerful tool, but in narrative and actor reel work, close-ups are usually better achieved through planned coverage, camera placement, or a physical push-in.
Use zoom for:
reframing before a take,
changing focal length between setups,
documentary flexibility,
controlled slow zoom when emotionally motivated,
observational moments where a zoom is part of the style.
Do not use zoom as a casual correction during a take.
14.2 Lens zoom ring
If using a manual zoom lens, the zoom ring controls focal length.
Manual zooming while recording can introduce:
camera shake,
uneven speed,
focus shift,
exposure change on variable-aperture lenses,
operator handling noise,
amateur-looking movement.
If a manual zoom during recording is intentional:
Use tripod or stable support.
Rehearse the move.
Check focus before and after.
Check exposure before and after.
Move slowly and smoothly.
Record a test.
14.3 FX6 handle/grip zoom rocker
The FX6 handle or grip zoom rocker can control compatible Sony power zoom lenses.
A rocker can produce smoother zooms than hand-turning a lens ring if the lens supports it.
Use a zoom rocker for:
slow documentary reframes,
controlled push-like zooms,
subtle pressure moves,
exterior observation,
situations where physical camera movement is not practical.
Do not jab or pump the rocker. Use gentle pressure and rehearse speed.
14.4 Sony power zoom lenses
Power zoom lenses are useful when a smooth zoom is required. They can make a controlled zoom possible without shaking the camera.
Power zoom uses:
| Use | Appropriate? |
|---|---|
| Slow psychological zoom | Yes, if motivated |
| Fast reframing mid-take | Usually no |
| Documentary adjustment | Sometimes |
| Actor reel emotional close-up | Usually prefer planned coverage/push-in |
| Feature scene | Only if zoom is part of visual grammar |
Power zoom does not automatically make a zoom cinematic. Motivation matters.
14.5 Manual zoom lenses
Manual zoom lenses are useful for changing framing between takes, but risky for zooming during a take.
Manual zoom during recording should be avoided unless:
the camera is locked down,
the move is intentional,
the operator has practiced it,
focus and exposure are checked,
and the scene benefits from the zoom.
If a manual zoom is done casually, it can look like a home-video correction.
14.6 Prime lenses and Clear Image Zoom
Prime lenses do not optically zoom. If using a prime lens, emotional close-ups come from:
camera placement,
lens change,
moving closer,
shooting separate coverage,
or limited digital reframing if quality permits.
Clear Image Zoom can provide limited digital reframing, but it should be used carefully. It is not the same as an optical zoom lens and should not replace proper shot planning.
14.7 Clear Image Zoom limits
Clear Image Zoom may be useful for modest reframing, but the operator should not treat it as a substitute for coverage.
Use it for:
small framing adjustments,
emergency reframing,
controlled minor push effect if tested.
Avoid relying on it for:
major close-ups,
final emotional coverage,
quality-critical feature shots,
untested production use.
If Clear Image Zoom is used, test image quality before relying on it.
14.8 Zoom versus push-in
A zoom and a push-in are emotionally different.
| Move | What Changes | Emotional Effect |
|---|---|---|
| Zoom-in | Focal length changes; camera stays still | Can feel observational, psychological, or artificial |
| Push-in | Camera physically moves closer | Feels like viewer is entering the subject’s space |
| Pull-out | Camera moves away | Can reveal isolation, context, abandonment |
| Zoom-out | Focal length widens from fixed position | Can reveal context in a more optical/observational way |
For emotional actor close-ups, a physical push-in usually feels more cinematic than a zoom-in.
14.9 Why “never zoom while recording” is not absolute
The statement “never zoom while recording” is too absolute. The better rule is:
Do not zoom while recording unless the zoom is intentional, smooth, motivated, and part of the storytelling.
Zooming while recording is bad when it is used to fix poor framing. It may be valid when it expresses a scene idea.
Bad zoom:
operator suddenly realizes the actor should be closer,
zoom speed is uneven,
focus shifts,
exposure changes,
movement looks accidental.
Good zoom:
slow psychological pressure,
controlled reveal,
observational documentary style,
deliberate isolation,
stylized period/genre choice.
14.10 When zooming while recording is acceptable
Zooming while recording can be acceptable in these cases:
| Scenario | Why It May Work |
|---|---|
| Psychological pressure | Slow zoom creates tension |
| Realization | Viewer is drawn into thought |
| Threat | Frame tightens as danger rises |
| Isolation | Zoom narrows world around subject |
| Reveal | Zoom-out exposes context |
| Documentary observation | Operator follows reality |
| Performance moment | Subtle move supports emotion |
The zoom must be smooth enough that the audience feels the intention rather than noticing the operation.
14.11 Emotional push-in
A push-in is often the preferred way to get an emotional close-up during a scene.
Use a push-in for:
confession,
realization,
grief,
fear,
moral decision,
emotional climax,
internal shift.
Push-in procedure:
Decide emotional moment.
Choose start frame.
Choose end frame.
Rehearse movement.
Check focus at start and end.
Check exposure.
Record take with movement timed to performance.
A push-in should not be random. It should happen because the scene is pulling the viewer closer.
14.12 Emotional pull-out
A pull-out can suggest:
loneliness,
defeat,
abandonment,
loss of control,
larger context,
emotional distance.
Pull-out procedure:
Start close enough to read emotion.
End wider to reveal environment or isolation.
Keep movement smooth.
Maintain focus.
Avoid changing exposure unintentionally.
Let the performance drive timing.
A pull-out can be especially useful in feature scenes and actor reels where the emotional beat ends in separation or uncertainty.
14.13 Slow zoom-in for psychological pressure
A slow zoom-in can work when it is nearly invisible. It can create pressure, suspicion, dread, or psychological compression.
Use sparingly.
Settings/operation:
stable camera support,
power zoom if available,
very slow speed,
focus checked,
exposure checked,
motivated by scene,
not overused.
If the audience notices “the camera is zooming,” the move may be too obvious unless that is the intended style.
14.14 Slow zoom-out for isolation/reveal
A slow zoom-out can reveal:
empty room,
larger environment,
other characters,
danger,
loneliness,
context.
It can be useful in documentaries as well when revealing where a subject is or what surrounds them.
The move must be planned so the end frame matters. A zoom-out that ends on a messy background weakens the shot.
14.15 Indoor zoom guidance
Indoors, space is limited, so zooms may be tempting. The better approach is usually planned coverage.
Indoor hierarchy for emotional close-ups:
Shoot a separate close-up.
Move the camera closer.
Use a longer focal length if space allows.
Use a slow push-in if supported.
Use a subtle zoom only if motivated.
Indoor risks:
| Risk | Cause |
|---|---|
| Camera shake | manual zoom ring |
| Focus error | focal length change |
| Exposure shift | variable-aperture zoom |
| Amateur feel | unmotivated zoom |
| Background clutter | tighter framing reveals bad set choices |
14.16 Outdoor zoom guidance
Outdoors, zoom lenses are useful because space and background control vary.
Outdoor zoom uses:
choose a longer focal length to simplify background,
reframe quickly between takes,
compress distance,
isolate subject,
avoid moving physically into unsafe or impractical positions.
Outdoor zoom while recording should still be motivated.
Use ND to maintain aperture. Do not use zoom to solve brightness.
14.17 Zoom-focus recheck rule
After every zoom change:
Recheck focus.
This is especially important when:
using long focal lengths,
shooting close-ups,
using wide aperture,
using manual focus,
using variable zoom lenses,
shooting in bright sun.
Do not assume focus remains perfect after zooming.
Field procedure:
Zoom/reframe.
Use Focus Magnifier.
Check near eye.
Adjust focus.
Confirm exposure.
Roll.
14.18 Variable-aperture zoom warning
Some zoom lenses change maximum aperture as they zoom.
Example concept:
wide end may allow f/3.5,
telephoto end may only allow f/5.6.
If zooming during a take, this can cause the image to darken as the lens zooms in.
Before using a zoom during recording:
| Check | Required |
|---|---|
| Does aperture change while zooming? | Test |
| Does exposure shift? | Watch waveform |
| Does focus shift? | Test |
| Is the zoom smooth? | Rehearse |
| Is the move motivated? | Confirm |
If exposure changes visibly, do not use that zoom move unless the change is acceptable or intentional.
14.19 Coverage versus zooming mid-take
For actor reels and feature scenes, the best emotional close-ups usually come from planned coverage rather than mid-take zooms.
Coverage plan:
| Shot | Purpose |
|---|---|
| Master / wide | geography |
| Medium | body language |
| Close-up | emotion |
| Insert | detail |
| Reaction | listening/thinking |
| Push-in | emotional escalation |
If emotional close-ups matter, plan them. Do not rely on zooming during the take to discover them.
Final zoom rule:
Zoom before recording for framing. Push or cut for emotion. Zoom during recording only when the zoom itself is the storytelling choice.
Chapter 15. Cine EI Exposure Monitoring
15.1 Why LCD appearance is not enough
The FX6 LCD or external monitor image is not enough to judge exposure, especially in Cine EI and S-Log3.
Reasons:
S-Log3 is flat by design.
A monitoring LUT can make exposure look more normal than it really is.
Screen brightness can mislead.
Outdoor glare can hide exposure problems.
The image may look “moody” while actually being underexposed.
Highlights may be clipped even if the face looks acceptable.
The operator’s eyes adapt to the monitor.
For this project, exposure should be judged with technical tools, not only by the picture on the screen.
Use:
waveform,
zebras,
histogram as secondary support,
gray card/white reference when practical,
skin-tone judgment through LUT,
test recording and playback.
The rule is:
The monitor shows the look. The waveform tells the truth.
15.2 Monitoring LUT versus exposure truth
A LUT is a viewing transform. It helps the operator see something closer to a normal image instead of flat log. But a LUT can also hide problems if the operator trusts it too much.
The LUT answers:
What might the image feel like?
Is the framing and contrast roughly right?
Is the monitor usable for composition?
Does skin look plausible?
The waveform answers:
Where are levels actually sitting?
Is the face too low?
Are highlights clipping?
Is the gray card near target?
Are windows/practicals out of range?
A scene can look good through a LUT but still be underexposed in log. Conversely, a flat log image can look washed out but be technically well exposed.
Use both.
15.3 Waveform as primary exposure truth
The waveform is the primary exposure tool in this workflow.
Use waveform to check:
gray card,
white card,
skin,
windows,
practical lamps,
white clothing,
sky,
reflective surfaces,
shadow floor,
overall scene distribution.
Waveform is especially important for muted color because the operator may be tempted to make the image dark. A dark-looking image must still be a clean exposure.
Practical waveform workflow:
Turn on monitoring LUT for viewing.
Turn on waveform/video signal monitor.
Place subject.
Check face level.
Check brightest important highlight.
Adjust ND/light/aperture as needed.
Record a short test if critical.
For controlled work, waveform should be used before recording, not only after a problem is discovered.
15.4 Zebras as fast warnings
Zebras are useful for quick exposure checks. They are not as complete as waveform, but they help the operator react quickly.
Use zebras for:
warning when highlights approach clipping,
checking white reference,
checking skin if configured for that purpose,
fast exterior exposure control,
monitoring changes during documentary work.
Zebras should be treated as a reference tool. The exact zebra setup depends on camera configuration and operator preference. The project’s key rule is not a specific zebra number; it is that zebras should be used as an exposure warning system rather than ignored.
Use zebras to avoid:
clipped faces,
clipped white shirts,
blown practical lamps,
blown windows when they matter,
overexposed skies when they are important.
15.5 Histogram as secondary tool
Histogram shows the overall distribution of brightness values. It is useful, but it does not tell exactly where the face sits. It also does not show which part of the image is causing a spike.
Histogram can help identify:
extreme underexposure,
extreme overexposure,
clipped highlight-heavy scene,
crushed shadow-heavy scene.
But for serious Cine EI exposure decisions, waveform is more useful.
Use histogram as a secondary tool, not the primary exposure truth.
15.6 S-Log3 exposure references
S-Log3 has technical reference points that help the operator judge exposure.
15.6.1 18% gray around 41 IRE
A standard 18% gray reference in S-Log3 is around:
41 IRE
Use this with a gray card when setting or checking exposure.
Practical use:
Place gray card at subject position.
Light it with the same light as the face.
View waveform.
Adjust exposure so gray sits near the expected reference.
Then check actual skin and highlights.
Do not expose only by theory. Use the gray card as a reference, then judge the actual subject.
15.6.2 90% white around 61 IRE
A 90% white reference in S-Log3 is around:
61 IRE
This can be useful when using a white card or reference chart.
Caution:
a white card can clip or reflect glare,
white clothing may not be a proper reference,
practical scene highlights may exceed this,
not every white object needs to sit at the same level.
Use 90% white as a technical reference, not a blind rule.
15.7 Skin-tone exposure guidance
Skin tone is not one fixed number. Different complexions, lighting styles, contrast ratios, and scene moods require judgment.
The project rule is:
Expose skin cleanly enough to grade, then create mood with lighting and grade.
Do not make skin muddy in-camera to get a muted look.
Practical skin guidance:
| Situation | Exposure Priority |
|---|---|
| Actor reel close-up | Face and eyes must be readable |
| Dramatic feature close-up | Skin can be shaped but not starved |
| Documentary interview | Skin should look natural and credible |
| Darker skin tones | Preserve highlight shape and avoid underexposure |
| Pale skin / bright forehead | Protect highlights without lowering whole face too far |
| Backlit exterior | Expose for face or add fill/adjust angle |
For actor reels, the performer’s face is the product. Do not hide it.
15.8 Highlight protection
Highlights to watch:
windows,
lamps,
practical bulbs,
white shirts,
white paper,
shiny skin,
cars,
sidewalks,
sky,
reflective surfaces.
Not all highlights must be saved. Some practical bulbs or specular reflections may clip acceptably. But important highlights should be controlled.
Highlight-control options:
| Problem | Correction |
|---|---|
| Face good, window too bright | Reframe, curtain, flag, reduce window, accept if not important |
| White shirt clipping | Change wardrobe or reduce exposure/lighting |
| Practical lamp ugly | Dim lamp, change bulb, reposition |
| Sky too hot | Reframe, use shade/backlight, expose subject intentionally |
| Forehead highlight too hot | Soften key, powder, adjust angle, reduce light |
The key question is:
Is the clipped highlight important to the shot?
If yes, control it. If no, it may be acceptable.
15.9 Indoor exposure procedure
Controlled indoor Cine EI procedure:
Set camera to Cine EI.
Confirm S-Gamut3.Cine/S-Log3.
Confirm Base ISO/EI.
Set frame rate and shutter.
Choose aperture for the scene.
Set ND Clear unless too bright.
Set manual white balance.
Turn on monitoring LUT.
Turn on waveform/zebras.
Place subject in final position.
Set key light and negative fill.
Check face on waveform.
Check highlights/practicals/windows.
Adjust light/ND/aperture as needed.
Focus near eye.
Check audio.
Record a 10-second test.
Play back if the take matters.
Indoor exposure rule:
Do not make the image dark by starving the camera. Make the scene dark by controlling light.
15.10 Outdoor exposure procedure
Outdoor Cine EI procedure:
Set Base ISO 800 for daylight.
Set frame rate.
Set shutter to 180° equivalent.
Choose aperture for focus/look.
Turn Variable ND On.
Set white balance/custom daylight.
Turn on monitoring LUT.
Use waveform/zebras.
Expose for the face/subject.
Watch sky, white shirts, and reflective surfaces.
Recheck focus in bright sun.
Record and review test when possible.
Outdoor exposure priorities:
| Scene | Priority |
|---|---|
| Actor close-up | face/eyes |
| Two-person dialogue | both faces |
| Documentary interview | face and audio |
| Chase/action | focus and motion |
| Landscape/context | protect important highlights |
If the sun is harsh, the best exposure tool may be location choice: open shade, backlight, or a better angle.
15.11 Why not to underexpose for mood
Underexposure is one of the most dangerous mistakes in S-Log3 muted-color shooting.
Underexposure can cause:
noisy shadows,
muddy image,
weak skin,
color breaking in grade,
loss of texture,
fake-looking darkness,
actor eyes disappearing.
Mood should come from:
lighting ratio,
negative fill,
background control,
wardrobe,
lens choice,
camera position,
and final grade.
A cleanly exposed face can still appear moody if the shadow side is shaped and the background is controlled.
The correct principle:
Capture clean information. Create mood intentionally.
15.12 Test-clip exposure review
Before serious shooting, record a short technical test.
The test clip should include:
subject’s face,
normal speech,
loud speech if relevant,
movement if relevant,
brightest important background element,
silence for room noise,
focus target.
Review for:
| Review Item | Question |
|---|---|
| Face exposure | Is skin clean and readable? |
| Highlights | Are important highlights controlled? |
| Shadows | Are they rich but not muddy? |
| Focus | Is near eye sharp? |
| Audio | Is dialogue clean? |
| Room noise | Is TV/HVAC/rub audible? |
| LUT | Is monitor look misleading? |
| Continuity | Does this match intended coverage? |
A 10-second test can prevent an entire scene from being recorded wrong.
Final exposure-monitoring rule:
Use the LUT to see. Use waveform and zebras to know. Use playback to confirm.
Chapter 16. Cine EI, Base ISO, and EI Workflow
16.1 Cine EI versus normal ISO operation
Cine EI should be treated differently from normal ISO operation. In a normal ISO workflow, the operator may think of ISO as a gain control that directly brightens or darkens the recorded image. In Cine EI, the operating concept is closer to a digital cinema negative workflow.
The camera is operated around its base sensitivity, while Exposure Index affects how the image is rated, monitored, and exposed. The goal is not to ride ISO constantly. The goal is to choose the correct base sensitivity, expose the image cleanly, and preserve a strong S-Log3 file for grading.
The simplified distinction is:
| Workflow | Practical Meaning |
|---|---|
| Normal ISO thinking | ISO is treated like a brightness/gain knob |
| Cine EI thinking | Base ISO is the sensor operating foundation; EI guides exposure rating/monitoring |
For this project, Cine EI is used because it supports a disciplined, gradeable S-Log3 workflow. The camera is not being used merely to get a pretty Rec.709 picture straight out of the monitor. The internal recording should preserve a clean log image that can later be graded into the muted cinematic look.
The important Cine EI mindset is:
Shoot a clean negative. Do not bake panic decisions into the file.
That means:
choose the proper base ISO,
expose intentionally,
use waveform/zebras,
use LUT for monitoring,
keep Internal Rec MLUT Off unless intentionally baking a LUT,
avoid underexposing for mood,
create mood through lighting and final grade.
In the project’s “Netflix-type muted color” workflow, Cine EI is not a magic look button. It is the controlled capture mode that gives the later muted grade room to work.
16.2 Base ISO 800
Base ISO 800 is the normal starting point for controlled lighting and daylight shooting.
Use Base ISO 800 for:
actor reels with controlled lighting,
feature-style interior scenes where lights can be used,
daylight exteriors,
exterior interviews,
outdoor dialogue,
controlled documentary interviews,
scenes where the operator can add light or shape light,
situations where clean highlight handling and standard base operation are preferred.
Base ISO 800 should be the first thought when the scene has adequate light.
Examples:
| Scene | Base ISO Choice |
|---|---|
| Interior actor close-up with soft key | 800 |
| Interior two-person dialogue with lights | 800 |
| Day exterior dialogue | 800 |
| Open-shade interview | 800 |
| Controlled documentary interview | 800 |
| Bright practical-light interior with supplemental light | 800 |
When using Base ISO 800 indoors, the operator should not try to make a dark scene by starving the camera. If the room is too dark, add or redirect light, open aperture if appropriate, or consider whether Base ISO 12800 is genuinely needed.
Base ISO 800 gives the operator a stable controlled foundation. The muted look should come from light shape, negative fill, and grade, not from accidental underexposure.
16.3 Base ISO 12800
Base ISO 12800 is for low-light situations where Base ISO 800 is not practical. It is not automatically “better” for every night or moody scene. It is a high-base option for scenes where the available light level requires it.
Use Base ISO 12800 for:
genuinely low-light interiors,
night interiors with weak practicals,
documentary available-light work,
low-light exterior night situations,
situations where adding light is impossible or undesirable,
emergency low-light capture where missing the shot is worse.
Examples:
| Scene | Base ISO Choice |
|---|---|
| Available-light night room | 12800 may be needed |
| Documentary in dim location | 12800 may be needed |
| Candle/practical-light mood scene | 12800 may be needed if not adding light |
| Dark interior where lighting can be added | 800 may still be better |
| Controlled feature night scene with lights | 800 or 12800 depending lighting design |
Base ISO 12800 should not be used as a license to stop lighting or stop exposing carefully. It increases the camera’s low-light capability, but the operator still needs clean exposure, proper white balance, and good monitoring.
If the image is underexposed at Base ISO 12800, it can still be noisy, muddy, and hard to grade. High base ISO does not eliminate the need for exposure discipline.
16.4 EI as exposure-rating / monitoring decision
Exposure Index in Cine EI should be understood as an exposure-rating decision rather than a casual gain knob.
EI affects how the operator interprets the image and where exposure is encouraged to land. The EI setting can make the monitoring image appear brighter or darker relative to the base sensitivity strategy, guiding the operator to expose differently.
The operator should use EI deliberately. It should not be changed constantly just to make the monitor look pleasant.
The working concept:
| EI Choice | Practical Effect |
|---|---|
| Lower EI than base | Encourages brighter exposure; can give cleaner shadows |
| Higher EI than base | Encourages darker exposure; may protect highlights but can risk shadows |
| EI equal to base | Neutral starting point |
The operator must remember:
EI affects the exposure strategy. It is not a substitute for lighting, ND, aperture, or waveform.
For a muted cinematic look, the temptation may be to raise EI or darken exposure because the monitor looks moodier. That is dangerous if it starves the log file. It is usually better to expose cleanly and create the mood through lighting and grading.
16.5 Lower EI effect
A lower EI setting encourages the operator to expose the scene brighter relative to the base. This can result in cleaner shadows because more light is placed into the recorded image.
Practical effect:
| Lower EI Use | Benefit | Risk |
|---|---|---|
| Cleaner shadows | More exposure in darker parts | Less highlight headroom if pushed too far |
| Actor close-ups | Cleaner skin and eyes | Must protect forehead/highlights |
| Moody interiors | Prevents mud/noise | Must shape with lighting, not over-brighten scene |
Lower EI can be useful when the operator wants to protect shadow quality and avoid the common mistake of underexposing S-Log3. It can help preserve cleaner skin and shadow detail.
However, lower EI must still be paired with highlight monitoring. If the operator exposes too brightly, highlights may become difficult to protect. Use waveform and zebras.
The practical rule:
Lower EI can help clean shadows, but do not ignore highlights.
16.6 Higher EI effect
A higher EI setting encourages the operator to expose darker relative to the base. This can help protect highlights, but it can also make shadows thinner or noisier if the scene is not lit or exposed carefully.
Practical effect:
| Higher EI Use | Benefit | Risk |
|---|---|---|
| Highlight-heavy scene | Encourages highlight protection | Shadows may suffer |
| Bright exterior contrast | May protect sky/window areas | Subject face may become too dark |
| Practical lamp scenes | Can preserve bright sources | Actor skin may become underexposed |
Higher EI should not be used just to make the monitor look moodier. If the image is dark because the operator raised EI and did not compensate properly, the S-Log3 file may become noisy and weak.
The practical rule:
Higher EI can protect highlights, but do not sacrifice the subject’s face and shadows accidentally.
16.7 Indoor Base ISO choices
Indoor Cine EI operation should begin with a realistic evaluation of the light.
Use Base ISO 800 indoors when:
lighting is controlled,
soft key can be added,
practicals are supported with hidden light,
actor reel or feature scene can be staged,
the scene is not genuinely too dark.
Use Base ISO 12800 indoors when:
the location is genuinely dim,
documentary conditions prevent adding light,
the scene relies on available practicals,
low-light capture is necessary,
the operator cannot get clean exposure at Base ISO 800 without unacceptable aperture/shutter compromise.
Indoor decision table:
| Indoor Condition | Recommended Base ISO |
|---|---|
| Lit actor reel | 800 |
| Lit feature dialogue | 800 |
| Controlled interview with key light | 800 |
| Window daylight interior | 800 |
| Dim documentary room | 12800 may be needed |
| Night practical-only scene | 12800 may be needed |
| Scene too dark but light can be added | Add light and consider 800 |
| Scene too dark and light cannot be added | 12800 |
The operator should also check ND. If an interior scene is too dark and ND is accidentally engaged, remove ND before changing base ISO.
Indoor checklist:
Confirm ND Clear.
Confirm shutter 180°.
Choose aperture.
Add or shape light.
Select Base ISO 800 or 12800 based on actual need.
Set EI deliberately.
Verify exposure with waveform.
16.8 Outdoor Base ISO choices
For most daylight exterior work, use:
Base ISO 800
Outdoor scenes normally have enough light, so the exposure problem is often too much brightness, not too little. The correct tool is Variable ND, not Base ISO 12800.
Use Base ISO 800 for:
daylight interviews,
open shade,
exterior actor scenes,
exterior dialogue,
outdoor chase/action,
establishing shots,
bright documentary coverage.
Outdoor Base ISO 12800 may be considered only for genuinely low-light exterior conditions, such as night or very dark available-light scenes.
Outdoor decision table:
| Outdoor Condition | Recommended Base ISO |
|---|---|
| Bright daylight | 800 |
| Open shade | 800 |
| Overcast day | 800 |
| Golden hour | 800 unless too dim |
| Night exterior | 12800 may be needed |
| Dark available-light documentary | 12800 may be needed |
The exterior operating principle:
Use Base ISO 800 and Variable ND for daylight. Do not use high base ISO as an exterior brightness control.
16.9 Low-light Cine EI choices
Low-light Cine EI operation requires careful judgment. The operator must decide whether to:
add light,
open aperture,
use Base ISO 12800,
change composition,
use practicals,
accept a darker mood,
or modify the scene.
Low-light should not mean uncontrolled underexposure.
Low-light decision path:
Scene looks too dark
↓
Is ND accidentally on?
↓
Is shutter correct?
↓
Can aperture open safely?
↓
Can light be added or redirected?
↓
Is Base ISO 12800 appropriate?
↓
Use waveform to confirm clean exposure
For actor reels, low-light should be used carefully. If the actor’s face and eyes disappear, the reel fails even if the shot feels “moody.”
For feature scenes, low-light can work if designed. Practical lamps, motivated sources, negative fill, and controlled highlights can make a scene dark but still clean.
For documentaries, low-light may be unavoidable. In that case, Base ISO 12800 is a practical tool, but headphones, focus, and exposure should still be checked.
16.10 Cine EI Quick versus Cine EI concept
The project’s controlling workflow is Cine EI-based. Cine EI Quick may provide a faster operating variant depending on camera setup, but the important concept is not the label alone. The important concept is preserving a disciplined Cine EI / S-Log3 workflow:
base sensitivity chosen deliberately,
EI used intentionally,
monitor LUT used for viewing,
internal recording protected as clean log,
exposure verified with waveform/zebras,
lighting used to create mood,
final look completed in grade.
Do not switch Cine EI operating modes casually before a serious shoot. If the camera is configured and tested in one Cine EI workflow, preserve that workflow unless there is a deliberate reason to change and retest.
Field rule:
Do not change the camera’s Cine EI operating logic on shoot day unless you know exactly why.
16.11 Practical EI field rules
Use these practical rules:
| Rule | Reason |
|---|---|
| Start from Base ISO 800 in controlled/daylight work | Stable default |
| Use Base ISO 12800 only when low light requires it | Avoid unnecessary high-base use |
| Treat EI as exposure rating | Do not ride it like normal ISO |
| Do not underexpose for mood | S-Log3 becomes muddy/noisy |
| Use waveform/zebras | Monitor image can mislead |
| Use ND for brightness | Protect shutter/aperture |
| Use lighting for mood | Not accidental underexposure |
| Record test clip | Confirms exposure and monitoring |
Cine EI operator statement before rolling:
“Base ISO chosen. EI deliberate. Exposure checked on waveform. LUT is only monitoring.”
Chapter 17. Recording Format, Codec, Frame Rate, and Audio Channel Planning
17.1 Recommended cinematic defaults
The recommended baseline for serious muted-color Cine EI shooting is:
| Setting Area | Recommended Default |
|---|---|
| Resolution | 4K UHD / QFHD |
| Codec | XAVC-I when storage allows |
| Frame rate | 23.98p / 24p for actor reel and feature-style scenes |
| Color/gamma | S-Gamut3.Cine / S-Log3 |
| Recording bit depth/color | Use high-quality 10-bit 4:2:2 workflow where configured |
| Monitoring | LUT/MLUT On for viewing |
| Internal Rec MLUT | Off for clean log recording |
| Audio | Verify CH1/CH2/CH3 routing before takes |
This baseline is designed for a strong original file, flexible grading, and professional post workflow.
The defaults should be adjusted only for a real reason:
| Change | Valid Reason |
|---|---|
| XAVC-L instead of XAVC-I | long recording/storage limit |
| 30p instead of 24p | documentary/broadcast/project requirement |
| 60p | slow motion or motion-specific need |
| Internal LUT baked | deliberate quick-turnaround workflow, not default |
| Lower resolution | storage or delivery constraint |
The project’s preference is to record a strong original and use proxies if the edit system struggles.
17.2 4K UHD / QFHD
4K UHD / QFHD is the preferred capture format for this FX6 workflow because it provides:
higher image quality,
more room for reframing,
better future-proofing,
stronger actor reel and feature presentation,
better source for grading,
more flexible documentary post-production.
Even if final delivery is 1080p, shooting 4K gives the editor options.
Useful 4K benefits:
| Use | Benefit |
|---|---|
| Actor reel close-up | slight reframing without obvious loss |
| Documentary interview | crop/punch-in for edit variation |
| Feature scene | better source for grade and delivery |
| Stabilization | some room for correction |
| Archive | stronger master footage |
The caution is storage and processing. XAVC-I 4K creates larger files. If the computer struggles, the solution should usually be proxies, not reducing capture quality unless necessary.
17.3 XAVC-I versus XAVC-L
The project distinguishes XAVC-I and XAVC-L based on quality, edit performance, and storage.
| Codec | Description | Best Use |
|---|---|---|
| XAVC-I | Intra-frame, larger files, robust editing/quality | actor reels, features, important interviews |
| XAVC-L | Long-GOP, smaller files, more storage-efficient | long documentary/event coverage |
XAVC-I is preferred when:
the take matters,
storage is manageable,
grading quality matters,
the footage will be featured,
edit performance can be supported by proxies if needed.
XAVC-L is acceptable when:
long recording time matters,
storage is limited,
documentary coverage is extended,
the shot is less grading-critical,
the operator needs more efficient media use.
Decision table:
| Production Type | Recommended Codec |
|---|---|
| Actor reel performance scene | XAVC-I |
| Feature dialogue scene | XAVC-I |
| Dramatic close-up | XAVC-I |
| Important documentary interview | XAVC-I if storage allows |
| Long documentary sit-down | XAVC-I or XAVC-L depending duration/storage |
| Long event coverage | XAVC-L may be practical |
| B-roll | XAVC-I for important, XAVC-L for volume if needed |
17.4 23.98p / 24p actor reel and feature workflow
For actor reels and feature-style scenes, 23.98p or 24p is the preferred cinematic baseline.
Use 23.98p / 24p for:
dramatic actor reels,
narrative scenes,
feature-style dialogue,
emotional close-ups,
cinematic interviews if project style supports it.
Pair with:
| Frame Rate | Shutter |
|---|---|
| 23.98p / 24p | 1/48 or 180° |
This gives normal cinematic motion. Do not raise shutter to darken the image. Use ND.
Actor reel reminder:
The actor’s performance matters more than extreme camera style. Use cinematic motion, clean focus, clear eyes, and clean dialogue.
17.5 Documentary interview options
Documentary interviews may be shot at 23.98p / 24p or another project frame rate depending on final use. The key is consistency.
Documentary choices:
| Situation | Practical Choice |
|---|---|
| Cinematic sit-down interview | 23.98p / 24p |
| Project uses 30p | 29.97p / 30p |
| Broadcast/event style | match delivery requirement |
| Mixed-source documentary | choose project standard and stay consistent |
For documentary interviews, audio quality and consistency matter as much as frame rate. Before recording a long interview:
verify audio routing,
confirm RØDE Split/Merged state,
check headphones,
record room tone,
confirm card space,
confirm codec/storage plan.
Use XAVC-I if the interview is important and storage allows. Use XAVC-L if duration/storage requires it.
17.6 Slow motion / S&Q considerations
Slow motion and S&Q should be planned before the shoot. Do not casually enter S&Q without understanding audio and post implications.
Before using S&Q:
| Check | Why |
|---|---|
| Frame rate | Determines slow-motion effect |
| Shutter | Must match motion intent |
| Audio behavior | Some S&Q modes may not record normal audio |
| Lighting | Higher frame rates may need more light |
| Flicker | Artificial lights may flicker |
| Post timeline | Must conform correctly |
| Clip log | Mark as S&Q |
Use slow motion for:
action emphasis,
emotional movement,
visual detail,
documentary B-roll,
chase/action inserts.
Avoid slow motion when:
dialogue sync is required,
lighting is too weak,
post plan is unclear,
the footage must match normal-speed dialogue coverage.
If a clip is S&Q, log it clearly.
17.7 10-bit 4:2:2 logic
For S-Log3 muted-color grading, a robust 10-bit 4:2:2 recording workflow is preferred where configured. The reason is grading flexibility.
S-Log3 footage will be transformed and graded. A stronger recording format helps preserve:
skin tone,
subtle color transitions,
shadow detail,
highlight rolloff,
restrained saturation,
clean grade adjustments.
The muted look can involve careful color shaping. Weak source files are less tolerant of grading.
The rule is:
If the scene matters, capture the strongest practical original and use proxies for editing performance.
17.8 Audio channel verification
Recording format is not only picture. Audio channel layout must be verified before recording.
Possible audio layouts:
| Setup | CH1 | CH2 | CH3 | CH4 |
|---|---|---|---|---|
| One RØDE with safety | TX1 main | TX1 lower safety | — | — |
| Two RØDE split | TX1 | TX2 | — | — |
| One RØDE in permanent split | TX1 | silent/unused | — | — |
| Two RØDE + boom | TX1 | TX2 | Boom | Off/Shoe CH2 |
| Merged lavs + boom | TX1+TX2 merged | Boom | — | — |
Before recording, state the routing out loud if necessary:
“CH1 TX1, CH2 TX2, CH3 boom.”
Then test each source.
Audio channel mistakes are easy to make because some settings are physical switches and some are menu routing. ALL File may not save physical switch positions or RØDE receiver mode. Check them manually.
17.9 Matching recording format to post workflow
The recording format must match the editing plan.
If using DaVinci Resolve or Adobe Premiere Pro:
import full reel folders,
preserve camera-original structure,
generate proxies if needed,
grade/export from originals,
keep audio channel identity.
Do not choose lower capture quality merely because playback is choppy. Choppy playback can often be solved with proxies.
Format/post decision table:
| Problem | Better Solution |
|---|---|
| Computer struggles with XAVC-I | Generate proxies |
| Storage filling too fast | Use smaller reel offloads or XAVC-L where appropriate |
| Long interview | Consider XAVC-L or more cards |
| Editing lag | DNxHR proxies |
| Duplicate clip names | Reel folder + unique clip IDs |
| Huge card copy | smaller future reel targets |
17.10 Avoiding mixed frame rates without plan
Do not mix frame rates casually. Mixed frame rates create post-production complications.
Avoid unplanned mixing of:
23.98p,
24p,
29.97p,
30p,
59.94p,
60p,
S&Q clips.
If mixing is intentional, log it.
Clip log should record:
frame rate,
S&Q status,
codec,
reel ID,
clip ID,
scene description.
Frame-rate decision table:
| Use | Frame Rate |
|---|---|
| Actor reel cinematic scene | 23.98p / 24p |
| Feature-style scene | 23.98p / 24p |
| Documentary project standard | project-dependent |
| Slow-motion B-roll | planned higher frame rate/S&Q |
| Event/documentary long coverage | match project delivery |
Final rule:
Pick the project frame-rate standard before shooting and deviate only by plan.
Chapter 18. Assignable Buttons and User Menu Field Map
18.1 Why field controls should be fast
The FX6 has deep menus, but field operation should not require hunting through menus during a take. Critical controls should be assigned or placed where the operator can reach them quickly.
The controls that matter most during a shoot are:
focus magnification,
waveform/video signal monitor,
zebras,
LUT On/Off,
Face/Eye AF,
Push AF,
Audio Status,
Rec Review.
These controls are not cosmetic. They prevent failed takes.
Fast access is important because on a real shoot the operator may need to respond to:
focus uncertainty,
exposure change,
monitor image confusion,
audio problem,
room noise,
unexpected actor movement,
changing light,
need to review a take.
A good button/menu map reduces stress.
18.2 Assignable button priorities
The assignable button priorities should support the user’s actual workflow: Cine EI, muted-color monitoring, RØDE audio, focus-critical actor/documentary work, and test review.
18.2.1 Focus Magnifier
Focus Magnifier is one of the most important assignable functions.
Why it matters:
close-ups require eye focus,
actor reels fail if eyes are soft,
S-Log3/LUT monitor image may not show fine focus clearly,
bright sun makes screen judgment harder,
shallow aperture reduces tolerance.
Use before rolling on:
actor close-ups,
interview close-ups,
long-lens exterior shots,
rack focus starts/ends,
shallow depth of field shots.
18.2.2 Waveform / Video Signal Monitor
Waveform or Video Signal Monitor should be quickly accessible because exposure cannot be judged reliably by the monitor image alone.
Use waveform to check:
face,
gray card,
white reference,
windows,
practical lights,
sky,
bright shirts,
shadow placement.
For muted color, this is critical because the image may look moody while being underexposed.
18.2.3 Zebras
Zebras provide fast exposure warnings. They are useful when the operator needs a quick check without staring at waveform.
Use zebras to watch:
highlight clipping,
bright skin areas,
white clothing,
windows,
sky,
practicals.
Zebras are especially useful outdoors and during documentary movement.
18.2.4 LUT On/Off
LUT On/Off is useful because the operator may need to compare:
flat S-Log3 view,
LUT-applied preview,
exposure confidence,
color/contrast direction.
The LUT should help viewing, but it can also mislead if treated as exposure truth. A fast LUT toggle helps the operator understand what is monitor transform and what is underlying log.
Preferred recording remains:
Internal Rec MLUT Off
while monitoring LUT can be On.
18.2.5 Face/Eye AF
Face/Eye AF should be quickly reachable if using compatible lenses and autofocus workflow.
Use cases:
solo operator interviews,
documentary subject movement,
walk-and-talks,
actor movement when manual focus is difficult.
But Face/Eye AF must be tested. Quick access lets the operator enable or disable it depending on the shot.
18.2.6 Push AF
Push AF is useful when the operator wants temporary autofocus assistance without fully relying on continuous autofocus.
Use cases:
grab focus before rolling,
correct focus after subject shifts,
documentary quick setup,
manual focus workflow with occasional assist.
Push AF is especially useful when the operator wants control but also needs speed.
18.2.7 Audio Status
Audio Status should be accessible because audio routing is a major part of this project.
The operator must often verify:
CH1 source,
CH2 source,
CH3 source if boom adapter used,
INPUT1/INPUT2 reference,
headphone monitor channel,
levels,
limiter/AGC status depending setup,
routing after switching one-transmitter/two-transmitter/boom workflows.
Audio Status is not optional. The project’s audio system has multiple valid configurations, so the current configuration must be visible.
18.2.8 Rec Review
Rec Review allows the operator to check whether the last take recorded properly.
Use Rec Review after:
new audio routing,
new lens/focus setup,
new LUT/output setup,
first take of scene,
critical performance,
new card/reel start,
exterior exposure setup.
A short review can catch:
no audio,
wrong channel,
soft focus,
bad exposure,
unwanted room noise,
framing mistake,
blown highlight,
wrong LUT monitoring assumption.
18.3 User Menu Page 1: Exposure
User Menu Page 1 should contain exposure controls and checks.
Suggested contents:
| Item | Reason |
|---|---|
| ISO/Gain/EI | Cine EI exposure strategy |
| Base ISO | 800 / 12800 decision |
| Exposure Index | rating/monitoring decision |
| ND Filter | exposure control |
| Shutter | motion control |
| Zebra | highlight/skin warning |
| Video Signal Monitor / Waveform | exposure truth |
The exposure page should answer:
What base ISO am I in?
What EI am I rating at?
Is shutter correct?
Is ND doing exposure work?
Are zebras/waveform available?
18.4 User Menu Page 2: Look / LUT
User Menu Page 2 should contain look and LUT-related controls.
Suggested contents:
| Item | Reason |
|---|---|
| Cine EI/Flex.ISO Set | confirm operating mode |
| Color Gamut | confirm S-Gamut3.Cine/S-Log3 |
| LUT On/Off VF/Proxy/Stream | viewfinder preview |
| LUT On/Off SDI/HDMI | external monitor preview |
| Internal Rec LUT | protect clean recording |
| Base Look | choose s709/other look |
| Scene File | look backup/load |
This page should answer:
Am I recording S-Gamut3.Cine/S-Log3?
Is the monitor receiving MLUT?
Is Internal Rec MLUT Off?
What Base Look is selected?
The most dangerous mistake here is accidentally baking a LUT into internal recording when the intent is clean log.
18.5 User Menu Page 3: Focus
User Menu Page 3 should contain focus controls.
Suggested contents:
| Item | Reason |
|---|---|
| Focus Mode | manual/AF state |
| Focus Area | AF behavior |
| Face/Eye Detection AF | interview/actor tracking |
| Push AF Mode | temporary assist behavior |
| Peaking | manual focus aid |
| Focus Magnifier | critical focus check |
This page should support the focus decision:
manual or AF,
eye tracking or not,
peaking on/off,
magnifier available,
focus behavior appropriate to scene.
For actor reels, this page protects the near-eye rule.
18.6 User Menu Page 4: Audio
User Menu Page 4 should contain audio controls.
Suggested contents:
| Item | Reason |
|---|---|
| Audio Input | master audio routing area |
| CH1 Input Select | TX1/main/safety routing |
| CH2 Input Select | safety vs TX2 routing |
| CH3 Input Select | boom via Shoe CH1 if used |
| INPUT1 MIC Reference | RØDE input sensitivity |
| INPUT2 MIC Reference | second RØDE input sensitivity |
| Monitor CH / Headphone | what operator hears |
| Audio Level Meter | visible confirmation |
This page is critical because the project has multiple audio modes:
| Mode | CH1 | CH2 | CH3 |
|---|---|---|---|
| One-transmitter safety | INPUT1 | INPUT1 | — |
| Two-transmitter split | INPUT1 | INPUT2 | — |
| One-transmitter in split mode | INPUT1 | INPUT2 silent | — |
| Two lavs + boom | INPUT1 | INPUT2 | Shoe CH1 |
| Merged lavs + boom | INPUT1 merged | INPUT2 boom | — |
The operator must know which mode is active.
18.7 User Menu Page 5: Recording / Media
User Menu Page 5 should contain recording and media controls.
Suggested contents:
| Item | Reason |
|---|---|
| Rec Format | resolution/codec/frame rate |
| S&Q Motion | slow motion state |
| Proxy Rec | post workflow |
| Simul Rec | if used |
| All File | save/load full setup |
| User File | user setup backup |
| Format Media | card management, use carefully |
This page should support:
confirming recording format,
avoiding accidental S&Q state,
saving settings,
managing cards carefully.
Format Media must be used only after verified backup. Do not format production cards casually.
18.8 Button-map operating rule
The button and user-menu map should support the real field workflow.
Priority controls are:
Focus Magnifier,
Waveform/Video Signal Monitor,
Zebras,
LUT On/Off,
Face/Eye AF,
Push AF,
Audio Status,
Rec Review.
The operating rule is:
Assign buttons to prevent failed takes, not to decorate the camera.
The best button map is the one that lets the operator quickly answer:
Is focus sharp?
Is exposure safe?
Is LUT monitoring correct?
Is audio routed correctly?
Did the take record properly?
PART IV — LUT, MONITORING, SETTINGS FILES, AND FX6 SETTINGS CARD
Chapter 19. LUT / MLUT Monitoring Setup
19.1 S-Gamut3.Cine/S-Log3 does not automatically mean monitor LUT
A key project finding was that setting the camera to S-Gamut3.Cine/S-Log3 does not automatically mean the external monitor will display a LUT-applied image.
There are separate concepts:
camera color/gamma,
monitor/output LUT,
internal recording LUT.
The camera can record S-Gamut3.Cine/S-Log3 while the external monitor receives:
flat log,
LUT-applied image,
or a signal altered by output settings.
The operator must deliberately set SDI/HDMI MLUT behavior.
The practical rule:
S-Gamut3.Cine/S-Log3 defines the capture. SDI/HDMI MLUT defines what the external monitor sees.
Do not assume the monitor image is normalized unless the FX6 output LUT setting is on.
19.2 Three separate items
The project separates three items that are often confused.
19.2.1 Camera color/gamma
The camera color/gamma is the recording foundation.
Project baseline:
S-Gamut3.Cine / S-Log3
This defines the log capture intended for grading. It does not by itself guarantee that the LCD or external monitor is showing the final look.
19.2.2 SDI/HDMI MLUT
SDI/HDMI MLUT controls whether the FX6 sends a LUT-applied image through the external video output.
If SDI/HDMI MLUT is On:
the external monitor can see a normalized/look preview,
the monitor does not need to import its own LUT,
the operator can judge composition and broad contrast more easily.
If SDI/HDMI MLUT is Off:
the external monitor may see flat S-Log3,
the image may look washed out,
exposure may be harder to judge visually,
waveform/zebras still matter.
19.2.3 Internal Rec MLUT
Internal Rec MLUT controls whether the LUT is baked into the camera’s internal recording.
For this project, the preferred setting is:
Internal Rec MLUT Off
That preserves clean S-Gamut3.Cine/S-Log3 for grading.
If Internal Rec MLUT is On, the LUT may be recorded into the file. That is not the preferred workflow unless deliberately chosen for a fast turnaround or specific baked-look project.
19.3 Recommended settings
The project’s preferred monitoring setup is:
| Destination | Recommended Setting |
|---|---|
| VF/Proxy/Stream | MLUT On if desired |
| SDI/HDMI | MLUT On for external monitor preview |
| Internal Rec | MLUT Off for clean S-Log3 |
This lets the operator see a normalized image while the camera records gradeable log footage.
19.3.1 VF/Proxy/Stream MLUT On
Turning VF/Proxy/Stream MLUT On gives the operator a usable preview on the camera’s viewing path.
Use this when:
S-Log3 appears too flat for composition,
judging broad contrast,
showing talent/client a normal-looking image,
working in the muted preview style.
The operator should remember that this is only a viewing transform.
19.3.2 SDI/HDMI MLUT On
Turn SDI/HDMI MLUT On when the external monitor should see the LUT-applied image.
This is especially important for the Elvid RigVision monitor discussed in the project, because it does not appear to import LUTs directly. If the FX6 sends the MLUT-applied output, the monitor can still display the normalized image.
External monitor workflow:
FX6 records clean S-Log3 internally
↓
FX6 applies MLUT to SDI/HDMI output
↓
External monitor displays LUT-applied image
19.3.3 Internal Rec MLUT Off
Keep Internal Rec MLUT Off for the project’s main workflow.
Reason:
preserves clean log,
gives grading flexibility,
prevents accidental baked LUT,
supports muted look in post,
avoids committing to monitor preview as final image.
The field statement should be:
“Monitor LUT On. Internal Rec LUT Off.”
19.4 External monitor LUT behavior
The external monitor displays the signal it receives. If the FX6 sends a LUT-applied image through SDI/HDMI, the monitor shows that image.
Therefore, a monitor does not need to import LUTs if the FX6 is already applying the MLUT to the output.
Signal behavior:
| FX6 SDI/HDMI MLUT | Monitor Display |
|---|---|
| Off | Flat S-Log3/log-like image |
| On | LUT-applied/normalized preview |
This is the answer to the project question about whether S-Gamut3.Cine/S-Log3 plus LUT On settings can allow the monitor to see the LUT without loading the LUT into the monitor.
Yes, if the FX6 is set to send MLUT through SDI/HDMI, the monitor can display the FX6-applied LUT image.
19.5 Why monitor does not need its own LUT if FX6 sends MLUT
If the FX6 applies the LUT before the signal reaches the monitor, the monitor is simply displaying the already transformed image.
This matters because the Elvid RigVision monitor may not import LUTs. That limitation is not fatal if the FX6 output is configured correctly.
Workflow:
| Device | Role |
|---|---|
| FX6 | Applies MLUT to SDI/HDMI output |
| Elvid monitor | Displays received image |
| Internal FX6 recording | Remains clean S-Log3 if Internal Rec MLUT Off |
This is the simplest monitoring workflow for the user’s setup.
19.6 Double-LUT warning
Do not apply two LUTs.
Double-LUT happens when:
the FX6 sends a LUT-applied image,
and the monitor also applies a LUT.
Result can be:
too much contrast,
crushed shadows,
clipped-looking highlights,
oversaturated color,
wrong skin tone,
misleading exposure judgment.
For this project:
| FX6 SDI/HDMI MLUT | Monitor LUT |
|---|---|
| On | Off / not used |
| Off | Monitor LUT could be used only if monitor supports correct LUT |
Since the Elvid RigVision likely does not import LUTs, the practical setup is:
FX6 SDI/HDMI MLUT On; monitor LUT not used.
19.7 Internal recording safety
The safest recording workflow is:
| Function | Setting |
|---|---|
| Camera capture | S-Gamut3.Cine/S-Log3 |
| Monitoring | MLUT On |
| Internal Rec MLUT | Off |
This prevents the operator from accidentally baking the preview look into the recording.
The internal file should remain flexible for:
DaVinci Resolve grading,
Premiere workflow,
muted final color,
exposure correction,
skin-tone protection,
matching shots.
Do not turn Internal Rec MLUT On unless the operator deliberately wants to record the LUT-applied look.
19.8 s709 monitoring look
s709 is preserved as a recommended safe monitoring look because it is restrained and useful for viewing S-Log3 material without pushing the image into an overly harsh Rec.709 preview.
Use s709 when:
judging a more natural contrast preview,
protecting skin,
avoiding aggressive LUTs,
shooting actor reels,
working toward muted color.
s709 is not the final grade. It is a monitoring reference.
19.9 709(800%) reference look
709(800%) is preserved as another reference look. It can be useful as a more standard normalized viewing option.
Use it as:
a comparison,
a technical reference,
a different preview option.
Do not confuse it with the final grade. Like s709, it is a monitoring tool.
19.10 Custom Nelson Muted Preview LUT concept
The project allows for a future custom “Nelson Muted Preview LUT” concept. This would be a preview LUT designed to approximate the desired restrained Netflix-type muted look.
However, it should not be loaded or used casually without testing.
Before adopting a custom muted LUT:
Confirm it is designed for S-Gamut3.Cine/S-Log3 input.
Test it on skin.
Test it indoors and outdoors.
Test it on actor close-ups.
Test it on documentary interviews.
Confirm it does not crush shadows.
Confirm it does not make skin gray.
Confirm Internal Rec MLUT remains Off unless intentionally baking.
The custom LUT should be a preview aid, not a substitute for lighting and grading.
Final LUT rule:
Use LUTs to see the image. Use S-Log3 to preserve the image. Use grading to finish the image.
Chapter 20. Elvid RigVision Monitor and External Monitoring
20.1 Elvid RigVision LUT-import limitation
The project question was whether the Elvid RigVision monitor can import a LUT.
The preserved conclusion is:
The Elvid RigVision monitor discussed does not appear to support direct LUT import.
That means the monitor should not be treated like a LUT-capable production monitor where the operator loads .cube files directly into the monitor.
But that limitation does not prevent proper LUT monitoring because the FX6 can send a LUT-applied image through SDI/HDMI when configured.
The practical result:
| Need | Solution |
|---|---|
| See normal/muted preview on Elvid | Use FX6 SDI/HDMI MLUT On |
| Load LUT into Elvid | Not available/likely unsupported |
| Avoid flat S-Log3 monitor image | Let FX6 apply MLUT to output |
| Avoid double-LUT | Do not apply monitor LUT |
20.2 Why FX6-applied MLUT solves the issue
If the FX6 applies the MLUT to the SDI/HDMI output, the external monitor does not need to know anything about LUTs. It simply displays the signal it receives.
Signal path:
FX6 internal image: S-Gamut3.Cine/S-Log3
↓
FX6 applies selected MLUT to SDI/HDMI output
↓
Elvid RigVision receives normalized/LUT-applied image
↓
FX6 internal recording remains clean log if Internal Rec MLUT is Off
This solves the user’s monitor problem without needing a LUT-capable monitor.
The operator should verify:
SDI/HDMI MLUT is On,
Internal Rec MLUT is Off,
selected Base Look is appropriate,
monitor image changes when MLUT is toggled,
camera recording remains log.
20.3 Monitor LUT off when FX6 SDI/HDMI MLUT is on
If using a monitor that can import LUTs, the rule would be:
Do not apply monitor LUT when FX6 is already outputting MLUT.
For the Elvid RigVision monitor, direct LUT import appears unavailable, so this double-LUT risk is less about accidentally loading a LUT into Elvid and more about understanding the correct signal path.
The safe external monitoring state is:
| FX6 Setting | Monitor State |
|---|---|
| SDI/HDMI MLUT On | Monitor displays FX6-applied LUT |
| Internal Rec MLUT Off | Camera records clean S-Log3 |
| Monitor LUT | Not used |
If a different external monitor is used later and it does support LUTs, choose one LUT location:
| LUT Location | Use |
|---|---|
| FX6 output LUT | preferred for simple setup |
| Monitor LUT | possible if FX6 SDI/HDMI MLUT Off |
| Both | avoid |
20.4 External monitor as view-only device versus recorder warning
The Elvid RigVision should be treated as a viewing monitor in this workflow, not as a recorder or color-management authority.
Its job is:
composition,
focus assistance if clear enough,
viewing LUT-applied image,
director/talent preview,
framing.
It should not override:
waveform exposure judgment,
FX6 internal recording settings,
S-Log3 capture logic,
Resolve/Premiere color management,
post-production grading.
A monitor image can be affected by:
brightness setting,
contrast setting,
viewing angle,
ambient light,
HDMI/SDI signal settings,
LUT output setting from camera.
Therefore:
Use the monitor to see. Use camera tools to verify. Use post to finish.
20.5 Practical monitoring setup table
Use this practical table for the Elvid RigVision workflow.
| Item | Recommended Setting / Role |
|---|---|
| FX6 color/gamma | S-Gamut3.Cine/S-Log3 |
| Selected viewing LUT/Base Look | s709 or chosen test look |
| VF/Proxy/Stream MLUT | On if desired |
| SDI/HDMI MLUT | On |
| Internal Rec MLUT | Off |
| Elvid monitor LUT import | Not relied upon |
| Elvid monitor role | Display FX6-applied output |
| Exposure verification | FX6 waveform/zebras |
| Recording | Clean S-Log3 internally |
| Warning | Do not assume monitor image equals final grade |
External monitor pre-roll checklist:
Confirm FX6 is in S-Gamut3.Cine/S-Log3.
Confirm the desired Base Look/LUT is selected.
Confirm SDI/HDMI MLUT is On.
Confirm Internal Rec MLUT is Off.
Look at Elvid monitor and verify image is not flat log if LUT preview is intended.
Toggle LUT if needed to confirm behavior.
Use waveform/zebras for exposure.
Record test if monitor/output settings were changed.
Final monitor rule:
The Elvid does not need to import a LUT if the FX6 is sending the LUT-applied image. The camera records clean log; the monitor displays the preview.
Chapter 21. LUT Acquisition and FX6 Settings Card
21.1 Why to preload only a small LUT set
The FX6 should not be loaded with a large, random collection of LUTs. A large LUT collection creates confusion in the field and increases the chance that the wrong LUT will be selected, monitored, or accidentally baked into a recording path.
For this project, LUTs are used primarily as monitoring references. They are not the final grade, and they are not a substitute for exposure, white balance, lighting, art direction, or careful post-production color work.
The correct philosophy is:
Carry only the LUTs you understand, trust, and have tested.
A small controlled LUT set is better than a large LUT library because it helps the operator know exactly what the monitor is showing.
A recommended small LUT set would include:
| LUT Type | Purpose |
|---|---|
| s709 | Primary safe monitoring look |
| 709(800%) | Reference/alternate normalized look |
| Sony official S-Gamut3.Cine/S-Log3 LUTs | Trusted technical baseline |
| Optional Sony creative look | Test only, not default |
| Future custom Nelson Muted Preview LUT | Project-specific preview after testing |
Avoid loading LUTs simply because they are described as “cinematic,” “Netflix,” “moody,” “teal orange,” or “film.” A LUT made for the wrong camera, wrong gamma curve, or wrong color space can mislead exposure and color judgment.
In this project, the monitoring LUT should help answer:
Is the face readable?
Is the contrast direction close to the intended muted look?
Is the background too distracting?
Are skin tones plausible?
Is the scene becoming too dark or too crushed?
The LUT should not be used to decide final color on set. The final look should be built in DaVinci Resolve or Premiere/color workflow from the clean S-Log3 recording.
21.2 Recommended LUTs
The recommended LUT set should remain small and controlled. Each LUT should have a clear purpose.
21.2.1 s709
s709 is the preferred safe monitoring LUT for this project.
It is useful because it gives a normalized image that is generally restrained and suitable for judging a natural-looking S-Log3 image without pushing the contrast and saturation into an aggressive look.
Use s709 for:
actor reel close-ups,
controlled interviews,
feature-style dialogue,
muted cinematic monitoring,
skin-tone judgment,
safe external monitor preview.
s709 is not the final grade. It is a monitoring reference.
The practical use is:
| Setting | Recommended Use |
|---|---|
| Camera capture | S-Gamut3.Cine/S-Log3 |
| Monitor | s709 MLUT |
| Internal Rec MLUT | Off |
| Final grade | done later in post |
The advantage of s709 is that it lets the operator see a reasonable image without committing that look to the recorded file.
21.2.2 709(800%)
709(800%) is useful as another reference monitoring look. It can serve as a more standard normalized preview option.
Use 709(800%) when:
comparing against s709,
checking a more standard Rec.709-style preview,
verifying whether a scene is too flat, too contrasty, or too bright,
testing monitor behavior.
It should not be treated as the final “Netflix muted” look. It is a reference.
A practical LUT test procedure is:
Set camera to S-Gamut3.Cine/S-Log3.
Set Internal Rec MLUT Off.
Turn SDI/HDMI MLUT On.
View s709.
View 709(800%).
Compare skin, contrast, and shadow detail.
Choose the safer monitoring look for that shoot.
Keep the final grade for post.
21.2.3 Sony official S-Gamut3.Cine/S-Log3 LUTs
Sony official LUTs are preferred over random internet LUTs because they are more likely to be technically correct for the FX6 color/gamma path.
Use official Sony LUTs as:
trusted technical monitoring references,
controlled starting points,
comparison tools,
baseline transforms for testing.
The key requirement is that the LUT must be built for the correct input:
S-Gamut3.Cine / S-Log3
Do not use a LUT intended for:
Canon Log,
V-Log,
ARRI LogC,
RED IPP2,
generic Rec.709 footage,
unknown log footage,
a different Sony gamma/color space unless intentionally tested.
Wrong-input LUTs can create bad contrast, wrong saturation, distorted skin, and false exposure confidence.
21.2.4 Optional creative Sony looks
Optional creative Sony looks can be loaded for testing, but they should not become the field default unless they have been tested across the user’s actual shooting scenarios.
Test creative looks on:
indoor actor close-up,
two-person dialogue,
documentary interview,
exterior open shade,
exterior sun/backlight,
darker practical-light scene,
different skin tones,
muted wardrobe,
bright background.
A creative LUT that looks good on one shot may fail on another. For actor reels, this is especially dangerous because the actor’s face must remain the priority.
Use creative looks only if:
they are correct for the FX6 log/color path,
they preserve skin,
they do not crush shadows,
they do not clip highlights misleadingly,
they do not make the monitor look better than the recorded exposure actually is,
they are documented in the field notes.
21.2.5 Custom Nelson Muted Preview LUT
A future custom Nelson Muted Preview LUT could be useful if it is designed specifically for this project’s style. Its purpose would be to approximate the preferred muted cinematic direction while still preserving safe viewing judgment.
It should be treated as a preview LUT only until fully tested.
The custom LUT should be designed to:
keep skin natural,
restrain saturation,
avoid crushed blacks,
preserve shadow texture,
avoid harsh contrast,
protect actor faces,
work indoors and outdoors,
avoid misleading exposure.
Before using a custom Nelson Muted Preview LUT on a real shoot:
| Test | Required Check |
|---|---|
| Actor close-up | Does skin remain alive? |
| Dark interior | Are shadows readable, not crushed? |
| Exterior shade | Does face look clean? |
| Direct daylight | Are highlights misleading? |
| Documentary interview | Does it look credible? |
| Wardrobe colors | Are muted colors controlled? |
| Bright background | Does it over-darken subject? |
| Internal recording | Confirm LUT is not baked unless deliberate |
The custom LUT should never replace waveform, zebras, manual white balance, or exposure testing.
21.3 Avoiding random LUT packs
Random LUT packs are risky because many LUTs are not built for the FX6 S-Gamut3.Cine/S-Log3 input. A LUT may look attractive in advertising but be wrong for the camera’s actual signal.
Risks of random LUTs:
| Risk | Result |
|---|---|
| Wrong input gamma | bad contrast and exposure preview |
| Wrong color space | distorted color and skin |
| Overly strong contrast | crushed shadows |
| Oversaturation | non-muted look |
| Excessive desaturation | dead skin |
| Unclear purpose | field confusion |
| Too many options | decision paralysis |
For this project, LUTs must support the operator’s job. They should not create additional uncertainty.
Field rule:
If you do not know what input the LUT expects, do not use it on the FX6 for production monitoring.
A safe LUT must answer:
Is it for S-Log3?
Is it for S-Gamut3.Cine?
Is it intended for monitoring or final conversion?
Has it been tested on skin?
Is Internal Rec MLUT Off?
Is the monitor double-LUT-free?
21.4 Correct card folder paths
LUTs must be placed in the correct folder structure for the FX6 to recognize them for import.
21.4.1 SD card LUT path
For an SD card, use:
/PRIVATE/SONY/PRO/LUT/
This means the LUT files should be inside the LUT folder at that path.
A practical SD card structure would be:
SD CARD/
PRIVATE/
SONY/
PRO/
LUT/
s709.cube
709_800.cube
Nelson_Muted_Test.cube
Folder names matter. Do not scatter LUT files randomly on the card.
21.4.2 CFexpress Type A LUT path
For a CFexpress Type A card, use:
/SONY/PRO/LUT/
A practical CFexpress structure would be:
CFexpress CARD/
SONY/
PRO/
LUT/
s709.cube
709_800.cube
Nelson_Muted_Test.cube
The project preference is to use a dedicated settings card rather than mixing settings/LUT files casually with production footage cards.
21.5 Importing LUTs into FX6
The FX6 must import the LUT from the card before it can be selected as a Base Look or monitoring look.
General workflow:
Prepare the LUT files on the computer.
Confirm they are .cube files intended for the FX6/S-Log3/S-Gamut3.Cine workflow.
Place them in the correct card folder.
Insert the settings/LUT card into slot B if following the project’s Media(B) workflow.
Go to the FX6 Look/Base Look import area.
Choose import from Media(B).
Select the LUT file.
Import it into the camera.
Confirm it appears in the available Base Look list.
Select it only after confirming it is the intended LUT.
Do not assume that placing a LUT on a card automatically activates it. The LUT must be imported and selected.
21.6 Selecting the imported Base Look
After import, the LUT or look must be selected as the active Base Look / monitoring look, depending on the FX6 menu structure and current mode.
The operator must confirm:
| Check | Required Answer |
|---|---|
| Is the LUT imported? | Yes |
| Is it selected as Base Look? | Yes, if intended |
| Is SDI/HDMI MLUT On? | Yes, for external monitor preview |
| Is Internal Rec MLUT Off? | Yes, for clean log recording |
| Is the image on monitor changed? | Yes, if LUT output active |
| Is waveform still used? | Yes |
Changing the Base Look affects monitoring behavior and possibly output behavior depending on LUT On/Off destinations. The operator must know which outputs are affected.
21.7 Input/output LUT setting warning
The LUT must match the input signal.
For this project, the baseline input is:
S-Gamut3.Cine / S-Log3
Do not load or select a LUT if it expects a different input unless it is being tested intentionally.
Correct LUT input:
S-Gamut3.Cine / S-Log3 → selected LUT → monitoring preview
Wrong LUT input examples:
Canon Log LUT used on S-Log3
V-Log LUT used on S-Log3
ARRI LogC LUT used on S-Log3
Rec.709 LUT used directly on S-Log3
Unknown "cinematic" LUT used without input specification
Potential consequences:
skin becomes orange/green/gray,
contrast becomes misleading,
shadows crush,
highlights appear worse than they are,
exposure judgment becomes unreliable,
monitor no longer represents a useful preview.
Input/output must be treated as technical, not decorative.
21.8 Why to keep LUT files backed up separately
Do not rely on the camera alone as the only place where LUTs exist.
Keep backup copies of LUT files in:
PROJECT/
00_ADMIN/
FX6_SETTINGS/
LUTS/
and on the dedicated settings card.
A practical backup structure:
FX6_SETTINGS_BACKUP/
ALL_FILES/
USER_FILES/
SCENE_FILES/
LUTS/
s709/
709_800/
SONY_OFFICIAL/
NELSON_MUTED_TEST/
NOTES/
Reason:
ALL File may preserve menu configuration but not necessarily all external LUT source files in a usable standalone way.
A card can be formatted.
LUTs may need to be reloaded later.
Post-production needs to know what monitoring LUT was used.
Future shoots must recreate the same monitoring environment.
LUT backup rule:
Save the LUT file, the camera setting, and the note explaining when it was used.
Chapter 22. ALL Files, User Files, Scene Files, and Dedicated Settings Card
22.1 What ALL File saves
An FX6 ALL File is used to save a broad set of camera configuration settings. It is the closest practical way to preserve the current camera setup across the menus.
For this project, the ALL File is valuable because the FX6 setup includes many linked settings:
Cine EI mode,
S-Gamut3.Cine/S-Log3 setup,
recording format,
LUT/MLUT routing,
monitoring configuration,
audio menu routing,
user menu configuration,
assignable button setup,
file-related camera settings,
and many other savable menu values.
The practical project expectation is:
ALL File should capture most savable camera menu values across Menu 0–10, including many Level 1 through Level 4 menu settings where they are actual savable settings.
That does not mean it replaces written documentation. It saves camera configuration; it does not create a readable operator manual.
Use ALL File when:
the camera is finally configured for the Cine EI muted-color workflow,
a shoot setup has been tested and confirmed,
the user wants to preserve current menu state,
the user wants to reload the setup later,
or the user wants to send/share the camera settings for review.
The project’s saved ALL File procedure is:
Project → All File → Save to Media(B) → Execute
Then choose a “No File” slot for a new save, or choose an existing File ID if deliberately overwriting.
22.2 What ALL File does not save
An ALL File does not save everything in the physical production system.
It does not reliably save or represent:
| Item | Reason |
|---|---|
| Physical switch positions | Switches must be visually checked |
| Lens zoom/focus/iris ring position | Physical lens state |
| RØDE receiver mode | External device |
| RØDE receiver gain | External device |
| RØDE onboard recording status | External device |
| Cable Techniques cable routing | Physical cable state |
| Blue XLR / red XLR placement | Physical connection |
| Headphone volume perception | Monitoring preference/physical |
| Boom mic model | External device |
| Boom adapter physical switches | External device/physical |
| Elvid monitor settings | External monitor |
| Loaded LUT source files on computer | External files |
| Lighting layout | Physical set |
| White/gray card shot | Production reference |
| File log entries | Production paperwork |
| Production card backup status | Post workflow |
Therefore, ALL File is powerful but not sufficient by itself.
The correct rule is:
ALL File saves camera menu state. It does not save the entire physical rig or production workflow.
22.3 Menu 0–10 settings and ALL File capture
The user specifically asked whether ALL File will capture and save Level 1 through Level 4 settings for Menu 0–10.
The practical answer is:
It should save most savable camera menu settings across the camera’s menu system, but it should not be treated as a substitute for written camera-verified documentation or physical switch checks.
In the project context, Menu 0–10 refers to the broader FX6 canonical menu mapping structure. ALL File is a camera configuration file, not a printed menu map.
Therefore:
| Need | Use |
|---|---|
| Restore camera setup | ALL File |
| Know exact menu hierarchy/wording | Written canonical menu document |
| Verify physical switches | Manual inspection |
| Preserve RØDE gain/mode | RØDE notes/device setup |
| Preserve external monitor behavior | Monitor notes/settings |
| Preserve lighting setup | Lighting diagram/notes |
| Preserve file workflow | Handbook/log/checklists |
An ALL File can be excellent for restoring the camera, but the operator still needs a checklist.
22.4 Level 1–Level 4 camera values versus written documentation
The FX6 canonical menu work recorded menu levels and values. That written structure is documentation. An ALL File is camera data.
They serve different purposes.
| Item | Purpose |
|---|---|
| Canonical menu document | Human-readable reference |
| ALL File | Reloadable camera setup |
| User File | User setup backup |
| Scene File | Look/Paint-related backup |
| Checklist | Confirms physical/external items |
| Clip log | Production record |
The ALL File may preserve the camera value, but it does not tell the operator why that setting matters. It also does not warn the operator that the RØDE receiver must be in Split mode or that blue XLR must go to INPUT1.
The handbook and checklist remain necessary.
22.5 Slot B / Media(B) workflow
The preserved project workflow uses card slot B / Media(B) for settings-file operations.
Procedure:
Insert a formatted card in slot B.
Go to the FX6 Project menu.
Choose All File.
Choose Save to Media(B).
Choose Execute.
Select a “No File” slot to create a new save, or select an existing File ID if overwriting intentionally.
Confirm Execute.
This slot B procedure is important because settings files and LUT import workflows are tied to the camera’s media-file handling.
The project also preserves the distinction:
All File is different from User File.
Do not assume saving one automatically gives the same protection as saving all possible file types.
22.6 ALL File save/load procedure
Save procedure
Use this when the camera is configured and tested.
Project
→ All File
→ Save to Media(B)
→ Execute
Then:
choose a “No File” slot for new save,
or choose an existing File ID only if intentionally overwriting.
Before saving, confirm:
| Check | Why |
|---|---|
| Cine EI mode correct | saves correct operating mode |
| S-Gamut3.Cine/S-Log3 correct | saves color/gamma setup |
| Recording format correct | preserves format defaults |
| Audio routing correct | saves menu routing |
| LUT routing correct | saves monitoring path |
| User menu/buttons correct | preserves field controls |
| Internal Rec MLUT Off | protects clean recording |
| SDI/HDMI MLUT On if desired | monitor workflow |
| Date/version note made | avoids mystery files later |
Load procedure
Use this when restoring the setup.
Insert settings card in slot B.
Go to Project → All File.
Choose Load from Media(B).
Select the intended ALL File.
Execute load.
Restart or confirm as required by camera behavior.
Perform manual checks after loading.
After loading, manually verify:
INPUT1 switch = MIC if using RØDE,
INPUT2 switch = MIC if using split RØDE,
no phantom power to RØDE,
CH1/CH2 routing,
RØDE receiver mode,
RØDE gain,
Cable Techniques cable routing,
monitor output behavior,
Internal Rec MLUT Off,
SDI/HDMI MLUT On if using external monitor LUT preview,
white balance state,
ND physical state,
audio meters,
test recording.
Loading ALL File does not eliminate the need for pre-roll verification.
22.7 User File backup
A User File can preserve user-related camera setup items, depending on camera behavior and file type. It should be saved as an additional backup, not as a replacement for ALL File.
Use User File to preserve:
user menu configuration,
assignable button setup,
operator preferences,
custom field layout.
Project rule:
Save ALL File first for broad setup. Save User File as companion protection.
Recommended settings-card folder note:
FX6_SETTINGS_CARD/
ALL_FILE/
USER_FILE/
SCENE_FILE/
LUT/
README_SETTINGS_NOTES.txt
The exact folder structure on the card is camera-managed, but the backup on the computer can be organized this way.
22.8 Scene File backup
Scene File is useful for look-related settings. In the FX6 context, Scene File / Paint/Look-related information may help preserve the selected look configuration.
Use Scene File as an additional look backup when:
Base Look has been selected,
LUT/Look configuration has been tested,
Paint/Look settings are part of the workflow,
the camera’s look behavior should be preserved.
Scene File should not replace ALL File because ALL File covers broader camera configuration.
The correct hierarchy is:
| File Type | Use |
|---|---|
| ALL File | Broad camera setup |
| User File | User/operator setup |
| Scene File | Look/Paint-related setup |
| LUT files | Actual LUT source files |
| Written notes | Human-readable context |
22.9 LUT file backup
The actual LUT files should be backed up separately from the camera settings files.
Why:
the camera may import LUTs internally,
the card may later be formatted,
post-production may need the LUT reference,
future reload may require the original .cube,
the ALL File may not be enough to reconstruct the entire LUT library.
Recommended backup location:
PROJECT_ADMIN/
FX6_SETTINGS/
LUTS/
s709/
709_800/
SONY_OFFICIAL/
NELSON_MUTED_TEST/
For each LUT, keep a note:
| LUT | Input | Purpose | Use |
|---|---|---|---|
| s709 | S-Gamut3.Cine/S-Log3 | monitor | primary safe preview |
| 709(800%) | S-Gamut3.Cine/S-Log3 | monitor/reference | alternate |
| Nelson Muted Preview | S-Gamut3.Cine/S-Log3 | future project look | test only until approved |
22.10 Physical switch limitations
The FX6 has physical controls that must be manually checked. A settings file cannot be trusted to confirm physical switch positions.
Physical items to check:
| Physical Item | Check |
|---|---|
| INPUT1 switch | MIC for RØDE |
| INPUT2 switch | MIC for RØDE split |
| MIC+48V | Off for RØDE |
| ND physical state | Clear/On/Variable as intended |
| WB switch | A/B/Preset as intended |
| Channel dials | CH1/CH2 levels correct |
| Cable routing | blue INPUT1, red INPUT2 |
| Headphones | connected and audible |
| Boom adapter switches | match boom mic type |
| Lens switches | AF/MF, stabilization, iris behavior |
Project rule:
After loading settings, physically inspect the camera.
22.11 RØDE settings not saved by FX6
The FX6 cannot save RØDE receiver/transmitter settings.
RØDE items to check separately:
| RØDE Item | Required Check |
|---|---|
| Receiver output gain | 0 dB for saved baseline |
| Receiver mode | Split for two transmitters |
| Transmitter assignment | TX1/CH1, TX2/CH2 |
| Onboard recording | enabled if used |
| Battery | charged |
| Storage | available for onboard recording |
| Receiver connection | 3.5 mm cable seated |
| Transmitter placement | 6–8 inches below chin / no rub |
The RØDE system is external to the FX6 settings file. It requires its own checklist.
22.12 External monitor settings not saved by FX6
The FX6 can control whether its output carries MLUT, but it does not save the external monitor’s own settings.
For the Elvid RigVision monitor:
| Item | Check |
|---|---|
| Power | on |
| Input | correct HDMI/SDI path |
| Brightness | usable but not trusted for exposure |
| LUT import | not relied upon |
| FX6 output | SDI/HDMI MLUT On if preview desired |
| Double LUT | avoid if using another LUT-capable monitor |
The monitor should be treated as a display, not the final authority.
22.13 Boom adapter switch settings not saved by FX6
If using Sony XLR-K3M/K2M or similar shoe-mounted adapter, some physical adapter settings may need manual confirmation.
Check:
| Adapter Item | Required State |
|---|---|
| Adapter mounted | secure in Multi Interface Shoe |
| Boom cable | plugged into adapter INPUT1 |
| Input type | MIC / MIC+48V / LINE based on source |
| Phantom power | only if boom requires it |
| CH3 routing | Shoe CH1 |
| CH4 | Off or Shoe CH2 if needed |
| Levels | tested with boom speech |
| Headphones | boom monitored |
Do not assume loading ALL File confirms the adapter’s physical switches.
22.14 Dedicated FX6 Settings Card
The project recommends a dedicated settings card.
Label:
FX6 SETTINGS — DO NOT FORMAT
The settings card should be separate from production recording cards whenever practical.
Purpose:
store ALL Files,
store User Files,
store Scene Files,
store LUT import files,
preserve tested configurations,
prevent accidental formatting during production.
Do not use the settings card as a routine production recording card.
A settings card is not valuable if it gets formatted on set.
22.15 Why not to rely on production recording cards
Production cards are used, copied, verified, formatted, and reused. They are not safe as the sole storage location for critical FX6 settings and LUTs.
Risks of using production cards for settings:
| Risk | Result |
|---|---|
| Card formatted after offload | settings lost |
| Card filled with footage | settings buried/confusing |
| Card handed to editor | setup files separated |
| Card reused | LUTs/settings overwritten |
| Emergency format | settings destroyed |
Use production cards for footage. Use a dedicated settings card for settings.
22.16 Recommended card label: FX6 SETTINGS — DO NOT FORMAT
The card should be physically labeled.
Recommended label:
FX6 SETTINGS — DO NOT FORMAT
If small label space is limited:
FX6 SETTINGS
DO NOT FORMAT
Also consider a card case label:
Sony FX6 Settings / LUT / ALL File Card
Do Not Use For Footage
Do Not Format
The label matters because on a shoot, cards can be confused quickly.
22.17 Computer/NAS/USB duplicate backup
Do not rely only on the physical settings card.
Back up settings to:
PC folder,
NAS if available,
USB drive,
project archive,
external backup drive.
Suggested computer folder:
FX6_SETTINGS_BACKUP/
2026-05-15_CINE_EI_MUTED/
ALL_FILE/
USER_FILE/
SCENE_FILE/
LUTS/
NOTES/
Include a simple notes file:
README_FX6_SETTINGS.txt
The notes should describe:
date saved,
camera mode,
audio workflow,
LUT monitoring behavior,
Internal Rec MLUT state,
RØDE baseline,
any known physical switch requirements.
22.18 Settings-card checklist
Before considering the settings-card system complete, confirm:
| Item | Complete? |
|---|---|
| Dedicated settings card labeled | Yes |
| ALL File saved to Media(B) | Yes |
| User File saved if desired | Yes |
| Scene File saved if desired | Yes |
| LUT files copied to correct folder | Yes |
| LUTs imported/tested | Yes |
| Computer backup made | Yes |
| USB/NAS backup made | Yes |
| README/notes created | Yes |
| Production cards kept separate | Yes |
| Physical-switch checklist printed or saved | Yes |
Final settings-file rule:
Save camera setup with ALL File, preserve operator setup with User File, preserve look support with Scene File/LUTs, and still verify every physical/external item by checklist.
PART V — MUTED-COLOR SHOOTING METHOD, LIGHTING, LENSES, MOVEMENT, AND DESIGN
Chapter 23. Pro Tips for Netflix-Type Muted Color
23.1 Do not underexpose for mood
The most important muted-color rule is:
Do not underexpose S-Log3 to create mood.
Underexposure may look “dark” on the monitor, but it often produces:
muddy shadows,
noisy blacks,
weak skin,
color that breaks during grading,
actor eyes disappearing,
a cheap-looking image rather than cinematic mood.
Mood should come from:
lighting ratio,
negative fill,
controlled background,
practical-light motivation,
color palette,
lens choice,
composition,
and final grade.
A cleanly exposed image can still feel dark if the scene is shaped correctly.
Correct method:
Expose face cleanly
↓
Let shadow side fall with control
↓
Use negative fill
↓
Control background brightness
↓
Grade restrained
Wrong method:
Lower exposure until screen looks dark
↓
Record noisy/muddy S-Log3
↓
Try to rescue in post
23.2 Use Cine EI like a negative workflow
Cine EI should be treated like a digital negative workflow. The goal is to record strong image information that can later be shaped in post.
This means:
record clean S-Gamut3.Cine/S-Log3,
monitor with a LUT,
do not bake the LUT unless deliberately intended,
expose with waveform/zebras,
preserve skin,
protect important highlights,
give the grade room to work.
Think of the camera file as the negative and the LUT as a viewing print. The viewing print helps on set, but the negative must remain strong.
23.3 Record clean log, monitor with LUT
The recommended workflow is:
| Function | Setting |
|---|---|
| Internal recording | S-Gamut3.Cine/S-Log3 |
| Internal Rec MLUT | Off |
| VF/Proxy/Stream MLUT | On if useful |
| SDI/HDMI MLUT | On for external monitor |
| External monitor LUT | Off if FX6 sends MLUT |
This gives the operator a normal-looking preview while preserving clean log.
The field statement is:
“Recording log. Monitoring LUT.”
If the operator is unsure whether the LUT is being baked into the file, stop and verify before recording important work.
23.4 Use s709 as safe monitor look
s709 is a safe primary monitoring choice for this project because it is restrained and useful for judging S-Log3 footage without an overly aggressive look.
Use s709 for:
actor reels,
interviews,
feature-style dialogue,
skin judgment,
muted-color preview.
Do not assume the s709 monitor image is the finished grade. It is a controlled viewing aid.
23.5 Lock white balance
White balance must be locked for controlled work.
Use:
A for main setup,
B for alternate setup,
Preset for fixed fallback.
Avoid ATW for actor reels and feature scenes because it may drift during a take. Drifting white balance makes shots harder to match and can damage skin consistency.
Before rolling:
“ATW off. WB locked.”
23.6 Let ND protect aperture
Aperture is chosen for depth, focus, and emotional feel. ND controls brightness.
Do not stop down from f/4 to f/11 merely because the exterior is bright if f/4 is the desired look. Use Variable ND.
Exterior rule:
Choose aperture first. Dial ND second.
Interior rule:
Start ND Clear. Add ND only if the scene is too bright.
23.7 Keep shutter boring and correct
For normal cinematic motion, keep shutter at 180° or equivalent.
| Frame Rate | Shutter |
|---|---|
| 24p | 1/48 or 180° |
| 30p | 1/60 or 180° |
| 60p | 1/120 or 180° |
Do not use shutter as a casual exposure control.
Change shutter only for:
flicker,
stylized motion,
action sharpness,
deliberate creative effect.
23.8 Pick aperture for emotion and focus reliability
Aperture affects emotional feel and focus safety.
Use:
| Shot | Aperture |
|---|---|
| Solo close-up | f/2.8–f/4 |
| Interview | around f/4 |
| Two-person dialogue | f/4–f/5.6 |
| Walk-and-talk | f/4–f/5.6 |
| Action/wide | f/5.6–f/8 if needed |
Very shallow focus can look cinematic but can ruin a performance if eyes go soft. Actor reels require sharp eyes more than extreme blur.
23.9 Use waveform and zebras
Use waveform and zebras because the monitor image can mislead.
The LUT may make the image look acceptable while the log exposure is weak. The waveform reveals actual levels.
Use waveform for:
face,
gray card,
white reference,
windows,
practicals,
skies,
shadow level.
Use zebras for fast warning.
23.10 Protect skin tones
Skin is the priority in actor reels, interviews, and dialogue.
Muted color does not mean dead skin.
Protect skin by:
exposing cleanly,
using soft key light,
controlling mixed color temperatures,
avoiding extreme WB shifts,
using restrained LUTs,
grading carefully,
not crushing shadows into the face.
The subject’s face should remain alive even if the scene is restrained.
23.11 Control wardrobe and set color
The muted look begins in front of the lens.
Wardrobe and set design should use restrained colors:
charcoal,
navy,
gray,
olive,
brown,
cream,
muted burgundy,
faded denim,
earth tones,
aged wood,
dark metal.
Avoid unless intentional:
neon colors,
bright red,
saturated royal blue,
busy patterns,
shiny plastic,
loud logos,
pure white shirts in high contrast,
strong green walls near skin.
A loud red shirt cannot be fully fixed by a LUT. Control color before shooting.
23.12 Use negative fill
Negative fill means using darkness or black material to remove unwanted fill light from one side of the subject.
It helps create:
facial shape,
contrast,
mood,
depth,
cinematic restraint.
Examples:
black cloth,
black foamcore,
flag,
unlit wall,
dark curtain,
subject positioned away from white walls.
Negative fill is often more effective than adding another light.
23.13 Do not overlight the room
The muted cinematic look is not flat brightness. Avoid lighting everything equally.
Bad approach:
Bright room
Flat face
Bright background
No contrast
Better approach:
Soft key on face
Controlled shadow side
Background darker or shaped
Practical motivated
The scene should have controlled contrast. The face should be readable, but the room does not need to be evenly lit.
23.14 Use practical lights carefully
Practical lights can make a scene feel cinematic, but they can also cause problems.
Risks:
blown lamps,
ugly color temperature,
mixed lighting,
distracting background brightness,
skin contamination,
flicker,
cheap-looking over-bright bulbs.
Use practicals as motivation, not necessarily as the only light.
Practical-light method:
Place practical where it motivates light.
Dim or change bulb if too bright.
Add hidden soft light for face.
Control spill.
Check waveform for lamp clipping.
Check skin color.
23.15 Control windows
Windows can dominate exposure.
Window problems:
blown highlights,
backlit faces,
inconsistent cloud/sun changes,
mixed color temperature,
reflections,
distracting bright rectangles.
Options:
| Problem | Correction |
|---|---|
| Window too bright | curtain, flag, reframe, reduce exposure if face allows |
| Subject backlit | add fill/key or rotate setup |
| Changing sunlight | move to shade or control with diffusion |
| Window color too cool | white balance for face, not window |
| Background too bright | darken room side or reframe |
For interviews, avoid placing a bright window directly behind the subject unless intentionally controlled.
23.16 Focus on the near eye
For close-ups, focus on the near eye.
This applies to:
actor reels,
dramatic close-ups,
interviews,
long-lens portraits,
shallow depth-of-field shots.
If the near eye is soft, the shot often feels wrong, even if another part of the face is sharp.
Use Focus Magnifier.
23.17 Use deeper focus for two-person scenes
Two-person scenes need enough depth of field for both people if both are meant to be readable.
Use:
f/4–f/5.6
when both subjects need to be acceptably sharp.
If using f/2.8 or wider, decide intentionally who is the focus priority. Do not accidentally make one actor soft.
23.18 Shoot coverage
Do not rely on zooming mid-take to create close-ups later.
Shoot coverage:
wide/master,
medium,
over-the-shoulder,
close-up,
reaction,
insert/detail,
movement or push-in if needed.
Actor reels especially benefit from clean close-ups and reaction shots because performance is the product.
23.19 Do not casually zoom while recording
Zooming while recording is not forbidden, but casual zooming usually looks amateur.
Do not zoom because:
the framing was not planned,
the actor’s emotion was missed,
the camera is too far away,
or the operator suddenly wants a close-up.
Zoom while recording only when:
the zoom is slow,
motivated,
smooth,
rehearsed,
emotionally justified,
and technically checked for focus/exposure.
23.20 Push-ins beat zoom-ins
A physical push-in usually feels more cinematic than a zoom-in because the camera changes spatial relationship to the subject.
Use push-ins for:
realization,
confession,
emotional pressure,
discovery,
fear,
internal shift.
Use a zoom-in for psychological or observational effect only when that is the intended grammar.
23.21 Actor reel priority: performance clarity
For actor reels, the image should make the actor look professional without hiding performance.
Actor reel priorities:
sharp eyes,
readable face,
clean dialogue,
controlled background,
flattering but honest light,
no distracting color,
no over-stylized darkness,
performance-first framing.
A reel fails if the viewer cannot clearly see and hear the actor.
23.22 Feature priority: visual grammar
Feature scenes require consistent visual grammar.
This means:
light direction matches,
color palette holds,
coverage cuts together,
exposure remains consistent,
lens choices feel intentional,
movement has meaning,
close-ups match scene mood,
sound perspective is controlled.
Feature-style work is less about one beautiful shot and more about shots that cut together.
23.23 Documentary priority: reality first
Documentary work should look credible. It can be cinematic, but not fake.
Documentary priorities:
clean audio,
true subject presence,
readable face,
controlled but believable lighting,
fast setup,
accurate file management,
room tone,
backup audio,
reliable focus.
A documentary interview can be restrained and attractive without looking staged beyond credibility.
23.24 Audio is half the image
Bad audio makes good images feel amateur.
For this project, audio discipline includes:
RØDE receiver gain at correct setting,
FX6 inputs set to MIC,
no phantom power to RØDE,
CH1/CH2 routing verified,
headphones used,
room noise checked,
test recording reviewed,
split tracks confirmed,
boom used when appropriate.
The viewer may forgive a slightly imperfect image. They often will not forgive bad dialogue.
23.25 Use the boom as safety and tone tool
A boom mic can improve production sound because it captures a more natural voice perspective than lavs alone.
Boom benefits:
natural dialogue tone,
backup if lav rubs,
backup if transmitter fails,
better scene perspective,
useful blend with lavs,
more professional post choices.
The professional setup is:
| Channel | Source |
|---|---|
| CH1 | RØDE TX1 |
| CH2 | RØDE TX2 |
| CH3 | Boom through XLR-K3M/K2M |
If the adapter is unavailable, the lower-cost compromise is merged lavs plus boom.
23.26 Record room tone
Room tone should be recorded for each setup.
Record 20–30 seconds with:
same room,
same mic positions,
same background condition,
same HVAC state,
everyone quiet.
Room tone helps smooth edits and repair dialogue transitions.
23.27 Build a pre-roll ritual
A pre-roll ritual prevents mistakes.
Before rolling:
check frame rate,
check shutter,
check aperture,
check ND,
check white balance,
check LUT monitoring,
check Internal Rec MLUT Off,
check focus,
check audio routing,
check RØDE mode,
check headphones,
slate,
record test if needed.
A repeatable ritual matters more than memory.
23.28 Protect continuity
Continuity includes more than wardrobe and props. Technical continuity also matters.
Track:
white balance,
Base ISO,
EI,
ND,
aperture,
lens/focal length,
LUT,
audio routing,
mic placement,
lighting layout,
subject position.
If a setting changes, log it.
23.29 Keep a dedicated FX6 Settings Card
Use a dedicated settings card labeled:
FX6 SETTINGS — DO NOT FORMAT
It should store:
ALL Files,
User Files,
Scene Files,
LUT files,
notes.
Do not rely on production recording cards for settings preservation.
23.30 Keep only a few LUTs on the camera
Too many LUTs create field confusion.
Keep:
s709,
709(800%),
Sony official technical LUTs,
one tested project preview LUT if approved.
Remove random LUTs that are not part of the workflow.
23.31 Shoot a 10-second technical test
Before important work, shoot a short test that includes:
normal speech,
loud speech if relevant,
subject face,
movement,
silence for room noise,
bright background,
focus target.
Review for:
exposure,
focus,
audio,
room noise,
LUT/monitor behavior,
file recording.
A short test can save a full scene.
23.32 Do not over-grade
Muted does not mean crushed, gray, or lifeless.
Avoid:
crushing blacks too far,
removing all color,
making skin gray,
forcing teal/orange,
making every shot look the same regardless of scene,
overusing contrast,
destroying eye detail.
The grade should finish what was captured, not rescue what was neglected.
23.33 Actor reel grading versus feature grading
Actor reel grading should usually be cleaner and less stylized than feature grading.
Actor reel:
face readable,
skin natural,
performance visible,
subtle mood.
Feature:
can carry stronger style,
may use deeper contrast,
can support narrative world,
still must preserve skin and continuity.
Do not grade an actor reel so dark that casting cannot see the actor’s face.
23.34 Background must support the face
The background should support the subject, not compete.
Control:
brightness,
color,
clutter,
logos,
white objects,
saturated objects,
distracting lines,
moving elements,
practical lights.
A muted background helps the face carry the scene.
23.35 Use longer lenses to simplify chaos
Longer lenses can simplify backgrounds by narrowing the field of view and compressing space.
Use longer lenses for:
exterior actor close-ups,
interviews with busy backgrounds,
emotional isolation,
separating subject from environment.
But longer lenses increase focus sensitivity. Recheck focus.
23.36 Outside, choose shade before fighting sun
Open shade often produces better faces than direct sun.
Exterior priority:
find good light,
place subject well,
use ND,
control background,
protect audio from wind.
Do not fight terrible overhead sun if a better shaded angle exists.
23.37 Inside, control mixed color temperatures
Mixed lighting can ruin skin.
Common problems:
daylight window plus warm lamp,
overhead LED plus tungsten practical,
greenish room light,
computer screen spill,
TV color spill.
Fix by:
turning off bad sources,
choosing one dominant key,
gelling or matching lights,
controlling practicals,
white balancing for the face.
23.38 Shoot gray card and color reference
When practical, shoot a gray card or color reference at the start of a setup.
Use:
same light as subject,
same exposure setup,
same white balance,
same LUT monitoring path.
This helps post-production match shots and confirm color.
23.39 File discipline
Every good shoot can be damaged by bad media discipline.
File discipline includes:
reel naming,
card labeling,
full-card copy,
second backup,
unique clip IDs,
logs,
slates,
no random renaming,
no flat dumping of clips,
no arbitrary splitting of originals.
The file-management rule is:
A clip is not truly safe until it is copied, verified, backed up, and identifiable.
23.40 Final master rule
The final master rule for this entire muted Cine EI system is:
Build the image and sound in layers.
The layers are:
camera mode,
recording format,
shutter,
aperture,
ND,
white balance,
exposure tools,
LUT monitoring,
focus,
lighting,
production design,
audio routing,
headphones,
slate,
log,
full-card backup,
post workflow,
final grade.
No single setting creates the final result. The system creates the result.
Chapter 24. Lighting Layouts for Actor Reels
24.1 Universal muted-color lighting rules
Actor reel lighting has one primary job:
Make the actor look professional and emotionally readable.
The muted cinematic look should support the actor, not hide the actor.
Universal actor reel lighting rules:
| Rule | Meaning |
|---|---|
| Face must be readable | Do not bury performance in darkness |
| Eyes must be sharp and alive | Catchlight/eye detail matters |
| Background must be controlled | No loud distractions |
| Skin must remain natural | Muted does not mean gray |
| Light must be shaped | Avoid flat overhead lighting |
| Audio must be clean | Performance includes voice |
| Style must serve casting | Do not over-stylize |
The operator should avoid trying to make an actor reel look like a dark prestige-drama frame at the expense of clarity. Casting and viewers need to see the actor.
The best actor reel look is:
cinematic,
restrained,
clean,
performance-centered,
technically reliable.
24.2 One-person dramatic close-up interior
24.2.1 Goal
The goal is to create a dramatic but readable close-up for one actor.
The shot should show:
eyes,
emotional expression,
skin texture,
controlled shadow,
clean background,
no distracting color,
clean dialogue.
The scene can be moody, but the actor must not disappear.
24.2.2 Layout
Basic one-person muted close-up layout:
Darker / controlled background
optional subtle back edge
↓
Negative fill ACTOR
black side ↑
|
Camera
Soft key 30°–45°
Alternate room diagram:
Wall / background kept darker
-----------------------------------
[black cloth / negative fill]
|
|
Actor seated/standing
|
Camera
Soft key high/front-side
30°–45° from camera axis
The key should be soft but directional. Negative fill should create shape. The background should not be brighter than the face unless deliberately motivated.
24.2.3 Setup
Step-by-step setup:
Place actor away from the wall.
Choose a clean background.
Remove bright objects, logos, white clutter, and saturated colors.
Place soft key 30–45 degrees to one side of camera.
Raise key slightly above eye level.
Aim key toward the face, not the entire room.
Add negative fill on the opposite side if the room is too bright.
Add subtle background separation only if needed.
Set white balance manually.
Set exposure with waveform.
Focus on near eye.
Check audio with headphones.
Record a 10-second test.
Lighting notes:
| Issue | Correction |
|---|---|
| Face too flat | Add negative fill or move key off-axis |
| Shadow side too dark | Add gentle fill or move negative fill away |
| Background too bright | Turn off lights, flag, reframe |
| Eyes dead | adjust key height/angle for catchlight |
| Skin too gray | check WB/LUT/exposure |
| Too theatrical | soften key or reduce contrast |
24.2.4 FX6 starting point
Recommended starting point:
| Control | Starting Setting |
|---|---|
| Mode | Cine EI |
| Color/gamma | S-Gamut3.Cine/S-Log3 |
| Base ISO | 800 if lit |
| Frame rate | 23.98p / 24p |
| Shutter | 1/48 or 180° |
| Aperture | f/2.8–f/4 |
| ND | Clear |
| WB | Custom A |
| LUT monitoring | s709 / selected monitoring LUT |
| Internal Rec MLUT | Off |
| Focus | near eye |
| Audio | RØDE baseline or split if needed |
If the room is genuinely low light and cannot be lit, Base ISO 12800 may be considered, but the actor’s face must still be exposed cleanly.
24.2.5 Pro tip
For an actor reel, do not make the actor fight the look. The audience should see the performance immediately.
Pro tip:
Let the shadow create mood, but let the eyes carry the scene.
If the face looks “cinematic” but the performance is unreadable, the lighting has failed.
24.3 Two-person dialogue scene interior
24.3.1 Goal
The goal is to light two actors so the scene cuts cleanly between angles and both performances remain readable.
A two-person actor reel scene usually needs:
a usable two-shot,
over-the-shoulder angles,
close-ups,
reaction shots,
clean dialogue,
consistent light direction,
manageable focus.
The muted look should remain consistent across coverage.
24.3.2 Layout
Basic two-person dialogue layout:
Background controlled
Actor A Actor B
\ /
\ /
\ /
Camera for two-shot
Soft motivated key from one side
Negative fill on opposite side
Coverage layout:
Key source direction
↓
Actor A ↔︎ Actor B
Camera 1: two-shot
Camera 2: OTS to Actor A
Camera 3: OTS to Actor B
Camera 4: close-up/reaction
The light should appear motivated and consistent. Do not completely relight every angle in a way that breaks continuity.
24.3.3 Setup
Step-by-step setup:
Block actor positions first.
Keep both actors near the same focus plane if both must be sharp.
Choose a motivated light direction.
Place soft key to create shape on both faces.
Use negative fill to prevent flatness.
Control background brightness.
Avoid bright clutter between the actors.
Set aperture around f/4–f/5.6 for two-person safety.
Set RØDE split audio if both actors wear transmitters.
Test TX1/CH1 and TX2/CH2 separately.
Shoot two-shot.
Shoot each actor’s close-up with matching light direction.
Record room tone.
Focus note:
For two-person scenes, f/2.8 may be too shallow unless the blocking is controlled. f/4–f/5.6 is often safer.
24.3.4 Coverage pattern
Recommended coverage:
| Shot | Purpose |
|---|---|
| Master/two-shot | geography and relationship |
| Medium Actor A | performance |
| Medium Actor B | performance |
| OTS Actor A | dialogue connection |
| OTS Actor B | dialogue connection |
| Close-up Actor A | emotional beat |
| Close-up Actor B | emotional beat |
| Reaction | listening/thought |
| Insert/detail | object, hand, phone, evidence, etc. |
Actor reels often need strong close-ups and reactions. Do not shoot only wide or medium shots.
24.3.5 Pro tip
Pro tip:
Match the light direction more than the exact light position.
When moving for reverse coverage, the lighting may need adjustment, but the scene should still feel like the same motivated environment.
If Actor A is lit softly from camera left in one angle, Actor B’s reverse should not suddenly look like a different room unless intended.
24.4 Moody practical-light interior
24.4.1 Goal
The goal is to create an interior scene that appears motivated by lamps, windows, TV, or other practical sources while still keeping the actor readable and clean.
This is common for muted cinematic scenes:
living room drama,
late-night confession,
desk scene,
bedroom scene,
emotional phone call,
documentary-like interior portrait.
The danger is relying entirely on practicals and ending up with dark, noisy, ugly footage.
24.4.2 Layout
Basic practical-light motivated layout:
Practical lamp visible in background
↓
Background controlled / dimmed
Actor
↑
|
Camera
Hidden soft key motivated from lamp/window side
Negative fill opposite side
The practical should motivate the light. It does not have to provide all the light.
24.4.3 Setup
Procedure:
Choose practical source: lamp, window, TV, hallway, desk light.
Place practical where it motivates the scene.
Dim practical or use lower-output bulb if it clips.
Add hidden soft key from the same general direction.
Use negative fill on the opposite side.
Keep face exposure clean.
Control background brightness.
Set manual white balance for the face.
Check practical on waveform.
Avoid mixed ugly color unless intentional.
Common practical problems:
| Problem | Fix |
|---|---|
| Lamp clips badly | dim, change bulb, angle shade |
| Face too dark | add hidden soft key |
| Skin too orange | correct WB or change bulb |
| Mixed green overhead | turn off overhead |
| Background too busy | remove clutter/reframe |
| Room too flat | add negative fill |
24.4.4 Pro tip
Pro tip:
A practical can be the reason for the light without being the only light.
The audience accepts the practical as motivation. The hidden soft key makes the actor look professional.
24.5 Exterior emotional close-up
24.5.1 Best exterior layout
The best exterior emotional close-up usually uses open shade, backlight, or soft directional natural light.
Avoid direct overhead sun on the actor’s face.
Preferred exterior conditions:
| Condition | Why It Helps |
|---|---|
| Open shade | soft face, controlled contrast |
| Backlight | separates subject, protects face from harsh sun |
| Overcast | soft but may need contrast/negative fill |
| Golden hour | flattering, controlled if not too low/bright |
| Tree shade | useful if not dappled |
| Building shade | stable and controllable |
Basic exterior layout:
Sun behind or to side of subject
↓
Actor in open shade/backlight
Camera with longer lens
Negative fill or dark side if needed
24.5.2 Setup
Procedure:
Find open shade or backlight.
Avoid dappled light on face.
Choose clean background.
Use longer focal length if possible.
Set Base ISO 800.
Set shutter 180°.
Choose aperture f/2.8–f/4 if focus allows.
Turn Variable ND On.
Set white balance/custom daylight.
Focus on near eye.
Use wind protection for audio.
Record test.
Exterior issues:
| Problem | Correction |
|---|---|
| Harsh sun on face | move to shade/backlight |
| Background too bright | change angle/longer lens |
| Wind noise | add wind protection |
| Eye sockets dark | adjust angle or add bounce |
| Dappled light | move subject |
| Focus hard in sun | use magnifier/monitor shade |
24.5.3 Pro tip
Pro tip:
Outside, move the actor before fighting the sun.
A better position can solve more problems than adding gear.
24.6 Actor reel lighting priorities
24.6.1 Face readability
The actor’s face must be readable. The reel exists to show performance.
If the face is too dark, too contrasty, or too stylized, the reel becomes less useful.
Face readability includes:
eyes visible,
mouth visible,
emotion visible,
skin not gray,
expression clear.
24.6.2 Eye detail
Eyes carry performance. Use focus and light to preserve them.
Check:
near eye sharp,
catchlight present if appropriate,
no heavy shadow hiding both eyes,
glasses glare controlled,
no focus hunting.
24.6.3 Controlled background
A strong actor reel background is supportive, not distracting.
Control:
bright objects,
saturated colors,
clutter,
logos,
windows,
white walls,
busy shelves,
TV screens,
reflective surfaces.
24.6.4 Performance over style
The final actor reel rule is:
Performance over style.
A beautiful frame that hides the actor is not a successful reel shot. The muted look should help the actor look professional, not compete with the actor.
Chapter 25. Lighting Layouts for Feature Scenes
25.1 Interior naturalistic dialogue scene
25.1.1 Goal
The goal of a feature-style interior dialogue scene is to create believable motivated light that supports coverage and continuity.
Unlike a single actor reel close-up, a feature scene must cut between multiple angles. The lighting must therefore be repeatable and consistent.
The scene should have:
motivated key direction,
readable faces,
controlled contrast,
matched coverage,
stable white balance,
clean dialogue,
background depth,
restrained color palette.
The goal is not one isolated pretty frame. The goal is a scene that cuts.
25.1.2 Layout
Basic naturalistic interior layout:
Window / lamp / motivated source side
↓
Actor A Actor B
\ /
\ /
Camera positions
Negative fill on shadow side
Background controlled/dimmed
Another version:
Soft key motivated by window/lamp
Actor A Actor B
Camera 1: two-shot
Camera 2: OTS A
Camera 3: OTS B
Camera 4: close-ups
Negative fill opposite key
Background practical dimmed
The key should feel as if it comes from a real source: window, lamp, doorway, hallway, practical, or motivated offscreen source.
25.1.3 Setup
Procedure:
Decide the motivated light source.
Block actors before final lighting.
Set camera side and coverage plan.
Place soft key from motivated direction.
Add negative fill to create shape.
Control background lights and practicals.
Remove bright clutter.
Set manual white balance.
Set exposure with waveform.
Choose aperture for coverage: often f/4–f/5.6 for two-person scenes.
Record room tone.
Maintain lighting direction across reverses.
Coverage setup:
| Shot | Lighting Concern |
|---|---|
| Two-shot | both readable |
| OTS Actor A | Actor A face matches direction |
| OTS Actor B | Actor B face matches direction |
| CU Actor A | preserve same motivation |
| CU Actor B | preserve same motivation |
| Reaction | do not relight into different scene |
25.1.4 Pro tip
Pro tip:
Continuity is more important than making every angle independently dramatic.
If every angle looks like a different lighting setup, the scene will not feel professional.
25.2 Dark dramatic close-up
25.2.1 Goal
A dark dramatic close-up should feel controlled, not underexposed.
The goal is:
clean face exposure,
shaped shadow,
eye detail,
controlled highlight,
dark background,
emotional intensity,
no muddy S-Log3.
The actor can be in a dark environment, but the recorded image should still contain usable information.
25.2.2 Layout
Basic dark close-up layout:
Dark background
Negative fill Actor face
black side ↑
Camera
Narrow soft key
from motivated side
The key can be narrow, soft, and controlled. The shadow side can fall off, but not into unusable mud if the face must be read.
25.2.3 Setup
Procedure:
Darken or control the background first.
Place actor away from wall.
Add soft key from one side.
Add negative fill to deepen shadow side.
Use small edge/back light only if separation is needed.
Set WB manually.
Expose face cleanly with waveform.
Protect highlights.
Check eyes.
Record test.
Dark-scene mistakes:
| Mistake | Result |
|---|---|
| Underexpose face | noisy/muddy skin |
| No eye light | dead performance |
| Too much fill | flat/no mood |
| Practical too bright | attention pulled away |
| Background too black | subject may disappear |
| Over-grade | crushed unusable image |
25.2.4 Pro tip
Pro tip:
Make the room dark, not the file weak.
A cleanly exposed face against a controlled dark environment grades better than an underexposed face in a bright uncontrolled room.
25.3 Window-motivated daylight interior
25.3.1 Layout
Window-motivated daylight interiors can look high-end if controlled.
Basic layout:
Window / daylight source
↓
Actor near window side
Negative fill opposite side
Camera
Background angled away from bright window
Avoid placing the actor directly in front of a bright window unless that is the intended look and exposure is controlled.
25.3.2 Setup
Procedure:
Choose whether window is key, background, or motivation.
Avoid direct harsh sunlight on the face unless diffused.
Place actor at an angle to the window.
Use negative fill on opposite side if face is too flat.
Control bright window if it dominates.
Set white balance for the face.
Use waveform to check face and window.
Use ND if the scene is too bright at chosen aperture.
Shoot coverage before daylight changes too much.
Window-control tools:
curtains,
blinds,
diffusion,
flags,
angle change,
subject movement,
exposure compromise,
background choice.
25.3.3 Pro tip
Pro tip:
Window light is cinematic only when the window is controlled.
An uncontrolled window can become a blown white rectangle that steals attention from the actors.
25.4 Night interior with practicals
25.4.1 Layout
Night interiors often use practical lamps as visible motivation.
Basic layout:
Practical lamp in frame
↓
Hidden soft key motivated by lamp
Actor
Camera
Negative fill / dark background
The practical should motivate the light but does not have to be the only source.
25.4.2 Setup
Procedure:
Choose the practical source.
Dim or replace bulb if too bright.
Add hidden soft key from same direction.
Keep face readable.
Control spill on walls.
Avoid mixed ugly overheads.
Set WB intentionally.
Check practical clipping.
Use Base ISO 800 if lit enough; 12800 only if genuinely needed.
Record test.
Night interior audio note:
Rooms at night may seem quiet but can reveal refrigerators, HVAC, distant TV, and traffic. Use headphones and record room tone.
25.4.3 Pro tip
Pro tip:
A lamp in the frame can motivate the scene, but a hidden soft key often makes the actor look professional.
Do not rely on a bare lamp to do all the work unless the harshness is intentional.
25.5 Exterior day dialogue
25.5.1 Sun strategy
Exterior day dialogue should usually avoid direct harsh sun on faces.
Preferred sun strategies:
| Sun Position | Use |
|---|---|
| Backlight | often best for faces |
| Side-backlight | creates shape |
| Open shade | safest/softest |
| Overcast | soft but may need contrast |
| Direct front sun | usually harsh |
| Overhead sun | often worst |
The first lighting decision outdoors is often where to place the actors, not what camera setting to change.
25.5.2 Layout
Exterior dialogue layout:
Sun behind / side-back
↓
Actor A Actor B
\ /
Camera
Background chosen for tone
Variable ND controls exposure
Wind protection on audio
Use background distance and longer focal length if possible to simplify the image.
25.5.3 Procedure
Find open shade or backlight.
Choose clean background.
Keep both actors in similar light.
Set Base ISO 800.
Set shutter 180°.
Choose f/4–f/5.6 for two-person focus.
Turn Variable ND On.
Set WB for daylight/shade condition.
Use waveform/zebras.
Test audio for wind.
Shoot master and coverage before light changes too much.
Exterior continuity warning:
Sun movement can change the scene quickly. Work efficiently and log changes.
25.5.4 Pro tip
Pro tip:
The best exterior lighting tool is often a better location angle.
Move the actors, camera, or background before fighting bad sun.
25.6 Repeatable visual grammar
Feature scenes need repeatable visual grammar. This means the project should have consistent rules for how scenes look.
Examples:
| Scene Type | Visual Rule |
|---|---|
| Interior dialogue | motivated soft side light |
| Emotional close-up | controlled shadow, clean eyes |
| Exterior dialogue | open shade/backlight |
| Documentary interview | clean face, credible background |
| Night practical | practical motivates hidden soft key |
Repeatable grammar helps the viewer feel the film is intentional.
Without grammar, shots may feel random:
one shot flat,
one shot overly dark,
one shot over-saturated,
one shot underexposed,
one shot too sharp/deep,
one shot noisy.
25.7 Motivated light direction
Motivated light appears to come from a believable source.
Sources:
window,
lamp,
TV,
doorway,
hallway,
streetlight,
car headlights,
computer screen,
kitchen practical,
exterior sun.
The light does not have to literally come only from that source. It must feel like it could.
Example:
A lamp appears in the background. A hidden soft LED from the same side lights the actor. The audience accepts the lamp as motivation.
Motivated light keeps scenes believable.
25.8 Matching coverage between angles
When shooting coverage, match:
light direction,
contrast,
exposure,
white balance,
aperture/depth,
background level,
audio perspective,
eyeline,
focal length logic.
Coverage matching checklist:
| Item | Check |
|---|---|
| WB | same memory/preset unless changed deliberately |
| Key direction | consistent motivation |
| Aperture | consistent depth unless planned |
| Exposure | face levels match |
| Background | not suddenly brighter/darker |
| Audio | lav/boom channels consistent |
| Lens | not wildly different without reason |
| Focus | eyes sharp |
Matching does not mean every shot is identical. It means the shots belong to the same scene.
25.9 Consistent contrast and palette
Feature scenes depend on consistent contrast and palette.
Control:
wardrobe colors,
wall colors,
props,
practical lamps,
background saturation,
light color temperature,
LUT monitoring,
final grade direction.
A muted feature scene should not have one angle with a bright red object dominating the frame unless that object is intentional.
Contrast consistency also matters. If Actor A’s close-up is soft and low contrast while Actor B’s close-up is harsh and dark, the scene may feel mismatched.
Final feature lighting rule:
Design the scene, not just the shot.
Chapter 26. Lighting Layouts for Documentaries
26.1 Sit-down interview interior
26.1.1 Goal
The goal of a documentary sit-down interview is to make the subject look credible, natural, readable, and professionally recorded without making the setup feel fake or over-staged.
A documentary interview is not the same as a dramatic actor reel close-up. It can still be cinematic, but the viewer must believe the person and the setting. The lighting should support truthfulness, not call attention to itself.
The interview image should have:
clean face,
readable eyes,
natural skin,
controlled background,
believable light direction,
no ugly mixed-color contamination,
no distracting clutter,
clean audio,
enough depth to show environment without letting the background take over.
The primary documentary rule is:
Make the subject look real, trustworthy, and clear.
The muted-color approach for documentary should be restrained. It should not make the subject look artificially dark, gray, overly stylized, or theatrical. A documentary subject should not look like they are trapped in a music video unless that is the project’s deliberate style.
The best documentary interview look is:
| Element | Target |
|---|---|
| Face | clean, dimensional, readable |
| Eyes | sharp, natural, alive |
| Background | relevant but controlled |
| Color | restrained but believable |
| Contrast | shaped but not theatrical |
| Audio | clean, monitored, backed up if possible |
| Framing | stable, intentional, not distracting |
| Lighting | motivated, soft, simple |
26.1.2 Layout
Basic documentary sit-down interview layout:
Controlled background
practical / shelf / room depth
↓
Subject seated
↑
|
Camera
Soft key 30°–45° off camera
slightly above eye level
Negative fill on opposite side
if room is too flat
Alternate layout with interviewer eyeline:
Background with depth, not clutter
Subject
↘ eyeline to interviewer
Camera slightly off interviewer side
Soft key from interviewer/camera side
Negative fill opposite side
The subject usually should not stare directly into the lens unless the documentary style calls for direct address. A common interview setup places the interviewer slightly beside the camera so the subject’s eyeline is just off lens.
Suggested setup:
| Element | Position |
|---|---|
| Subject | 4–8 feet from background if possible |
| Camera | eye-level or slightly below/above depending tone |
| Key light | 30–45 degrees off camera |
| Negative fill | opposite key side if room is flat |
| Background practical | dimmed/controlled if used |
| Boom/lav | placed and tested before recording |
| Interviewer | near camera for natural eyeline |
The subject should not be pressed against a blank wall if avoidable. Separation from the background gives depth and improves the image immediately.
26.1.3 Setup
Step-by-step documentary interview setup:
Choose the quietest practical location available.
Listen for HVAC, refrigerator hum, traffic, TV, appliances, and room echo before setting the camera.
Choose the background before placing the subject.
Remove distracting objects, labels, logos, bright clutter, and anything that pulls attention from the subject.
Seat or stand the subject far enough from the background to create depth.
Decide eyeline: direct-to-camera or interviewer-off-camera.
Place camera at a respectful height, usually near eye level.
Set lens/focal length to avoid distortion while preserving environment.
Place soft key light 30–45 degrees off camera.
Raise key slightly above subject eye level.
Use negative fill if the face looks too flat.
Add or control background practical only if it supports the scene.
Turn off bad overhead lighting if possible.
Set manual white balance.
Set Cine EI / Base ISO / EI deliberately.
Set shutter to 180° equivalent.
Choose aperture, usually around f/4 for a sit-down interview.
Use ND only if needed.
Confirm LUT monitoring.
Confirm Internal Rec MLUT Off.
Set audio routing.
Place lav properly.
Add boom if available.
Listen through MDR-7506 headphones.
Record room tone.
Record a 10-second technical test.
Play back before the actual interview if time permits.
Interview exposure targets:
| Item | Goal |
|---|---|
| Face | clean and readable |
| Shadow side | shaped, not lost |
| Background | darker or controlled enough not to compete |
| Practical lamp | not clipping distractingly |
| Window | controlled or intentionally allowed |
| Skin | natural through monitoring LUT |
| Eyes | sharp and alive |
Interview audio targets:
| Item | Goal |
|---|---|
| Lav | clean, no rub |
| Boom | natural backup if used |
| Room | quiet enough |
| Levels | normal speech around -12 to -18 dB |
| Loud moments | below clipping |
| Headphones | no TV/HVAC/clothing problem |
26.1.4 Pro tip
Pro tip:
In documentary interviews, move the subject and clean the room before adding more camera settings.
A better background, quieter room, and softer face light will do more for the interview than an exotic LUT.
A simple high-quality interview is:
quiet room,
clean background,
soft side key,
manual white balance,
proper exposure,
sharp eyes,
clean lav/boom,
full-card offload.
Do not make the subject look overproduced. The subject should look credible, not staged beyond belief.
26.2 Sit-down interview with window light
26.2.1 Layout
Window light can be excellent for documentary interviews if it is controlled. It can also destroy the image if the subject is placed poorly.
Best window interview layout:
Window / soft daylight
↓
Subject turned partly toward window
Camera across from subject, not shooting
straight into bright window if avoidable
Negative fill or dark side opposite window
Background angled away from direct window brightness
Avoid this:
Bright window directly behind subject
↓
Subject becomes dark
↓
Camera sees blown window
Better:
Window to side/front-side
↓
Subject face lit softly
Camera angled so window is not a blown
rectangle behind subject
Window light should usually be side/front-side, not directly behind the subject, unless the backlight is deliberately controlled and the face is filled.
26.2.2 Setup
Step-by-step window-light documentary setup:
Find the window with the softest usable light.
Avoid direct harsh sun on the subject’s face unless diffused.
Place subject at an angle to the window.
Keep the window out of the background if it is too bright.
If the window must be in background, expose for the subject and decide whether the window can be allowed to blow.
Use curtains, blinds, diffusion, or angle changes to control brightness.
Use negative fill on the opposite side if the face looks too flat.
Turn off overhead lights that contaminate skin color.
Set manual white balance for the light falling on the face.
Use waveform to check face and window.
Use ND if the scene is too bright at the desired aperture.
Record a test.
Watch for changing daylight during a long interview.
Window interview concerns:
| Problem | Correction |
|---|---|
| Window behind subject blows out | Move camera/subject or reframe |
| Subject face too dark | Turn subject toward window or add fill |
| Face too flat | Add negative fill |
| Direct sun creates harsh shadows | Use diffusion or move to indirect light |
| Clouds changing exposure | monitor waveform and adjust if needed |
| Mixed lamp/window color | turn off lamp or control color |
| Background too bright | change angle or reduce window visibility |
Suggested camera baseline:
| Control | Starting Point |
|---|---|
| Base ISO | 800 |
| Shutter | 180° |
| Aperture | f/4 |
| ND | Clear indoors unless window makes scene too bright |
| WB | Custom at subject face |
| LUT | monitor on, internal record off |
| Focus | near eye |
| Audio | lav and boom if available |
26.2.3 Pro tip
Pro tip:
Do not white balance for the window; white balance for the face.
The subject is the interview. The window is only the light source or background element. If the face looks wrong, the interview looks wrong.
Window light can look expensive with minimal gear, but only if controlled. The best fix is often to rotate the subject or camera rather than add more equipment.
26.3 Run-and-gun interior / available light
26.3.1 Goal
Run-and-gun interior documentary work is about speed, reliability, and capturing the moment. The goal is not perfection. The goal is to make fast decisions that protect image, focus, and audio.
Available-light interiors are often messy:
mixed color temperatures,
dim corners,
overhead lights,
windows,
TVs,
reflective surfaces,
cluttered backgrounds,
room noise,
unpredictable subjects.
The operator must make fast improvements.
The priority order is:
audio,
face light,
focus,
exposure,
background,
color consistency,
file/log discipline.
In documentary run-and-gun work, a technically perfect shot that misses the moment is a failure. But a captured moment with unusable audio is also a failure.
26.3.2 Procedure
Fast interior available-light procedure:
Listen first. Identify TV, HVAC, echo, refrigerator, traffic, and appliance noise.
Put headphones on early.
Place subject near the best existing light.
Turn off ugly overheads if possible.
Use window light or practical motivation.
Remove bright background distractions quickly.
Set Base ISO based on available light: 800 if enough, 12800 if genuinely needed.
Set shutter correctly.
Choose aperture for focus safety, often f/4 if possible.
Set white balance manually if time allows; use Preset only if faster and acceptable.
Check waveform quickly.
Confirm audio meter/headphones.
Record.
Log enough to identify the clip later.
Fast improvement checklist:
| Problem | Fast Fix |
|---|---|
| Bad overhead light | turn it off if possible |
| Face too dark | move subject toward window/lamp |
| Background clutter | change angle |
| Room too echoey | move closer, use lav, choose softer room |
| Mixed light | choose one dominant source |
| Low light | open aperture/add light/consider 12800 |
| Noise | stop TV/HVAC if possible |
| Focus risk | stop down or use Face/Eye AF |
26.3.3 Quick layout
Available-light quick layout:
Window / lamp / best available source
↓
Subject turned toward light
Camera positioned to avoid clutter
and avoid bright window behind subject
Lav monitored with headphones
If the room is ugly, frame tighter. If the background is busy, use longer focal length. If light is bad, move the person before adjusting the camera.
Quick one-person documentary shot:
| Step | Action |
|---|---|
| 1 | Move subject to best light |
| 2 | Put background behind them with depth |
| 3 | Set WB |
| 4 | Check audio |
| 5 | Focus |
| 6 | Roll |
26.3.4 Pro tip
Pro tip:
In run-and-gun interiors, moving the subject three feet can solve more problems than changing five camera settings.
Move toward better light, quieter room, cleaner background, and less mixed color.
26.4 Exterior interview
26.4.1 Layout
Exterior interviews should prioritize face, sound, wind control, and background.
Best exterior interview layout:
Sun behind or side-back
↓
Subject in open shade
or backlit position
Camera with clean background
Lav with wind protection
Boom only if wind/crew support allows
Avoid:
direct overhead sun,
subject squinting,
wind into mic,
loud traffic behind subject,
bright white walls,
moving distractions,
uncontrolled public background.
Exterior face strategy:
| Light Condition | Action |
|---|---|
| Direct harsh sun | move to shade/backlight |
| Open shade | use as primary |
| Overcast | add contrast with negative fill if needed |
| Backlight | expose face, watch highlights |
| Golden hour | use carefully; changes fast |
26.4.2 Setup
Exterior interview procedure:
Listen for traffic, wind, people, machinery, aircraft, water, birds, and background noise.
Choose the quietest workable location.
Choose background with depth and relevance.
Place subject in open shade or backlight.
Avoid direct sun in eyes.
Use wind protection on lav.
Use boom only if wind protection and operator support are adequate.
Set Base ISO 800.
Set shutter 180°.
Choose aperture f/4–f/5.6 for focus safety.
Turn Variable ND On.
Set WB for daylight/shade condition.
Use waveform/zebras.
Check face exposure.
Check background highlights.
Record test.
Monitor wind through headphones.
Record room tone/ambient tone if useful.
Exterior interview audio warning:
A lav without wind protection can be destroyed by breeze. Always listen before recording. Wind rumble may not be obvious without headphones.
26.4.3 Pro tip
Pro tip:
For exterior interviews, choose shade and quiet before choosing the lens.
A beautiful background is not worth unusable wind noise or a squinting subject in harsh sun.
26.5 Walk-and-talk exterior
26.5.1 Goal
The goal of a walk-and-talk exterior is to capture movement, conversation, and location energy while keeping exposure, focus, and audio usable.
Walk-and-talks are harder than locked interviews because:
light changes as people move,
focus distance changes,
background changes,
wind changes,
footsteps and handling noise appear,
framing must be maintained,
audio must remain consistent.
The priority is reliability:
| Priority | Requirement |
|---|---|
| Audio | lavs secured, wind managed |
| Focus | Face/Eye AF or safe aperture |
| Exposure | ND ready, possibly Auto ND |
| Route | stable light path |
| Framing | rehearsed camera movement |
| File/log | slate and note route/take |
26.5.2 Layout
Walk-and-talk route layout:
Route chosen for consistent light
Start point → walking path → end point
Avoid sun/shade/sun/shade flicker
Avoid loud traffic if possible
Avoid background chaos
Camera moves backward/side/parallel
Lavs on subjects
Optional boom only with crew support
Better route:
Open shade path
consistent background
low wind
quiet enough for dialogue
Worse route:
direct sun → shade → direct sun
traffic noise
wind tunnel
busy background
26.5.3 Procedure
Walk-and-talk procedure:
Scout the route before recording.
Listen for traffic/wind at start, middle, end.
Decide whether the camera moves backward, sideways, or follows.
Check safety for operator movement.
Set Base ISO 800.
Set shutter 180°.
Choose aperture f/4–f/5.6 for focus safety.
Turn Variable ND On.
Consider Auto ND only if light changes are unavoidable.
Set WB for dominant light condition.
Use Face/Eye AF if tested and helpful.
Secure lavs against clothing rub.
Add wind protection.
Test TX1/TX2 if two people.
Rehearse walking speed.
Record a test segment.
Play back audio if time allows.
Roll actual take.
Log route and take notes.
26.5.4 Pro tip
Pro tip:
A walk-and-talk is won in the route choice.
A route with stable shade, low wind, and low traffic is more valuable than a dramatic but technically chaotic route.
26.6 Quick one-light field interview
26.6.1 Layout
A quick one-light field interview is useful when available light is weak, flat, ugly, or uncontrolled.
Basic layout:
Background with depth
Subject
Camera
Soft LED 30°–45° off camera
slightly above eye level
Negative fill if room is too flat
If the background is too bright, angle the subject/camera. If the room is too flat, add negative fill.
26.6.2 Gear
Minimal useful gear:
| Gear | Purpose |
|---|---|
| Soft LED light | key light |
| Light stand | stable placement |
| Diffusion/softbox | soft face |
| Black cloth/foamcore | negative fill |
| RØDE lav | close dialogue |
| MDR-7506 headphones | audio monitoring |
| Gray/white card | white balance |
| FX6 | Cine EI capture |
| Extra battery/card | reliability |
Optional:
boom mic,
Sony XLR-K3M/K2M,
small practical lamp,
reflector,
sandbag,
extension cord.
26.6.3 Procedure
Quick one-light interview setup:
Choose quiet location.
Place subject away from wall.
Pick simple background.
Put soft LED 30–45 degrees off camera.
Raise light slightly above eye line.
Dim light until face is clean but not overlit.
Add negative fill if face is flat.
Set manual WB using gray/white card.
Set Base ISO 800 if light is sufficient.
Choose aperture around f/4.
Focus on near eye.
Set lav.
Listen with headphones.
Record test.
Roll.
One-light corrections:
| Problem | Correction |
|---|---|
| Face too flat | move light farther side or add negative fill |
| Shadow too dark | move light closer to camera or reduce negative fill |
| Background too bright | reframe, turn off light, move subject |
| Light too harsh | diffuse or move light closer/larger |
| Glasses glare | raise/angle key |
| Skin shiny | adjust light angle/intensity |
26.6.4 Pro tip
Pro tip:
One soft light, good placement, and clean audio can look more professional than a complicated setup done badly.
Do not add unnecessary lights until the face, background, and audio are already working.
26.7 Documentary lighting priorities
26.7.1 Truthfulness
Documentary lighting should feel believable. The viewer should not be pulled out of the subject’s story by lighting that feels artificial or self-important.
Truthful does not mean ugly. It means the lighting supports the subject and setting.
26.7.2 Clean faces
The subject’s face must be readable. This is especially important in interviews.
Clean face means:
eyes visible,
skin natural,
no ugly mixed color,
not hidden in shadow,
not blown out,
not flattened by overhead light.
26.7.3 Fast setup
Documentary work often requires speed. A simple repeatable setup is better than an elaborate setup that takes too long and causes the subject to lose energy.
Fast setup priorities:
quiet room,
good background,
soft key,
manual WB,
clean audio,
focus,
exposure test.
26.7.4 Audio protection
Audio is central to documentary work. Protect audio with:
proper lav placement,
wind protection,
headphone monitoring,
room tone,
boom if available,
onboard RØDE backup if supported,
test recording.
A beautifully lit interview with bad sound is not usable.
26.7.5 Background control
Documentary background should be meaningful but not distracting.
Control:
clutter,
logos,
bright windows,
strong color objects,
moving people,
reflective surfaces,
irrelevant items,
harsh practicals.
The background should help tell the subject’s story, not steal attention.
Final documentary lighting rule:
Make the person credible, the face readable, the audio clean, and the background controlled.
Chapter 27. Lens, Movement, and Emotional Coverage
27.1 Lens-choice guide
Lens choice affects emotional tone, background control, focus difficulty, and how close the viewer feels to the subject.
A useful lens/focal-length guide:
| Shot Type | Typical Focal Length Concept | Use |
|---|---|---|
| Wide establishing | 24–35mm | environment, geography |
| Interior medium | 35–50mm | natural dialogue framing |
| Interview medium | 35–70mm | subject + background |
| Close-up | 50–85mm | emotional face |
| Exterior portrait | 85–135mm | background compression |
| Documentary walk-and-talk | 24–50mm | movement and flexibility |
| Detail/insert | depends on object | emphasis |
These are practical ranges, not rigid rules. Sensor format, lens availability, room size, and desired look matter.
The project principle is:
Choose the lens for emotional distance and background control, not merely because it fits.
Lens choice affects:
| Lens Choice | Effect |
|---|---|
| Wider lens close to face | intimacy, distortion risk |
| Longer lens farther away | compression, cleaner background |
| Moderate focal length | natural perspective |
| Very long lens | isolation, focus difficulty |
| Very wide lens | environment, possible distortion |
27.2 Prime versus zoom
Prime lenses and zoom lenses have different workflow advantages.
| Lens Type | Strength | Weakness |
|---|---|---|
| Prime | discipline, often strong image character, simple focal decision | must move camera/change lens |
| Zoom | flexible framing, fast documentary use, fewer lens changes | can encourage lazy framing, may be variable aperture |
| Power zoom | smooth controlled zoom possible | depends on lens, can look artificial if unmotivated |
| Manual zoom | flexible but risky to zoom while rolling | shake/focus/exposure shift risk |
For actor reels and feature scenes, primes or deliberate focal-length choices encourage better shot design. For documentary work, zooms can be extremely useful because reality moves faster than a controlled film set.
The rule is:
Use primes for discipline when time allows; use zooms for flexibility when reality demands it.
27.3 Interior focal-length choices
Interior spaces often limit camera distance. The lens must fit the room while avoiding distortion.
Useful interior guide:
| Interior Shot | Focal-Length Concept |
|---|---|
| Small room wide | 24–35mm |
| Medium dialogue | 35–50mm |
| Interview | 35–70mm |
| Close-up | 50–85mm if room allows |
| Detail insert | close focus / appropriate lens |
Interior caution:
If a wide lens is placed too close to a face, it can distort features. That may be acceptable for a stylized shot, but usually not for actor reels or interviews.
Interior actor reel rule:
Do not distort the actor’s face unless deliberately intended.
For small rooms, it may be better to:
move furniture,
simplify background,
shoot tighter,
use a moderate lens,
avoid extreme wide close-ups.
27.4 Exterior focal-length choices
Exteriors often have more space, so longer lenses can be used to simplify the background and create emotional isolation.
Exterior guide:
| Exterior Shot | Focal-Length Concept |
|---|---|
| Emotional close-up | 70–135mm |
| Interview | 50–100mm depending background |
| Two-person dialogue | 35–85mm |
| Walk-and-talk | 24–50mm |
| Action/chase | depends on movement and safety |
| Establishing | 24–35mm or wider as needed |
Longer lenses help:
compress distance,
reduce background clutter,
make the image feel more cinematic,
isolate subject,
soften busy exterior environments.
But longer lenses increase:
focus sensitivity,
camera shake,
need for stable support,
difficulty following movement.
Use longer lenses when the shot can be controlled. Use wider/moderate lenses when movement or space requires it.
27.5 Emotional close-up hierarchy
When the goal is an emotional close-up, do not automatically zoom while recording. Use a hierarchy.
Preferred hierarchy:
Plan a close-up as coverage.
Move the camera physically closer.
Use a longer focal length.
Use a controlled push-in.
Use a slow motivated zoom only if the zoom itself is the storytelling choice.
Use Clear Image Zoom only as a tested limited tool, not as primary coverage.
Emotional close-ups should be built around performance.
Ask:
What is the emotional beat?
When does the subject change internally?
Does the viewer need to move closer?
Should the camera push, cut, or hold?
Is a reaction more powerful than a line?
Is the close-up for actor reel clarity or feature story grammar?
Actor reel close-up rule:
Capture the performance cleanly first. Add movement only if it helps.
27.6 Push-in for emotional intensity
A push-in physically moves the camera closer to the subject. It changes the viewer’s relationship to the subject.
Use a push-in for:
realization,
confession,
fear,
suspicion,
grief,
decision,
emotional pressure,
internal change.
Push-in procedure:
Identify the emotional line or moment.
Choose start frame.
Choose end frame.
Choose support: tripod slider, dolly, handheld, gimbal, or controlled move.
Rehearse movement speed.
Check focus at start.
Check focus at end.
Check exposure at start/end if light changes.
Coordinate movement with performance.
Record test if possible.
Push-in risks:
| Risk | Correction |
|---|---|
| Focus lost | stop down/rehearse/focus pull |
| movement shaky | use support or slower move |
| move too obvious | slow down |
| actor misses mark | rehearse |
| exposure changes | control light/ND |
| audio noise from movement | monitor headphones |
A push-in should feel motivated by the scene, not like the operator suddenly wanted a tighter shot.
27.7 Pull-back for isolation
A pull-back moves the camera away from the subject. It can reveal loneliness, defeat, danger, space, or context.
Use a pull-back for:
abandonment,
emotional isolation,
reveal of environment,
aftermath,
character smallness,
documentary context,
feature scene ending.
Pull-back procedure:
Start on meaningful close or medium frame.
Decide what the wider frame reveals.
Make sure the revealed background is controlled.
Rehearse movement.
Maintain focus or plan focus transition.
Confirm audio remains usable.
Roll when movement has purpose.
A pull-back fails if the end frame reveals clutter, ugly background, or irrelevant objects. The revealed environment must matter.
27.8 Longer lens for compression
Longer lenses compress space and simplify backgrounds. They are especially useful outdoors.
Use longer lenses to:
isolate actor,
reduce visual clutter,
compress background,
make exterior close-ups feel cinematic,
make interviews look cleaner,
reduce distracting wide-angle distortion.
Longer lens cautions:
| Issue | Risk |
|---|---|
| Focus | shallower apparent depth |
| Camera shake | more visible |
| Framing | harder to follow movement |
| Distance | operator farther from subject |
| Audio | camera may be far, but lav/boom handles sound |
For emotional close-ups, longer lenses can help the subject feel separated from the world. For documentaries, they can make a cluttered real environment more controlled.
27.9 Walk-and-talk support
Walk-and-talk support must match the type of movement.
Possible support options:
| Support | Use | Caution |
|---|---|---|
| Handheld | documentary energy | shake/fatigue |
| Gimbal | smooth movement | focus/audio management |
| Monopod | semi-mobile stability | limited motion |
| Tripod pan | subject passes through frame | less mobile |
| Shoulder rig | stable doc style | weight/setup |
| Dolly/slider | controlled feature move | setup time |
| Static camera | subject moves through frame | limited coverage |
For solo operator work, the safest approach may be:
lavs on subjects,
focus-safe aperture,
Face/Eye AF if tested,
route in stable light,
moderate focal length,
simple movement.
Do not choose a movement system that makes audio or focus impossible.
27.10 Tripod, slider, dolly, gimbal, handheld considerations
Each support choice affects the scene.
Tripod
Best for:
interviews,
controlled actor reels,
dialogue coverage,
locked emotional close-ups,
repeatable composition.
Advantages:
stable,
focus easier,
framing controlled,
professional.
Caution:
can feel static if scene needs movement.
Slider
Best for:
subtle push-ins,
reveal shots,
controlled movement,
product/detail shots.
Caution:
short move length,
requires setup,
focus may need adjustment.
Dolly
Best for:
feature-style push-ins/pull-outs,
controlled scene movement,
professional camera motion.
Caution:
needs space and smooth surface.
Gimbal
Best for:
walk-and-talk,
following movement,
dynamic documentary or feature motion.
Caution:
focus and audio become harder,
setup balance needed,
can look floaty if overused.
Handheld
Best for:
documentary immediacy,
tension,
realism,
mobile coverage.
Caution:
too much shake can feel amateur,
long lenses magnify instability.
The support should match the emotion. Do not use movement just because equipment allows it.
27.11 Focus during movement
Movement and focus must be planned together.
Questions:
Is subject moving toward/away from camera?
Is camera moving toward/away from subject?
Is aperture shallow?
Is autofocus reliable?
Is manual focus pull possible?
Is focus mark needed?
Is the movement repeatable?
Movement focus strategies:
| Situation | Strategy |
|---|---|
| Actor walks toward camera | stop down / AF / pull focus |
| Camera pushes in | rehearse focus endpoints |
| Walk-and-talk | f/4–f/5.6 and Face/Eye AF if tested |
| Gimbal move | AF or focus pull system |
| Feature push-in | marks and rehearsal |
| Documentary unpredictable | focus-safe aperture |
Focus during movement should be tested before important takes.
27.12 Rehearsing movement
Rehearsal prevents failed takes.
Rehearse:
actor movement,
camera movement,
focus,
framing,
audio cable/wireless behavior,
boom position if used,
exposure changes,
start/end marks,
eyeline.
Movement rehearsal checklist:
| Check | Question |
|---|---|
| Start frame | correct? |
| End frame | meaningful? |
| Focus start/end | sharp? |
| Exposure start/end | safe? |
| Audio | clean during movement? |
| Background | controlled throughout? |
| Operator path | safe? |
| Actor path | repeatable? |
For actor reels, movement should never distract from performance. For feature scenes, movement should be motivated. For documentaries, movement should preserve the moment without destroying focus/audio.
27.13 Coverage map for actor reels and features
A coverage map prevents relying on one shot to do everything.
Basic actor reel coverage map:
| Shot | Purpose |
|---|---|
| Medium | body language and context |
| Close-up | performance/emotion |
| Reaction | listening/thought |
| Insert/detail | story object or action |
| Optional push-in | emotional escalation |
Basic feature dialogue coverage map:
| Shot | Purpose |
|---|---|
| Master | geography |
| Two-shot | relationship |
| OTS Actor A | dialogue connection |
| OTS Actor B | dialogue connection |
| Close-up A | emotional detail |
| Close-up B | emotional detail |
| Reaction | subtext |
| Inserts | story/action detail |
Coverage should be logged. Clip descriptions should identify which scene/shot/take is on each file. That prevents confusion in post.
Final lens/movement rule:
Get the performance safely first. Add movement only when it improves the moment.
Chapter 28. Production Design and Muted Color Control
28.1 Why wardrobe and set color matter
The muted cinematic look begins before the camera records. Wardrobe, walls, props, practical lights, furniture, and background objects all affect color.
A LUT cannot fully fix a set full of loud, saturated, distracting colors. A grade cannot easily make a bright red shirt stop dominating the frame without damaging skin and other colors.
Production design controls what the camera sees.
Muted color is not only a post-production decision. It is a pre-production and on-set decision.
Key principle:
If a color is in front of the lens, the grade must deal with it.
For actor reels, production design should support the actor’s face and performance. For feature scenes, it should support story world and continuity. For documentaries, it should preserve credibility while reducing distractions.
28.2 Preferred muted palette
Preferred muted palette:
| Color Family | Examples |
|---|---|
| Dark neutrals | charcoal, black, deep gray |
| Blues | navy, faded denim, slate blue |
| Earth tones | brown, tan, taupe, clay |
| Greens | olive, moss, muted sage |
| Warm neutrals | cream, beige, oatmeal |
| Deep accents | burgundy, rust, dark mustard |
| Materials | wood, aged metal, canvas, leather |
| Background tones | gray wall, warm wood, off-white, muted curtains |
These colors work well because they support skin rather than fighting it. They also grade better into a restrained cinematic look.
Actor wardrobe should usually avoid colors that overpower the face. The viewer should look at the actor, not the shirt.
28.3 Colors to avoid unless intentional
Avoid or control:
| Color / Object | Problem |
|---|---|
| Bright red | dominates frame |
| Neon green | hard to grade, unnatural |
| Saturated royal blue | pulls attention |
| Bright white shirt | clips / distracts |
| Busy patterns | moiré/distraction |
| Loud logos | unprofessional / legal distraction |
| Shiny plastic | cheap highlights |
| Bright orange | dominates skin palette |
| Strong green walls | contaminates skin |
| TV screens | moving color distraction |
These are not banned forever. They can be used intentionally. But if the goal is a muted cinematic look, they must be controlled.
If a bright object must remain in frame, decide whether it is story-important. If not, remove it.
28.4 Controlling props and clutter
Props and clutter affect image quality.
Before recording, scan the frame for:
water bottles,
tissue boxes,
labels,
cables,
trash cans,
random papers,
bright objects,
reflective objects,
distracting photos,
clocks,
screens,
logos,
messy shelves,
strong color patches.
Documentary work may preserve truthful setting, but even documentary settings can be cleaned of irrelevant distractions.
Set-control process:
Frame the shot.
Look at background edges.
Remove bright clutter.
Remove labels/logos unless needed.
Reduce color distractions.
Create depth.
Add one meaningful background element if useful.
Recheck through monitor.
The background should answer:
Does this help the subject or distract from the subject?
28.5 Practical lights as color sources
Practical lights are visible lights in the scene: lamps, bulbs, screens, candles, hallway lights, signs, or other real sources.
They can create:
mood,
depth,
motivation,
warmth,
background interest.
They can also create:
blown highlights,
ugly color,
mixed temperature,
flicker,
bright distractions,
color spill on skin.
Practical control checklist:
| Check | Action |
|---|---|
| Too bright | dim/change bulb/reposition |
| Too warm | adjust WB or bulb |
| Too green | replace/turn off |
| Distracting | move or dim |
| Clipping | check waveform/zebras |
| Not motivating face | add hidden key |
| Flicker | test recording |
Practical rule:
A practical can motivate the light without being the only light.
28.6 Background separation
Background separation helps the subject stand out.
Ways to create separation:
| Method | Effect |
|---|---|
| Distance from background | depth |
| Longer lens | background compression/blur |
| Aperture | subject isolation |
| Back/rim light | edge separation |
| Background darker than face | attention to subject |
| Color contrast | subject stands out |
| Negative fill | facial shape |
| Controlled practical | depth point |
Do not solve every separation problem by opening the lens too wide. Sometimes moving the subject six feet from the wall is better than shooting at f/1.8.
28.7 Skin tone must remain natural
Skin is the most important color in actor reels, interviews, and dialogue scenes.
Muted color should never make skin:
gray,
green,
dead,
waxy,
overly orange,
crushed,
noisy,
lifeless.
Protect skin by:
setting manual white balance,
using correct LUT input,
exposing cleanly,
avoiding mixed color spill,
controlling wardrobe/background,
grading subtly.
The muted color principle is:
Mute the world around the person; keep the person alive.
28.8 Muting the environment, not the person
A successful muted image often makes the environment more restrained while the subject remains emotionally present.
This can be done by:
choosing muted wardrobe,
darkening or simplifying the background,
using soft key on face,
using negative fill,
reducing saturated props,
using controlled practicals,
preserving skin tone.
Wrong approach:
Desaturate entire image heavily
↓
Skin becomes gray
↓
Actor looks lifeless
Correct approach:
Restrained wardrobe/background
↓
Clean skin exposure
↓
Subtle grade
↓
Muted but alive image
28.9 Actor reel visual restraint
Actor reels should not look visually boring, but they should be restrained enough that the performance remains the center.
Avoid:
extreme darkness,
excessive color stylization,
distracting camera movement,
overly busy background,
wild practical colors,
shallow focus that misses eyes,
costume colors that dominate.
Actor reel production design should ask:
Does this help casting see the actor?
Is the face readable?
Is wardrobe flattering but not distracting?
Is the background professional?
Is the scene too stylized for the reel’s purpose?
28.10 Feature color consistency
Feature scenes require color continuity across the story world.
Color consistency includes:
recurring palette,
motivated color sources,
wardrobe planning,
background control,
consistent white balance logic,
consistent LUT monitoring,
final grade direction.
For a feature, one scene can be warmer or cooler than another, but the choices should feel designed.
Track:
| Item | Why |
|---|---|
| WB setting | shot matching |
| LUT used for monitoring | visual consistency |
| wardrobe colors | palette continuity |
| practical bulb colors | scene consistency |
| camera angle background colors | avoid mismatches |
| grade notes | post continuity |
28.11 Documentary credibility
Documentary production design must not feel fake. The setting should remain believable, but distractions can still be reduced.
Acceptable documentary cleanup:
remove trash,
silence TV,
move bright clutter,
reduce logos,
choose better angle,
turn off ugly light,
position subject near meaningful background.
Avoid making the scene look artificially staged if that undermines truthfulness.
Documentary background should support:
who the person is,
where they are,
why the setting matters,
without distracting from what they say.
Final production design rule:
Control what matters, remove what distracts, preserve what is truthful.
PART VI — PRE-SHOOT, ON-SET, AND SHOOT-DAY WORKFLOW
Chapter 29. Pre-Shoot Checklist and On-Set Test Procedure
29.1 Night-before setup checklist
The night-before checklist prevents shoot-day failures. It should be completed before any important actor reel, feature, or documentary shoot.
Camera and media:
| Item | Check |
|---|---|
| FX6 batteries | charged |
| Battery charger | packed |
| CFexpress/SD production cards | formatted only after backup confirmed |
| Settings card | labeled FX6 SETTINGS — DO NOT FORMAT |
| ALL File | saved on settings card |
| User File | saved if used |
| Scene File | saved if used |
| LUTs | copied/imported/tested |
| Card reader | packed |
| Backup drive | available |
| Second backup drive | available if possible |
Audio:
| Item | Check |
|---|---|
| RØDE transmitter(s) | charged |
| RØDE receiver | charged |
| RØDE receiver gain | 0 dB baseline |
| RØDE receiver mode | Split or Merged as needed |
| Cable Techniques cable | packed |
| 3.5 mm-to-XLR one-transmitter cable | packed if needed |
| MDR-7506 headphones | packed |
| Windscreens | packed |
| Boom mic | packed if used |
| XLR-K3M/K2M | packed if used |
| Boom XLR cable | packed |
| Onboard transmitter recording | enabled/tested if used |
Camera support and exposure:
| Item | Check |
|---|---|
| Tripod/plate | packed |
| Lens/lenses | cleaned |
| Lens caps | packed |
| ND workflow | internal ND tested |
| Gray/white card | packed |
| Monitor | packed/charged |
| HDMI/SDI cable | packed |
| Light meter/reference tools | optional |
Lighting:
| Item | Check |
|---|---|
| Key light | packed |
| Light stand | packed |
| Diffusion/softbox | packed |
| Negative fill | packed |
| Extension cords | packed |
| Practical bulbs/dimmers | packed if needed |
| Sandbags/weights | packed if needed |
Paperwork / logging:
| Item | Check |
|---|---|
| Clip log | printed or digital |
| Paper field log | printed |
| Pen/marker | packed |
| Slate/paper slate | packed |
| Project code | chosen |
| Physical card IDs | assigned |
| Reel naming plan | ready |
Night-before rule:
Do not wait until the subject is ready to discover a missing cable, dead transmitter, wrong card, or untested LUT.
29.2 Camera mode checklist
Before shooting, confirm the camera mode.
| Item | Required State |
|---|---|
| Shooting mode | Cine EI |
| Color/gamma | S-Gamut3.Cine/S-Log3 |
| Base ISO | 800 or 12800 deliberately chosen |
| EI | deliberate, not accidental |
| Internal Rec MLUT | Off unless intentionally baking |
| Monitoring LUT | On if desired |
| Frame rate | project standard |
| Codec | XAVC-I or XAVC-L by plan |
| Audio channels | routed correctly |
Camera mode must be checked after loading an ALL File and again after any major change.
29.3 Recording format checklist
Before recording:
| Setting | Check |
|---|---|
| Resolution | 4K UHD/QFHD if project baseline |
| Codec | XAVC-I for quality, XAVC-L for duration if needed |
| Frame rate | 23.98/24p or project standard |
| S&Q | Off unless deliberately shooting slow motion |
| Audio | normal recording confirmed |
| Proxy | on/off by plan |
| Card space | enough for scene |
| Card/reel ID | assigned/logged |
If S&Q is active accidentally, dialogue/audio and timing may be wrong. Always check S&Q before serious dialogue.
29.4 LUT checklist
Before recording:
| LUT Item | Required Check |
|---|---|
| Camera color/gamma | S-Gamut3.Cine/S-Log3 |
| Base Look | intended LUT selected |
| VF/Proxy/Stream MLUT | On if desired |
| SDI/HDMI MLUT | On if external monitor should see LUT |
| Internal Rec MLUT | Off for clean log |
| External monitor LUT | Off/not used if FX6 sends MLUT |
| Double-LUT risk | eliminated |
| LUT file | backed up separately |
Field statement:
“Monitor LUT On. Internal Rec LUT Off.”
29.5 White balance checklist
Before recording:
| WB Item | Check |
|---|---|
| ATW | Off for controlled scenes |
| WB switch | A/B/Preset selected deliberately |
| Gray/white card | used if practical |
| Card position | subject face position |
| Mixed lights | controlled if possible |
| Skin | checked through LUT |
| Continuity | same WB for matching shots |
| Change | logged if WB changes |
White balance is especially important for actor close-ups and interviews because skin must remain consistent.
29.6 ND checklist
Before recording:
| ND Item | Check |
|---|---|
| Interior | ND Clear unless too bright |
| Exterior | Variable ND On in daylight |
| Auto ND | Off for controlled scenes |
| Auto ND | considered only for documentary changing light |
| ND dial | adjusted for waveform exposure |
| Clear/On switch | confirmed before rolling |
| Aperture | chosen before ND |
| Shutter | protected at 180° |
ND check statement:
“Shutter locked. Aperture chosen. ND controlling exposure.”
29.7 Focus checklist
Before recording:
| Focus Item | Check |
|---|---|
| Focus mode | manual or AF deliberately selected |
| Focus Magnifier | used for critical shots |
| Eye | near eye sharp |
| Two-person | depth of field sufficient |
| Movement | rehearsed |
| Zoom change | focus rechecked |
| Bright sun | monitor visibility addressed |
| Face/Eye AF | tested if used |
| Rack focus | marks rehearsed |
Focus statement:
“Near eye sharp. Movement checked.”
29.8 Audio checklist
Before recording, confirm which audio workflow is active.
One-transmitter safety:
| Item | Setting |
|---|---|
| RØDE output | 0 dB |
| INPUT1 | MIC |
| CH1 | INPUT1 |
| CH2 | INPUT1 |
| CH1 dial | 7 |
| CH2 dial | 5 |
Two-transmitter split:
| Item | Setting |
|---|---|
| RØDE receiver | Split |
| Red XLR | INPUT1 |
| Blue XLR | INPUT2 |
| CH1 | INPUT1 |
| CH2 | INPUT2 |
| INPUT1/2 | MIC |
| Phantom | Off |
| TX1 test | CH1 |
| TX2 test | CH2 |
Boom three-track:
| Channel | Source |
|---|---|
| CH1 | TX1 |
| CH2 | TX2 |
| CH3 | Boom via Shoe CH1 |
| CH4 | Off/Shoe CH2 |
Always check headphones.
29.9 Physical switch checklist
Physical switches must be checked manually.
| Physical Switch / Control | Check |
|---|---|
| INPUT1 | MIC for RØDE |
| INPUT2 | MIC for RØDE split |
| MIC+48V | Off for RØDE |
| WB switch | A/B/Preset |
| ND | Clear/On/Variable |
| Channel dials | correct levels |
| Lens AF/MF | correct |
| Stabilization | correct for support |
| Monitor connection | secure |
| Cable Techniques | connected correctly |
| Headphones | plugged into FX6 headphone jack |
ALL File does not remove the need for this.
29.10 RØDE split cable checklist
For two transmitters:
| Item | Required |
|---|---|
| Receiver mode | Split |
| Cable | Cable Techniques TRS to dual XLR-3M |
| Red | INPUT1 |
| Blue | INPUT2 |
| INPUT1 | MIC |
| INPUT2 | MIC |
| CH1 | INPUT1 |
| CH2 | INPUT2 |
| Reference | -30 dB both |
| TX1 test | CH1 moves |
| TX2 test | CH2 moves |
| Headphones | clean |
| Test clip | reviewed |
Do not assume split mode is working until TX1 and TX2 are tested separately.
29.11 Boom adapter checklist
For boom addition:
| Item | Check |
|---|---|
| Adapter | Sony XLR-K3M/K2M mounted |
| Connection | Multi Interface Shoe secure |
| Boom | plugged into adapter INPUT1 |
| CH3 | Shoe CH1 |
| CH4 | Off or Shoe CH2 |
| Boom input | MIC / MIC+48V / LINE as appropriate |
| Phantom | only if boom requires it |
| RØDE inputs | no phantom |
| Headphones | boom checked |
| Test | lavs and boom separately tested |
Boom statement:
“CH1 TX1. CH2 TX2. CH3 boom.”
29.12 10-second technical test
Before serious recording, shoot a 10-second technical test.
Include:
subject face,
normal speech,
loud speech if relevant,
silence for room noise,
movement if relevant,
focus target,
brightest background element,
slate/ID if useful.
Review:
| Item | Question |
|---|---|
| Exposure | face clean? |
| Focus | near eye sharp? |
| Audio | correct channels? |
| Noise | TV/HVAC/clothing/wind? |
| LUT | monitoring as expected? |
| File | recording properly? |
| Background | distracting? |
The 10-second test is one of the strongest protections against failed shoots.
29.13 Playback review checklist
When reviewing the test clip:
| Review Area | Confirm |
|---|---|
| Picture | no obvious exposure problem |
| Focus | subject sharp |
| Skin | natural through LUT |
| Highlights | acceptable |
| Shadows | not muddy |
| Audio | correct channel/source |
| Room noise | acceptable |
| Wind | controlled |
| File | clip recorded |
| Monitor | not misleading |
Do not review only the picture. Listen to audio.
29.14 During-shoot continuity check
Track continuity during the shoot.
| Continuity Item | Track |
|---|---|
| WB | A/B/Preset/Kelvin |
| Base ISO | 800/12800 |
| EI | value |
| Aperture | f-stop |
| ND | state/value |
| Lens/focal length | shot notes |
| LUT | monitoring look |
| Audio | CH routing |
| Mic placement | unchanged? |
| Lighting | key/negative fill/practicals |
| Background | objects moved? |
| Card/reel | A001/A002 etc. |
If a setting changes, log it.
29.15 After-shoot backup checklist
After shooting:
Stop recording.
Label card/reel.
Do not format.
Copy full card structure.
Verify copy.
Make second backup.
Copy RØDE onboard recordings if used.
Copy room tone and audio files.
Update clip log.
Confirm project files organized.
Only format production card after backup confirmation.
Backup statement:
“Full card copied, verified, second backup made.”
Chapter 30. Master Shoot-Day Workflow
30.1 Load or confirm ALL File
At the start of the shoot, load or confirm the correct ALL File if the shoot depends on a saved camera configuration.
Procedure:
Insert FX6 Settings Card in slot B.
Load intended ALL File from Media(B) if needed.
Confirm camera has correct Cine EI setup.
Confirm S-Gamut3.Cine/S-Log3.
Confirm recording format.
Confirm LUT routing.
Confirm audio menu routing.
Confirm User Menu/assignable buttons if needed.
After loading:
Do not assume everything physical is correct.
The ALL File does not confirm:
RØDE mode,
RØDE gain,
cable placement,
physical input switches,
channel dial positions,
ND physical state,
external monitor settings,
boom adapter physical switches.
30.2 Confirm physical switches
Before rolling, physically inspect:
| Control | Check |
|---|---|
| INPUT1 | MIC if RØDE |
| INPUT2 | MIC if RØDE split |
| MIC+48V | Off for RØDE |
| WB switch | A/B/Preset intended |
| ND | Clear/Variable intended |
| Channel dials | correct |
| Lens AF/MF | intended |
| Stabilization | intended |
| Monitor cable | secure |
| Headphones | connected |
Physical switches can ruin a take even when menu settings are correct.
30.3 Confirm RØDE receiver mode
Confirm RØDE receiver mode for the current audio workflow.
| Workflow | RØDE Mode |
|---|---|
| One transmitter safety copy | mode appropriate for one transmitter |
| Two transmitters separate | Split |
| Merged lavs plus boom | Merged |
| Permanent split one-person | Split, TX1 only |
If two people are wearing transmitters and separate tracks are needed:
RØDE receiver must be in Split mode.
Test TX1 and TX2 separately.
30.4 Confirm Cable Techniques routing
For the split workflow:
| Cable Plug | FX6 Input |
|---|---|
| Red XLR | INPUT1 |
| Blue XLR | INPUT2 |
Then confirm:
| FX6 Channel | Input |
|---|---|
| CH1 | INPUT1 |
| CH2 | INPUT2 |
Say it out loud if needed:
“Red to one. Blue to two. CH1 input one. CH2 input two.”
Then test.
30.5 Confirm boom adapter if used
If using boom:
Confirm XLR-K3M/K2M is mounted securely.
Confirm boom cable is in adapter INPUT1.
Confirm adapter input type: MIC, MIC+48V, or LINE.
Confirm phantom power only if boom requires it.
Confirm CH3 receives Shoe CH1.
Confirm CH4 is Off unless used.
Speak into boom and watch CH3.
Listen in headphones.
Audio routing statement:
“CH1 TX1. CH2 TX2. CH3 boom.”
30.6 Set frame rate and recording format
Before recording:
| Item | Check |
|---|---|
| Resolution | 4K UHD/QFHD if baseline |
| Codec | XAVC-I or XAVC-L by plan |
| Frame rate | project standard |
| Shutter | matches frame rate |
| S&Q | off unless planned |
| Audio | normal recording if dialogue |
| Card space | enough |
| Reel ID | assigned |
Do not discover after a take that S&Q was on or frame rate was wrong.
30.7 Set Cine EI / Base ISO / EI
Confirm:
| Item | Decision |
|---|---|
| Mode | Cine EI |
| Base ISO | 800 or 12800 |
| EI | deliberate |
| Exposure tools | waveform/zebras |
Use Base ISO 800 for controlled/daylight work. Use 12800 only when low light genuinely requires it.
Statement:
“Base ISO selected. EI deliberate. Exposure checked.”
30.8 Set white balance
Set and lock white balance.
Procedure:
Choose A, B, or Preset.
Use gray/white card if possible.
Press WB SET if custom balancing.
Check skin through LUT.
Keep WB stable for matching shots.
Avoid ATW for controlled actor reels/features.
Statement:
“White balance locked.”
30.9 Set shutter
Set shutter for motion.
| Frame Rate | Shutter |
|---|---|
| 24p | 1/48 or 180° |
| 30p | 1/60 or 180° |
| 60p | 1/120 or 180° |
Do not change shutter for ordinary brightness correction. Use ND.
Statement:
“Shutter set for motion.”
30.10 Set aperture
Choose aperture for the shot.
| Scene | Aperture |
|---|---|
| Solo close-up | f/2.8–f/4 |
| Interview | around f/4 |
| Two-person | f/4–f/5.6 |
| Walk-and-talk | f/4–f/5.6 |
| Wide/action | f/5.6–f/8 if needed |
Do not choose extreme shallow focus if it risks ruining performance.
Statement:
“Aperture chosen for focus and look.”
30.11 Set ND
Set ND after shutter and aperture.
Interior:
| Situation | ND |
|---|---|
| normal interior | Clear |
| bright window/studio | Variable if needed |
Exterior:
| Situation | ND |
|---|---|
| daylight | Variable On |
| changing documentary light | consider Auto ND only if necessary |
Statement:
“ND controls exposure.”
30.12 Set LUT monitoring
Confirm monitoring path.
| Destination | Setting |
|---|---|
| VF/Proxy/Stream | MLUT On if desired |
| SDI/HDMI | MLUT On for external monitor |
| Internal Rec | MLUT Off |
| Monitor LUT | Off/not used if FX6 applies LUT |
Statement:
“Monitor LUT On. Internal Rec LUT Off.”
30.13 Set waveform/zebras
Turn on exposure tools.
Use waveform to check:
face,
highlights,
gray/white card,
windows,
practicals.
Use zebras for fast warnings.
Statement:
“Exposure checked with waveform/zebras.”
30.14 Confirm focus
Before rolling:
Put subject in position.
Use Focus Magnifier.
Focus near eye.
Check two-person depth if needed.
Recheck after zoom.
Test movement if needed.
Statement:
“Focus checked. Near eye sharp.”
30.15 Confirm audio
Confirm audio workflow.
One-transmitter:
| Channel | Source |
|---|---|
| CH1 | INPUT1 main |
| CH2 | INPUT1 lower safety |
Two-transmitter:
| Channel | Source |
|---|---|
| CH1 | TX1 |
| CH2 | TX2 |
Two-transmitter plus boom:
| Channel | Source |
|---|---|
| CH1 | TX1 |
| CH2 | TX2 |
| CH3 | boom |
Check:
meters,
headphones,
room noise,
transmitter placement,
wind,
clothing rub,
test recording.
Statement:
“Audio routed. Meters good. Headphones clean.”
30.16 Slate clip
Slate before recording or at the start of clip.
Verbal slate example:
A001, C0001, indoor action scene, take one.
For two-person audio, include:
TX1 interviewer CH1. TX2 interviewee CH2.
For boom:
CH3 boom.
Slate should help post identify the clip.
30.17 Record test
Record a short test when:
setup changed,
audio routing changed,
lighting changed,
lens changed,
location changed,
first take of day,
important scene.
Test should include:
face,
normal speech,
loud speech,
silence,
focus movement if needed,
background highlight.
30.18 Review
Review test for:
| Area | Check |
|---|---|
| Exposure | clean face |
| Focus | sharp eye |
| Audio | correct channels |
| Noise | no TV/HVAC/rub/wind |
| LUT | correct monitoring |
| Recording | file saved |
| Background | no major distraction |
Do not review only picture. Listen.
30.19 Record take
When all checks pass, record the take.
During recording:
watch meters,
watch focus,
monitor framing,
listen for audio problems,
avoid touching cables,
avoid unnecessary zoom,
hold handles before/after action if needed.
If a problem occurs, note it immediately.
30.20 Log clip
After recording, make a quick log note.
Minimal field log:
| Field | Example |
|---|---|
| Reel | A001 |
| Clip | C0001 |
| Scene | INT_ACT |
| Note | indoor action scene |
| Status | review/select |
Do not try to fill the entire spreadsheet during the shoot. Capture enough to identify the clip, then complete the full log after offload.
30.21 Backup media
After shooting:
Stop recording.
Label card/reel.
Copy full card structure.
Verify copy.
Make second backup.
Copy RØDE onboard recordings if used.
Update clip log.
Do not format until verified.
Backup statement:
“Full card copied. Verified. Second backup made. Log updated.”
PART VII — FILE MANAGEMENT, SLATES, LOGGING, OFFLOAD, RESOLVE/PREMIERE, PROXIES, AND STORAGE
Chapter 31. FX6 File-Management Doctrine
31.1 Why camera filenames alone are unsafe
The FX6 may create camera filenames that are simple and sequential, such as:
C0001.MXF
C0002.MXF
C0003.MXF
Those filenames are useful inside one camera card folder, but they are not safe as the only identifying system for a project.
The core danger is that the same camera filename can appear again on another card, another shoot day, another formatted card, or another reel. For example:
Card / Reel A001:
C0001.MXF
Card / Reel A002:
C0001.MXF
Card / Reel A003:
C0001.MXF
If those clips are later copied into one folder, imported carelessly, renamed casually, or disconnected from their reel folder, the editor may not know which C0001.MXF is which.
That can create serious problems:
wrong clip imported,
duplicate names in editing software,
media relink confusion,
clip descriptions attached to wrong footage,
accidental overwrite,
missing scene identification,
inability to tell which card a clip came from,
loss of subject matter tracking,
trouble finding best takes,
trouble matching audio backups,
trouble syncing RØDE onboard files,
confusion between actor reel, feature, and documentary footage.
The doctrine is:
The camera filename is only one part of the clip identity. It is not the whole identity.
A safe clip identity must include the reel/card context.
Correct unique clip identity:
A001_C0001
A001_C0002
A001_C0003
A002_C0001
A002_C0002
The reel prefix protects the clip from being confused with a same-numbered clip from another card.
31.2 Why same-name clips happen across cards
Same-name clips happen because cameras often restart or continue clip numbering based on internal rules, card state, formatting, or reel behavior. Even if numbering continues for a while, the operator should not depend on it as the only protection.
A physical card can be reused many times. Each time it is formatted and used again, clip numbering may eventually produce familiar names such as C0001.MXF.
Example:
| Physical Card | Shoot / Offload | Reel ID | Camera File |
|---|---|---|---|
| CFE-01 | morning actor reel | A001 | C0001.MXF |
| CFE-02 | afternoon exterior | A002 | C0001.MXF |
| CFE-01 reused later | chase scene | A003 | C0001.MXF |
The same physical card is not the same as the same reel. A physical card is reusable media. A reel is a specific recorded card/offload instance.
That distinction is central:
| Term | Meaning |
|---|---|
| Physical card ID | The reusable card itself, such as CFE-01 |
| Reel ID | One recorded batch/offload, such as A001 |
| Camera filename | The file created by camera, such as C0001.MXF |
| Unique Clip ID | Reel + camera filename stem, such as A001_C0001 |
The unique clip ID solves the duplicate filename problem.
31.3 Why camera originals should not be casually renamed
Camera-original files should not be casually renamed because the camera folder structure, metadata, sidecar files, and editing software relinking behavior may depend on the original relationships.
Renaming C0001.MXF to something like:
Outdoor chase scene best shot actor running with dialogue version 2.MXF
may seem helpful at first, but it creates risks:
long filename/path-length problems,
broken relinking,
broken metadata assumptions,
inconsistency with camera sidecar files,
confusion with original media backups,
mismatch between log and camera media,
editor uncertainty over whether file is original or modified,
risk of accidental duplicate names after manual renaming.
The safe method is:
Keep camera-original filenames unchanged and put descriptions in the log.
Example:
| Camera File | Unique Clip ID | Description in Log |
|---|---|---|
| C0001.MXF | A001_C0001 | Indoor action scene |
| C0002.MXF | A001_C0002 | Outdoor dialogue scene |
| C0003.MXF | A001_C0003 | Outdoor chase scene |
The description belongs in the log, not in the original filename.
If a renamed working copy is ever needed, it should be made from a duplicate, not from the preserved camera original.
Safe hierarchy:
01_CAMERA_ORIGINALS/
20260515_NCAR_FX6_A001/
[full original camera card structure unchanged]
03_PROXIES/
A001_C0001_proxy.mov
04_PROJECT_FILES/
Resolve or Premiere project files
00_ADMIN/
Clip_Log.xlsx
The original remains intact. The log carries the meaning.
31.4 Folder identity versus clip identity
Folder identity and clip identity serve different purposes.
Folder identity tells where a group of files came from.
Clip identity tells which exact clip is being discussed.
A safe reel folder name might be:
20260515_NCAR_FX6_A001
This tells the user:
| Folder Element | Meaning |
|---|---|
| 20260515 | shoot date |
| NCAR | project code |
| FX6 | camera |
| A001 | reel ID |
A safe clip ID might be:
A001_C0001
This tells the user:
| Clip ID Element | Meaning |
|---|---|
| A001 | reel |
| C0001 | camera clip filename stem |
The folder identifies the reel. The unique clip ID identifies the clip inside that reel.
Example structure:
PROJECT/
01_CAMERA_ORIGINALS/
20260515_NCAR_FX6_A001/
[camera card folder structure]
20260515_NCAR_FX6_A002/
[camera card folder structure]
Clip log:
| Reel Folder | Camera File | Unique Clip ID | Description |
|---|---|---|---|
| 20260515_NCAR_FX6_A001 | C0001.MXF | A001_C0001 | Indoor action scene |
| 20260515_NCAR_FX6_A001 | C0002.MXF | A001_C0002 | Outdoor dialogue scene |
| 20260515_NCAR_FX6_A002 | C0001.MXF | A002_C0001 | Outdoor chase pickup |
The camera filename may repeat, but the unique clip ID does not.
31.5 Project codes, reel IDs, physical card IDs, and unique clip IDs
The project uses four identity layers.
31.5.1 Project code
The project code is a short identifier for the production.
Examples:
| Project Type | Example Project Code |
|---|---|
| Nelson Cyr actor reel | NCAR |
| Feature test film | FFT |
| Documentary project | DOC1 |
| Interview project | INT1 |
| FX6 test | FX6T |
The project code should be short. Do not use a long title in every folder or filename.
Good:
NCAR
Bad:
Nelson_Cyr_Actor_Reel_Netflix_Muted_Color_Test_Full_Project_Version_Final
Long names create path-length problems and clutter.
31.5.2 Reel ID
The reel ID identifies each card/offload instance.
Examples:
A001
A002
A003
A004
A reel is not the physical card itself. It is one recorded batch.
If CFE-01 is used in the morning, offloaded, formatted, and used again in the afternoon, it receives a new reel ID.
Example:
| Time | Physical Card | Reel ID |
|---|---|---|
| Morning | CFE-01 | A001 |
| Afternoon | CFE-02 | A002 |
| Evening | CFE-01 reused | A003 |
31.5.3 Physical card ID
The physical card ID identifies the reusable card.
Examples:
CFE-01
CFE-02
SD-SETTINGS
The physical card should be labeled with a sticker or other visible identifier.
Physical card ID helps answer:
Which card was used?
Which card is still full?
Which card was offloaded?
Which card is safe to format?
Which card is the settings card and must not be formatted?
Physical card ID should not be used as a substitute for reel ID because the same physical card can produce multiple reels over time.
31.5.4 Unique Clip ID
The unique clip ID combines the reel ID and the camera filename stem.
Formula:
Unique Clip ID = Reel ID + "_" + Camera File Stem
Example:
| Reel ID | Camera File | Unique Clip ID |
|---|---|---|
| A001 | C0001.MXF | A001_C0001 |
| A001 | C0002.MXF | A001_C0002 |
| A002 | C0001.MXF | A002_C0001 |
| A003 | C0001.MXF | A003_C0001 |
This is the safest short identifier for logs, notes, bins, and verbal references.
31.6 Short-name discipline to avoid Windows/path-length problems
Long filenames and deep folders can create Windows path-length problems. Even when modern Windows can sometimes support long paths, many applications, plugins, backup tools, and older workflows may still behave poorly with very long names.
The safe approach is:
Keep folder names short and put descriptions in the log.
Bad long folder example:
20260515_Nelson_Cyr_Actor_Reel_Netflix_Muted_Color_Cine_EI_Outdoor_Dialogue_Chase_Scenes_Final_Version_A001
Better:
20260515_NCAR_FX6_A001
Bad long file description approach:
A001_C0001_Indoor_action_scene_actor_enters_room_finds_letter_turns_to_camera_shouts_take_1_best_focus_good_audio.MXF
Better:
A001_C0001
with log entry:
| Unique Clip ID | Scene | Description | Notes |
|---|---|---|---|
| A001_C0001 | INT_ACT | Actor enters room, finds letter, turns, shouts | focus good; audio clean |
The log carries the detail. The file/folder names carry the identity.
31.7 Never dump different cards into one flat folder
Never copy clips from multiple cards into one flat folder such as:
ALL_FX6_CLIPS/
C0001.MXF
C0002.MXF
C0001.MXF
C0002.MXF
That creates immediate risk of overwrite, duplicate names, confusion, and broken metadata relationships.
Unsafe flat-dump behavior:
| Action | Risk |
|---|---|
| Drag only MXF files into one folder | loses structure and metadata |
| Copy multiple cards into same folder | duplicate names |
| Rename after dumping | manual error |
| Import mixed clips without reel folders | relink confusion |
| Delete non-footage files | possible metadata loss |
Safe method:
01_CAMERA_ORIGINALS/
20260515_NCAR_FX6_A001/
[entire card copy]
20260515_NCAR_FX6_A002/
[entire card copy]
20260515_NCAR_FX6_A003/
[entire card copy]
Each reel stays intact.
31.8 File-management master rule
The master rule is:
Do not rely on camera filenames alone. Preserve full card folders, identify every reel, create unique clip IDs, and put descriptions in the log.
The complete doctrine:
Label physical cards.
Assign a new reel ID to each card/offload.
Copy the full card structure.
Keep camera originals unchanged.
Use short reel folder names.
Use unique clip IDs such as A001_C0001.
Put subject/scene descriptions in the log.
Do not dump multiple cards into one flat folder.
Do not split camera-original folders arbitrarily.
Verify and back up before formatting cards.
Chapter 32. Production Card and Reel Naming System
32.1 Physical card labels: CFE-01, CFE-02
Every reusable production card should have a physical label.
Suggested labels:
CFE-01
CFE-02
CFE-03
If using SD cards:
SD-01
SD-02
The settings card should be labeled differently:
FX6 SETTINGS — DO NOT FORMAT
Do not label a production card and the settings card in a way that can be confused.
Physical card labels help manage:
which card is in the camera,
which card has been offloaded,
which card is safe to format,
which card contains settings,
which card should never be used for production footage.
A physical card label does not replace reel ID.
32.2 Reel IDs: A001, A002, A003
A reel ID identifies a recorded card/offload instance.
Use:
A001
A002
A003
A004
The first recorded card/offload of the project is A001. The next is A002. Continue in order.
Example shoot day:
| Order | Physical Card | Reel ID | Folder |
|---|---|---|---|
| 1 | CFE-01 | A001 | 20260515_NCAR_FX6_A001 |
| 2 | CFE-02 | A002 | 20260515_NCAR_FX6_A002 |
| 3 | CFE-01 reused | A003 | 20260515_NCAR_FX6_A003 |
The reel ID must advance every time a new card/offload set is created.
Do not reuse A001 for a second card just because it is a new day or the same physical card.
32.3 Reused physical card gets a new reel ID
A physical card can be reused. A reel ID should not be reused within a project.
Example:
Morning:
CFE-01 → A001
Afternoon:
CFE-01 reused → A003
This is correct because CFE-01 is the physical card, while A003 is the new recorded media batch.
The safe rule:
Every time a card is recorded and offloaded as a new batch, assign the next reel ID.
Reusing physical card ID in the reel identity would be dangerous because it would not distinguish the morning footage from the afternoon footage.
32.4 Folder format: YYYYMMDD_PROJECT_FX6_A001
Use a short reel folder format:
YYYYMMDD_PROJECT_FX6_A001
Example:
20260515_NCAR_FX6_A001
Breakdown:
| Element | Meaning |
|---|---|
| 20260515 | date |
| NCAR | project code |
| FX6 | camera |
| A001 | reel ID |
This format is short enough to avoid long-path problems but informative enough to identify the footage.
Additional examples:
20260515_NCAR_FX6_A001
20260515_NCAR_FX6_A002
20260516_NCAR_FX6_A003
Do not add long scene descriptions into the reel folder name. Put scene descriptions in the log.
32.5 Examples for actor reel projects
Actor reel project code example:
NCAR
Possible folder structure:
NELSON_ACTOR_REEL_PROJECT/
01_CAMERA_ORIGINALS/
20260515_NCAR_FX6_A001/
20260515_NCAR_FX6_A002/
02_AUDIO_ORIGINALS/
20260515_RODE_TX1/
20260515_RODE_TX2/
03_PROXIES/
04_PROJECT_FILES/
05_EXPORTS/
00_ADMIN/
Clip_Log.xlsx
Example clip IDs:
| Reel | Camera File | Unique Clip ID | Description |
|---|---|---|---|
| A001 | C0001.MXF | A001_C0001 | indoor action scene |
| A001 | C0002.MXF | A001_C0002 | outdoor dialogue scene |
| A001 | C0003.MXF | A001_C0003 | outdoor chase scene |
Actor reel logging should emphasize:
scene type,
performance quality,
focus,
audio quality,
best takes,
emotional beats.
32.6 Examples for feature projects
Feature project code example:
FFT
Possible folder structure:
FEATURE_TEST_PROJECT/
01_CAMERA_ORIGINALS/
20260515_FFT_FX6_A001/
20260515_FFT_FX6_A002/
02_AUDIO_ORIGINALS/
03_PROXIES/
04_PROJECT_FILES/
05_EXPORTS/
00_ADMIN/
Feature logging should include:
scene number,
shot,
take,
angle,
lens/focal length if important,
audio routing,
best/take notes,
continuity notes.
Example log row:
| Unique Clip ID | Scene | Shot | Take | Description | Status |
|---|---|---|---|---|---|
| A001_C0001 | SC01 | MS | T01 | actor enters room | review |
| A001_C0002 | SC01 | CU | T01 | close-up emotional reaction | select |
| A002_C0001 | SC02 | WS | T01 | exterior chase start | review |
Feature work requires more detailed scene/shot/take tracking than a simple actor reel.
32.7 Examples for documentary projects
Documentary project code example:
DOC1
Possible folder structure:
DOCUMENTARY_PROJECT/
01_CAMERA_ORIGINALS/
20260515_DOC1_FX6_A001/
20260515_DOC1_FX6_A002/
02_AUDIO_ORIGINALS/
INTERVIEW_SUBJECT_01/
RODE_TX_BACKUPS/
ROOM_TONE/
03_PROXIES/
04_PROJECT_FILES/
05_EXPORTS/
00_ADMIN/
Interview_Log.xlsx
Clip_Log.xlsx
Documentary logging should emphasize:
subject,
topic,
location,
interview segment,
usable quotes,
b-roll content,
audio conditions,
releases/permissions if relevant.
Example:
| Unique Clip ID | Subject | Topic | Description | Audio |
|---|---|---|---|---|
| A001_C0001 | John | background | interview intro | CH1 lav |
| A001_C0002 | John | event story | emotional answer | CH1 lav / CH3 boom |
| A002_C0001 | B-roll | exterior | house exterior and street | natural sound |
Documentary footage becomes difficult to manage without description because clips may look similar in thumbnails. Log subject matter immediately.
32.8 Production card versus settings card distinction
Production cards and settings cards have different jobs.
| Card Type | Purpose | Label |
|---|---|---|
| Production card | records footage/audio/video | CFE-01, CFE-02 |
| Settings card | stores FX6 settings/LUTs | FX6 SETTINGS — DO NOT FORMAT |
The settings card should not be used casually for production footage because it may be formatted and lose settings files.
Production cards are expected to be:
recorded,
offloaded,
verified,
backed up,
formatted,
reused.
Settings card is expected to be:
protected,
rarely formatted,
used for ALL/User/Scene/LUT files,
backed up to computer/NAS/USB,
kept separate.
Final card rule:
Production cards are expendable after verified backup. The settings card is configuration protection and should not be treated as ordinary media.
Chapter 33. Clip Name Footage Description Log System
33.1 Purpose of the log
The log solves the problem that camera filenames do not describe what is inside each clip.
A clip name such as:
C0001.MXF
does not tell the editor:
scene,
subject,
take,
quality,
audio setup,
whether it is good,
whether it contains an indoor action scene,
whether it contains an outdoor dialogue scene,
whether it contains an outdoor chase scene,
whether there was wind noise,
whether focus was good,
whether the clip was imported,
whether proxies were created.
The log creates the missing meaning.
The log is the bridge between:
| Camera | Human Meaning |
|---|---|
| C0001.MXF | indoor action scene |
| C0002.MXF | outdoor dialogue scene |
| C0003.MXF | outdoor chase scene |
The log also protects against same-name clips from later cards by using the unique clip ID.
33.2 Full Excel log columns
The full Excel/XLSX log should include enough fields for production and post-production. It does not need every field filled on set. Many fields can be completed after offload.
Recommended full log columns:
| Column | Purpose |
|---|---|
| Date | shoot date |
| Project Code | short project ID |
| Physical Card ID | CFE-01, CFE-02 |
| Reel ID | A001, A002 |
| Reel Folder | full folder name |
| Camera | FX6 |
| Camera File Name | C0001.MXF |
| Unique Clip ID | A001_C0001 |
| Scene Code | INT_ACT, EXT_DLG, EXT_CHASE |
| Scene / Subject | plain description |
| Shot Type | WS, MS, CU, OTS, insert |
| Take | T01, T02, etc. |
| Location | room/exterior/site |
| Description | what happens in clip |
| Audio Routing | CH1 TX1, CH2 TX2, CH3 boom |
| RØDE Mode | Split, Merged, one TX |
| Boom Used | yes/no |
| WB | A, B, Preset, Kelvin if known |
| Base ISO | 800 or 12800 |
| EI | value if logged |
| LUT Monitor | s709, 709(800%), other |
| Internal Rec MLUT | Off/On |
| Codec | XAVC-I, XAVC-L |
| Frame Rate | 23.98, 24, 29.97, etc. |
| S&Q | yes/no |
| Focus Note | good, soft, check |
| Exposure Note | good, hot window, dark, etc. |
| Audio Note | clean, wind, TV, rub |
| Status | Select, Review, Hold, Reject |
| Backup 1 | yes/no |
| Backup 2 | yes/no |
| Imported to NLE | yes/no |
| Proxy Created | yes/no |
| Notes | additional comments |
The log is not meant to slow down production. The on-set version can be much shorter. The full version is completed after the card is copied and filenames are confirmed.
33.3 Unique Clip ID formula
The unique clip ID formula is:
Unique Clip ID = Reel ID + "_" + Camera File Stem
Examples:
| Reel ID | Camera File | Unique Clip ID |
|---|---|---|
| A001 | C0001.MXF | A001_C0001 |
| A001 | C0002.MXF | A001_C0002 |
| A001 | C0003.MXF | A001_C0003 |
| A002 | C0001.MXF | A002_C0001 |
| A002 | C0002.MXF | A002_C0002 |
This formula is short, readable, and safe.
It should be used in:
Excel log,
Word log,
paper notes,
Resolve bins,
Premiere bins,
proxy names if applicable,
audio backup notes,
verbal references.
The unique clip ID does not require renaming the original camera file. It is a log/reference identity.
33.4 Scene code system
Scene codes keep the log short while preserving meaning.
Examples:
| Scene Code | Meaning |
|---|---|
| INT_ACT | indoor action scene |
| EXT_DLG | exterior dialogue scene |
| EXT_CHASE | exterior chase scene |
| INT_INT | interior interview |
| EXT_INT | exterior interview |
| BROLL | b-roll |
| ROOM | room tone |
| TEST | technical test |
| SLATE | slate/reference |
| PICKUP | pickup shot |
For the user’s example first three clips:
| Clip | Scene Code |
|---|---|
| Clip 1 indoor action scene | INT_ACT |
| Clip 2 outdoor dialogue scene | EXT_DLG |
| Clip 3 outdoor chase scene | EXT_CHASE |
Scene codes should be short enough to use quickly, but clear enough to understand later.
33.5 Shot-size and angle fields
Shot-size and angle fields help the editor locate coverage.
Common shot-size codes:
| Code | Meaning |
|---|---|
| WS | wide shot |
| MS | medium shot |
| MCU | medium close-up |
| CU | close-up |
| ECU | extreme close-up |
| OTS | over-the-shoulder |
| INS | insert |
| RXN | reaction |
| BROLL | b-roll |
| WAT | walk-and-talk |
Angle fields can include:
| Angle | Meaning |
|---|---|
| A | primary angle |
| B | reverse or second angle |
| INT | interview angle |
| MOV | moving shot |
| LOCK | locked tripod |
| HH | handheld |
| GMBL | gimbal |
Example:
| Unique Clip ID | Scene | Shot | Angle | Description |
|---|---|---|---|---|
| A001_C0001 | INT_ACT | MS | A | actor enters room |
| A001_C0002 | EXT_DLG | OTS | B | outdoor dialogue reverse |
| A001_C0003 | EXT_CHASE | WS | MOV | chase across yard |
33.6 Audio-routing fields
Audio routing must be logged because the project has multiple valid audio configurations.
Possible audio-routing entries:
| Audio Setup | Log Entry |
|---|---|
| One RØDE with safety | CH1 TX1 main / CH2 TX1 safety |
| Two RØDE split | CH1 TX1 / CH2 TX2 |
| One RØDE in split mode | CH1 TX1 / CH2 silent |
| Two RØDE + boom | CH1 TX1 / CH2 TX2 / CH3 boom |
| Merged lavs + boom | CH1 merged lavs / CH2 boom |
| Room tone | CH1 room tone / CH2 safety or as configured |
| Test clip | specify tested routing |
Audio log examples:
| Unique Clip ID | Audio Routing | Audio Note |
|---|---|---|
| A001_C0001 | CH1 TX1 / CH2 TX1 safety | clean |
| A001_C0002 | CH1 TX1 / CH2 TX2 | check wind |
| A001_C0003 | CH1 TX1 / CH2 TX2 / CH3 boom | boom good, lav rustle on TX2 |
This prevents post-production confusion when a clip has silent CH2, merged lavs, or boom on CH3.
33.7 Look/LUT and format fields
The log should record important image format and monitoring details.
Recommended fields:
| Field | Example |
|---|---|
| Color/Gamma | S-Gamut3.Cine/S-Log3 |
| LUT Monitor | s709 |
| Internal Rec MLUT | Off |
| Base ISO | 800 |
| EI | 800 or chosen value |
| WB | A custom, B custom, Preset |
| Codec | XAVC-I |
| Frame Rate | 23.98p |
| Resolution | 4K UHD |
| S&Q | No |
This helps the user know:
what was recorded,
what was only monitored,
what should happen in post,
why one scene may look different from another.
Example:
| Unique Clip ID | Format / Look Note |
|---|---|
| A001_C0001 | S-Log3 clean, s709 monitor, Internal Rec MLUT Off |
| A001_C0002 | S-Log3 clean, s709 monitor, exterior WB B |
| A001_C0003 | S-Log3 clean, possible exposure shift outdoors |
33.8 Quality/select fields
The log should include a field for clip status.
Suggested values:
| Status | Meaning |
|---|---|
| Select | best or likely usable |
| Review | needs review |
| Hold | keep but not first choice |
| Reject | technical or performance problem |
| Audio Issue | audio problem |
| Focus Issue | focus problem |
| Exposure Issue | exposure problem |
| Best | strongest take |
| Test | technical test only |
Do not delete clips on set merely because they seem weak unless there is a very controlled reason. Mark them instead.
Example:
| Unique Clip ID | Status | Note |
|---|---|---|
| A001_C0001 | Review | focus check |
| A001_C0002 | Select | good dialogue |
| A001_C0003 | Hold | wind noise; good action |
The status field speeds up editing.
33.9 Backup/import/proxy status fields
The log can also track post-production progress.
Suggested columns:
| Column | Meaning |
|---|---|
| Backup 1 | first copy made |
| Backup 2 | second backup made |
| Verified | copy verified |
| Imported | imported into Resolve/Premiere |
| Proxy Created | proxy made |
| Audio Checked | channels verified |
| Synced | external/onboard audio synced if needed |
| Reviewed | content reviewed |
| Selects Marked | best portions marked |
Example:
| Unique Clip ID | Backup 1 | Backup 2 | Imported | Proxy | Audio Checked |
|---|---|---|---|---|---|
| A001_C0001 | Yes | Yes | Yes | Yes | Yes |
| A001_C0002 | Yes | Yes | Yes | No | Yes |
| A001_C0003 | Yes | No | No | No | No |
This prevents the user from losing track of what has been safely copied and what is still vulnerable.
33.10 Example row: indoor action scene
The user asked how the first three separate 10-minute clips would be logged. The first clip is an indoor action scene.
Example:
| Field | Entry |
|---|---|
| Date | 2026-05-15 |
| Project Code | NCAR |
| Physical Card ID | CFE-01 |
| Reel ID | A001 |
| Reel Folder | 20260515_NCAR_FX6_A001 |
| Camera | FX6 |
| Camera File Name | C0001.MXF |
| Unique Clip ID | A001_C0001 |
| Scene Code | INT_ACT |
| Scene / Subject | Indoor action scene |
| Shot Type | MS / action coverage |
| Take | T01 |
| Description | Indoor action scene; subject movement/action beat |
| Audio Routing | CH1 TX1 / CH2 TX1 safety or current routing |
| RØDE Mode | as used |
| WB | A custom |
| Base ISO | 800 if lit |
| LUT Monitor | s709 |
| Internal Rec MLUT | Off |
| Codec | XAVC-I or selected codec |
| Frame Rate | 23.98p / 24p if baseline |
| Focus Note | check movement focus |
| Audio Note | check handling/clothing noise |
| Status | Review |
| Notes | first 10-minute clip |
If using permanent split mode with one transmitter, audio routing would instead be:
CH1 TX1 / CH2 silent
If using two transmitters:
CH1 TX1 / CH2 TX2
The log must match actual routing.
33.11 Example row: outdoor dialogue scene
Second clip: outdoor dialogue scene.
Example:
| Field | Entry |
|---|---|
| Date | 2026-05-15 |
| Project Code | NCAR |
| Physical Card ID | CFE-01 |
| Reel ID | A001 |
| Reel Folder | 20260515_NCAR_FX6_A001 |
| Camera | FX6 |
| Camera File Name | C0002.MXF |
| Unique Clip ID | A001_C0002 |
| Scene Code | EXT_DLG |
| Scene / Subject | Outdoor dialogue scene |
| Shot Type | dialogue coverage |
| Take | T01 |
| Description | Outdoor dialogue scene; two-person or solo dialogue depending setup |
| Audio Routing | CH1 TX1 / CH2 TX2 if two people |
| RØDE Mode | Split if two transmitters |
| WB | B custom or daylight preset |
| Base ISO | 800 |
| LUT Monitor | s709 |
| Internal Rec MLUT | Off |
| Codec | XAVC-I or selected codec |
| Frame Rate | 23.98p / 24p if baseline |
| Focus Note | check eye focus / two-person depth |
| Audio Note | check wind and background noise |
| Status | Review or Select |
| Notes | second 10-minute clip |
Outdoor dialogue needs wind/audio notes because a technically good image can be ruined by wind noise.
33.12 Example row: outdoor chase scene
Third clip: outdoor chase scene.
Example:
| Field | Entry |
|---|---|
| Date | 2026-05-15 |
| Project Code | NCAR |
| Physical Card ID | CFE-01 |
| Reel ID | A001 |
| Reel Folder | 20260515_NCAR_FX6_A001 |
| Camera | FX6 |
| Camera File Name | C0003.MXF |
| Unique Clip ID | A001_C0003 |
| Scene Code | EXT_CHASE |
| Scene / Subject | Outdoor chase scene |
| Shot Type | action / movement |
| Take | T01 |
| Description | Outdoor chase scene; movement/action coverage |
| Audio Routing | current routing, likely scratch/lavs if used |
| RØDE Mode | Split/one TX/none as used |
| WB | B custom or daylight |
| Base ISO | 800 |
| LUT Monitor | s709 |
| Internal Rec MLUT | Off |
| Codec | XAVC-I or selected codec |
| Frame Rate | project frame rate or S&Q if planned |
| Focus Note | check motion focus |
| Audio Note | wind/handling/footsteps |
| Status | Review |
| Notes | third 10-minute clip; action may need multiple takes |
If this chase was shot in slow motion, the S&Q field must be marked clearly. If it is normal speed, mark S&Q as No.
33.13 How to use the Word/DOCX log version
The Word/DOCX log version is useful for printing, binder use, simple handwritten field notes, or production paperwork.
Use the Word version when:
working from paper,
handing a simple log sheet to someone else,
recording notes without opening Excel,
printing a field packet,
creating a production binder.
The Word log should include a simplified table:
| Reel | Clip | Scene | Take | Description | Audio | Status | Notes |
|---|
Example Word log entry:
| Reel | Clip | Scene | Take | Description | Audio | Status | Notes |
|---|---|---|---|---|---|---|---|
| A001 | C0001 | INT_ACT | T01 | Indoor action scene | CH1 TX1 / CH2 safety | Review | check focus |
| A001 | C0002 | EXT_DLG | T01 | Outdoor dialogue | CH1 TX1 / CH2 TX2 | Select | wind okay |
| A001 | C0003 | EXT_CHASE | T01 | Outdoor chase | scratch/lav | Review | check motion |
The Word version is easier to print and mark up. The Excel version is better for sorting, filtering, and post-production tracking.
33.14 How to use the paper log version
The paper log is the on-set fast version. It should not require the operator to fill 30 fields while shooting.
Minimal paper log fields:
| Field | Example |
|---|---|
| Reel | A001 |
| Clip | C0001 |
| Scene | INT_ACT |
| Note | indoor action |
| Status | review |
Paper log example:
A001 C0001 INT_ACT indoor action — review focus
A001 C0002 EXT_DLG outdoor dialogue — good audio
A001 C0003 EXT_CHASE chase scene — check motion/focus
The paper log rhythm is:
slate the clip,
shoot the clip,
write one short line,
move on,
complete full Excel log after offload.
Do not make the paper log so complex that it slows production.
Chapter 34. Minimal Field Logging Workflow
34.1 Why not to fill the full spreadsheet on set
The full spreadsheet is valuable, but it is too detailed for real-time shooting. On set, the operator is already managing:
camera,
focus,
exposure,
audio,
RØDE routing,
lighting,
subject performance,
slate,
media,
time,
continuity.
Trying to fill every spreadsheet field during shooting can cause missed moments and mistakes.
The solution is a two-stage logging workflow:
| Stage | Tool | Purpose |
|---|---|---|
| On set | minimal field log | quick identification |
| After offload | full Excel log | complete project record |
On set, capture only what is necessary to identify the clip.
After offload, complete the detailed log using actual filenames and verified card structure.
34.2 Five-field field log method
The minimal field log uses five fields:
| Field | Example |
|---|---|
| Reel | A001 |
| Clip | C0001 |
| Scene | INT_ACT |
| Note | indoor action |
| Status | review |
This is enough to find the clip later.
Example first three clips:
| Reel | Clip | Scene | Note | Status |
|---|---|---|---|---|
| A001 | C0001 | INT_ACT | indoor action scene | review |
| A001 | C0002 | EXT_DLG | outdoor dialogue scene | review/select |
| A001 | C0003 | EXT_CHASE | outdoor chase scene | review |
The five-field method is intentionally simple. It is designed for speed.
34.3 Before-recording notes
Before recording begins, write the fixed information at the top of the field log:
| Header Item | Example |
|---|---|
| Date | 2026-05-15 |
| Project | NCAR |
| Camera | FX6 |
| Physical Card | CFE-01 |
| Reel | A001 |
| Audio Setup | CH1 TX1 / CH2 TX2 |
| Look | S-Log3 clean / s709 monitor |
| WB | A or B |
| Frame Rate | 23.98p |
This prevents rewriting the same information for every clip.
Example field log header:
Date: 2026-05-15
Project: NCAR
Camera: FX6
Card: CFE-01
Reel: A001
Mode: Cine EI / S-Gamut3.Cine-S-Log3
Monitor LUT: s709
Audio: CH1 TX1 / CH2 TX2
Then each clip line can be short.
34.4 During-recording slate
The slate should match the log.
Verbal slate example for first clip:
A001, C0001, indoor action scene, take one.
Second clip:
A001, C0002, outdoor dialogue scene, take one.
Third clip:
A001, C0003, outdoor chase scene, take one.
If two transmitters are used, add:
TX1 on CH1. TX2 on CH2.
If boom is used: CH3 boom (Differs if Tascam DR-60D and NTG5 boom mic is used— See FX6 Audio Setup Field Guide Ver. 1.0)
The slate does not have to be elaborate. It just needs to create a reliable connection between the clip, the log, and the content.
34.5 After-recording quick note
Immediately after recording each clip, write one quick line.
Examples:
A001 C0001 INT_ACT indoor action — review focus
A001 C0002 EXT_DLG outdoor dialogue — good audio
A001 C0003 EXT_CHASE outdoor chase — check motion/focus
Do not write paragraphs on set unless there is a major issue.
Use short status words:
| Status | Meaning |
|---|---|
| good | likely usable |
| review | check later |
| select | strong take |
| hold | keep but not best |
| bad audio | audio problem |
| soft | focus issue |
| wind | wind issue |
| test | technical test |
| room | room tone |
The quick note should help the editor know what to inspect first.
34.6 After-offload spreadsheet completion
After the card is copied and verified, complete the full spreadsheet using actual camera filenames.
Procedure:
Copy full card folder.
Verify copy.
Open the reel folder.
Confirm actual camera filenames.
Match field log notes to filenames.
Create unique clip IDs.
Enter descriptions.
Add audio routing.
Add format/look notes.
Mark backup status.
Mark import/proxy status later.
Example conversion:
Field note:
A001 C0001 INT_ACT indoor action — review focus
Full log row:
| Field | Value |
|---|---|
| Reel ID | A001 |
| Camera File | C0001.MXF |
| Unique Clip ID | A001_C0001 |
| Scene Code | INT_ACT |
| Description | Indoor action scene |
| Status | Review |
| Focus Note | check focus |
The field log is the rough record. The Excel log becomes the master record.
34.7 Practical paper log example
A practical paper log page might look like this:
PROJECT: NCAR
DATE: 2026-05-15
CAMERA: FX6
CARD: CFE-01
REEL: A001
AUDIO: CH1 TX1 / CH2 TX2
LOOK: S-Log3 clean / s709 monitor
CLIP LOG
A001 C0001 INT_ACT indoor action scene review focus
A001 C0002 EXT_DLG outdoor dialogue scene good audio / check wind
A001 C0003 EXT_CHASE outdoor chase scene check motion focus
A001 C0004 ROOM room tone exterior 30 sec
A001 C0005 TEST LUT/audio test do not use final
This is fast, understandable, and easy to transfer into Excel later.
34.8 Field log rhythm: slate it, shoot it, write one short line, move on
The working rhythm is:
Assign reel and clip.
Slate it.
Shoot it.
Write one short line.
Move on.
Complete full log after offload.
Do not overcomplicate the field moment.
The operator should not be forced to choose between logging and directing/shooting. The field log supports the shoot. It does not become the shoot.
The simplest workable rhythm for the first three 10-minute clips is:
Before Clip 1:
Slate: A001, C0001, indoor action scene, take one.
After Clip 1:
Log: A001 C0001 INT_ACT indoor action — review focus/audio
Before Clip 2:
Slate: A001, C0002, outdoor dialogue scene, take one.
After Clip 2:
Log: A001 C0002 EXT_DLG outdoor dialogue — check wind/audio
Before Clip 3:
Slate: A001, C0003, outdoor chase scene, take one.
After Clip 3:
Log: A001 C0003 EXT_CHASE outdoor chase — check motion/focus
Final field logging rule:
Do the minimum on set that guarantees you can reconstruct the full record later.
Chapter 35. Verbal, Paper, Phone, Electronic, and Smart Slate Workflow
35.1 Why slating helps
Slating helps identify what is inside a clip. It creates a visible and/or audible reference that connects the footage to the log.
A slate can identify:
reel,
clip,
scene,
take,
audio routing,
subject,
date,
camera,
sync reference,
room tone,
test clip.
Slating is especially useful because camera filenames do not explain content. When the editor opens C0001.MXF, the slate can immediately say what it is.
For this project, slating supports:
actor reel organization,
two-person RØDE split-track confirmation,
boom channel confirmation,
documentary interview subject tracking,
duplicate filename prevention,
post-production clarity.
The simplest useful slate is a verbal slate.
35.2 Verbal slate method
A verbal slate is the easiest method. The operator or subject says the clip identity at the start of recording.
Basic verbal slate format:
Reel, clip, scene, take.
Example:
A001, C0001, indoor action scene, take one.
For the first three example clips:
A001, C0001, indoor action scene, take one.
A001, C0002, outdoor dialogue scene, take one.
A001, C0003, outdoor chase scene, take one.
For two-transmitter audio, add channel identity:
A001, C0002, outdoor dialogue scene, take one.
TX1 on CH1. TX2 on CH2.
For boom:
A001, C0002, outdoor dialogue scene, take one.
TX1 CH1. TX2 CH2. Boom CH3.
For room tone:
A001, room tone, exterior dialogue location, thirty seconds.
A verbal slate is fast, free, and effective.
35.3 Paper slate method
A paper slate is a visible written slate placed briefly in front of the camera.
A simple paper slate can be:
PROJECT: NCAR
REEL: A001
CLIP: C0001
SCENE: INT_ACT
TAKE: 1
AUDIO: CH1 TX1 / CH2 TX2
Use a paper slate when:
clip identification matters,
audio may not be heard clearly,
the editor needs visual reference,
a documentary subject should not speak slate,
multiple takes are being organized.
Paper slate advantages:
| Advantage | Meaning |
|---|---|
| free | paper/marker only |
| visual | appears in footage |
| flexible | can include anything |
| easy | no electronics |
| useful in post | thumbnail/reference |
Paper slate disadvantages:
| Disadvantage | Mitigation |
|---|---|
| can slow down | keep fields minimal |
| must be updated | assign one person or routine |
| may be forgotten | include in pre-roll ritual |
| not timecode sync | acceptable for current simple workflow |
For current FX6 use, a paper slate plus verbal slate is often enough.
35.4 Phone/tablet slate app method
A phone or tablet slate app can display a cleaner slate than paper. It may show:
project,
scene,
take,
time,
date,
timecode-style display,
production notes.
Use a phone/tablet slate when:
a cleaner visual slate is desired,
paper slate feels too improvised,
the operator wants reusable templates,
the production is small but organized.
Cautions:
| Issue | Warning |
|---|---|
| screen reflections | can glare |
| brightness | may be too bright/dim |
| battery | must be charged |
| notifications | disable |
| timecode claims | may not be true sync unless integrated |
| handling | do not slow shoot |
A phone slate is helpful for visibility but does not automatically solve file naming, logging, or true timecode sync unless connected to a proper timecode system.
35.5 Basic electronic slate
A basic electronic slate is a dedicated slate device that may show scene/take/time visually. It may or may not have real timecode capability.
Basic electronic slates help by:
looking professional,
displaying clear scene/take,
improving visual identification,
reducing messy handwriting,
speeding repeated takes if set up well.
But a basic electronic slate may not:
sync separate audio automatically,
rename camera files,
fill out logs,
prevent duplicate filenames,
organize footage,
replace reel IDs.
A basic electronic slate is useful if it improves discipline. It is not necessary for the current workflow if verbal/paper slate and logs are used correctly.
35.6 Professional timecode smart slate
A professional timecode smart slate displays timecode synchronized with the camera and/or audio recorder. It is common in more advanced productions, especially when using separate audio recorders, multiple cameras, or professional post workflows.
A true smart slate can help sync:
camera footage,
external audio recorder,
multiple cameras,
timecode-based editing workflows.
A professional smart slate becomes more useful when:
using a separate audio recorder,
shooting multi-camera,
working with a crew,
recording long documentary interviews with external audio,
needing timecode sync across devices,
handing footage to a professional editor.
For the current FX6 + RØDE workflow, a true timecode slate is not strictly required unless the production grows beyond camera-recorded audio and simple sync needs.
35.7 What smart slates help with
Smart slates help with synchronization and identification.
They can help:
| Function | Helpfulness |
|---|---|
| Sync separate audio | high if timecode system is correct |
| Sync multiple cameras | high |
| Identify scene/take visually | high |
| Professional workflow | high |
| Long-form documentary | useful |
| Editor handoff | useful |
Smart slates are valuable when the whole production uses timecode correctly.
A smart slate is not useful if only the slate has timecode but the camera and audio devices are not synced to the same timecode system.
35.8 What smart slates do not solve
Smart slates do not solve every file-management problem.
They do not automatically:
rename FX6 files,
prevent C0001.MXF duplication,
create unique clip IDs,
fill out the Excel log,
copy the card,
verify backups,
organize Resolve/Premiere bins,
fix bad audio,
fix wrong channel routing,
replace room tone,
choose best takes.
Even with a smart slate, the project still needs:
reel IDs,
unique clip IDs,
full-card offload,
clip log,
audio routing notes,
backup verification.
Smart slate rule:
Timecode helps sync; it does not replace media discipline.
35.9 Timecode synchronization versus file naming
Timecode and file naming solve different problems.
| System | Solves |
|---|---|
| Timecode | syncs clips/audio by time |
| File naming / reel IDs | identifies media uniquely |
| Clip log | explains content |
| Slate | connects visible/audio reference to log |
| Backup structure | protects files |
A clip can have perfect timecode and still be confusing if it is named C0001.MXF with no reel ID or log.
Likewise, a clip can be well named/logged but require manual sync if timecode is not used.
For the current workflow, the safest combination is:
Reel ID + Unique Clip ID + verbal/paper slate + clip log + full-card backup
Timecode can be added later if the production requires it.
35.10 Why Reel ID + Clip ID remains required
Even if using a slate, the unique clip ID remains required because it is the simplest way to avoid same-name confusion.
Example:
| Camera File | Without Reel | With Reel |
|---|---|---|
| C0001.MXF | ambiguous | A001_C0001 |
| C0001.MXF | ambiguous | A002_C0001 |
| C0001.MXF | ambiguous | A003_C0001 |
A slate may say “Scene 1 Take 1,” but that still does not uniquely identify the media across cards unless the reel/clip system exists.
Therefore, always preserve:
reel ID,
camera filename,
unique clip ID,
log description.
35.11 When a real timecode slate becomes justified
A real timecode slate becomes justified when the workflow grows beyond simple camera-recorded audio.
Consider a real timecode slate when:
| Situation | Reason |
|---|---|
| Separate audio recorder | sync benefit |
| Multiple cameras | sync benefit |
| Long interviews | sync reliability |
| Professional editor handoff | standard workflow |
| Crew production | faster organization |
| Complex documentary | large media volume |
| Music/performance sync | timing accuracy |
For the current FX6 + RØDE camera-audio workflow, the simpler slate/log system is sufficient if used consistently.
If the user later adds an external audio recorder, multi-camera production, or larger crew workflow, timecode becomes more valuable.
35.12 Recommended slate workflow for current FX6 use
The recommended current workflow is:
Verbal slate + optional paper/phone slate + minimal field log + full spreadsheet after offload.
Step-by-step:
Assign reel ID.
Confirm camera file number if practical.
Start recording.
Verbal slate: “A001, C0001, indoor action scene, take one.”
Include audio routing if important: “TX1 CH1, TX2 CH2, boom CH3.”
Shoot the scene.
Stop recording.
Write one-line field log note.
After offload, enter full details into Excel log.
For the first three sample clips:
Slate 1:
A001, C0001, indoor action scene, take one.
Field log:
A001 C0001 INT_ACT indoor action — review focus/audio
Slate 2:
A001, C0002, outdoor dialogue scene, take one. TX1 CH1, TX2 CH2.
Field log:
A001 C0002 EXT_DLG outdoor dialogue — check wind/audio
Slate 3:
A001, C0003, outdoor chase scene, take one.
Field log:
A001 C0003 EXT_CHASE outdoor chase — check motion/focus
Final slate rule:
The slate identifies the clip at the moment of recording. The log preserves the meaning after the shoot. The reel ID prevents duplicate filename confusion.
Chapter 36. FX6 Full-Card Offload Integrity
36.1 Why full card structure matters
The FX6 does not create footage as isolated human-described movie files meant to be dragged loosely into random folders. A camera card can contain a folder structure, video media files, metadata, sidecar information, indexes, thumbnails, and other non-obvious support files that help editing software understand what was recorded.
The safe professional rule is:
Copy the full card structure, not just the visible video files.
A full-card copy preserves the relationship between:
the MXF video/audio files,
card folder hierarchy,
clip metadata,
timecode information,
camera-generated indexing,
potential sidecar data,
thumbnail/management files,
and the editing application’s ability to recognize the media as camera-original footage.
Even if DaVinci Resolve or Adobe Premiere Pro can import an individual MXF file, that does not mean it is best practice to separate that MXF from the rest of the camera card structure.
The production-safe method is to treat each card/offload as a complete reel.
Example:
PROJECT/
01_CAMERA_ORIGINALS/
20260515_NCAR_FX6_A001/
[entire copied card contents]
That reel folder becomes the untouched camera-original master for that card.
The reason this matters is simple: once camera-original structure is damaged, reorganized, partially copied, or mixed with other cards, later post-production problems become harder to diagnose.
A clip may still play, but the workflow becomes less reliable.
Possible problems from not preserving full structure:
| Mistake | Possible Result |
|---|---|
| Drag only MXF files | metadata/context lost |
| Mix multiple cards together | duplicate filenames |
| Delete non-video folders | relinking/import issues |
| Rename camera originals | confusion with metadata/logs |
| Split card by file size | broken reel integrity |
| Copy without verification | hidden corruption risk |
| Format before backup | permanent loss risk |
The full-card copy is the master source. Everything else—proxies, transcodes, edited timelines, exports—comes later.
36.2 Why non-footage files matter
Non-footage files may look unnecessary because they are not the visible video clips. That assumption is dangerous.
A camera card may include files that help with:
clip indexing,
timecode reference,
camera metadata,
file spanning,
thumbnail display,
NLE recognition,
reel identification,
audio/video relationship,
file management.
Even if a particular editor can read the MXF file alone, the safest archival and professional workflow is to keep the camera’s complete original structure intact.
The non-footage files are part of the camera-original package.
Treat the full card as one unit:
CARD CONTENTS = footage + metadata + structure + support files
Do not decide on set that something is unnecessary just because it does not look like video.
A production assistant, editor, or future version of you should be able to open the reel folder and see the card exactly as it was copied.
Correct:
20260515_NCAR_FX6_A001/
[full original card structure]
Incorrect:
FX6 Clips/
C0001.MXF
C0002.MXF
C0003.MXF
The incorrect version may play, but it has lost its card context.
36.3 Why not to drag only MXF files into one folder
Dragging only MXF files into one folder is one of the most dangerous shortcuts in this workflow.
It creates multiple problems at once:
It separates the media from the card structure.
It removes context from related camera files.
It increases duplicate-name risk.
It encourages casual renaming.
It makes reel identity unclear.
It complicates backup verification.
It may confuse future relinking.
It makes it harder to know which card a clip came from.
Bad workflow:
ALL_VIDEO_FILES/
C0001.MXF
C0002.MXF
C0003.MXF
C0001.MXF
C0002.MXF
The second C0001.MXF may overwrite the first, be auto-renamed by the computer, or create confusion. Even if the system prevents overwrite, the editor now has duplicate camera filenames without reel context.
Safe workflow:
01_CAMERA_ORIGINALS/
20260515_NCAR_FX6_A001/
[full card copy]
20260515_NCAR_FX6_A002/
[full card copy]
Then use the log to create unique clip IDs:
| Reel | Camera File | Unique Clip ID |
|---|---|---|
| A001 | C0001.MXF | A001_C0001 |
| A002 | C0001.MXF | A002_C0001 |
The original camera filename remains untouched, but the clip is now uniquely identified.
36.4 Full-card copy procedure
Use this procedure every time a production card is offloaded.
36.4.1 Prepare the destination folder
Create the project folder structure before copying.
Recommended structure:
PROJECT_NAME/
00_ADMIN/
01_CAMERA_ORIGINALS/
02_AUDIO_ORIGINALS/
03_PROXIES/
04_PROJECT_FILES/
05_EXPORTS/
06_DELIVERY/
Inside 01_CAMERA_ORIGINALS, create a reel folder:
20260515_NCAR_FX6_A001
Do not copy footage into a loose desktop folder.
36.4.2 Confirm physical card and reel ID
Before copying, identify:
| Item | Example |
|---|---|
| Physical Card ID | CFE-01 |
| Reel ID | A001 |
| Project Code | NCAR |
| Camera | FX6 |
| Date | 20260515 |
Write this in the log before copying.
Example:
Card: CFE-01
Reel: A001
Destination: 20260515_NCAR_FX6_A001
36.4.3 Copy the full card contents
Open the card at the top level and copy everything into the reel folder.
Correct:
Source card root
↓ copy all contents
Destination reel folder
Destination:
01_CAMERA_ORIGINALS/
20260515_NCAR_FX6_A001/
[entire copied card contents]
Do not open the card, hunt for MXF files, and drag only the video clips.
36.4.4 Do not change the original structure
After copying, do not reorganize the copied card contents.
Do not:
rename camera files,
move MXF files out of their original folders,
delete support folders,
delete small files,
combine folders from multiple cards,
split the reel folder into pieces,
add unrelated files inside the camera-original folder.
The camera-original folder should remain a faithful copy.
If notes are needed, put them in:
00_ADMIN/
or in the clip log, not inside the preserved card structure unless using a separate clearly labeled notes folder outside the original copied contents.
36.4.5 Record the copy in the log
After copying, update the log:
| Field | Entry |
|---|---|
| Physical Card ID | CFE-01 |
| Reel ID | A001 |
| Reel Folder | 20260515_NCAR_FX6_A001 |
| Copy Status | copied |
| Verify Status | pending or complete |
| Backup 1 | yes |
| Backup 2 | pending or yes |
This prevents uncertainty later.
36.5 Verify before formatting
Never format a production card immediately after dragging files without verification.
Formatting should happen only after:
full card copied,
copy verified,
second backup made,
log updated,
footage opened/import-tested if practical,
RØDE onboard recordings copied if used,
user is certain the card is no longer the only copy.
Verification can be done by:
comparing folder size,
checking file count,
spot-opening clips,
importing into Resolve/Premiere,
using copy software with verification,
comparing source/destination properties,
confirming log entries.
Minimum verification:
| Check | Required |
|---|---|
| Destination folder exists | yes |
| Folder size plausible | yes |
| Clips visible | yes |
| First clip opens | yes |
| Last clip opens | yes |
| Log updated | yes |
| Second backup complete | yes before formatting |
If anything is uncertain, do not format.
Card-format rule:
A card is not safe to format until the footage exists in at least two verified places.
36.6 Two-backup rule
The project should use at least two copies before formatting production cards.
Recommended minimum:
| Copy | Location | Purpose |
|---|---|---|
| Copy 1 | main working drive | edit/import |
| Copy 2 | backup drive/NAS/external | protection |
Better:
| Copy | Location |
|---|---|
| Copy 1 | editing drive |
| Copy 2 | local backup drive |
| Copy 3 | NAS or separate archive drive |
The more important the footage, the more conservative the backup should be.
Do not count the camera card as a backup after it is needed for reuse. A card that will be formatted is temporary storage, not long-term protection.
Backup sequence:
Camera card
↓
Copy to working drive
↓
Verify
↓
Copy to backup drive
↓
Verify
↓
Only then consider formatting card
36.7 Folder structure for camera originals
Use this structure:
PROJECT/
01_CAMERA_ORIGINALS/
20260515_NCAR_FX6_A001/
[full card copy]
20260515_NCAR_FX6_A002/
[full card copy]
20260516_NCAR_FX6_A003/
[full card copy]
Do not use:
PROJECT/
FX6_FILES/
C0001.MXF
C0002.MXF
C0003.MXF
The reel folder name carries the key identity. The full card copy preserves integrity.
Recommended naming structure:
YYYYMMDD_PROJECT_CAMERA_REEL
Example:
20260515_NCAR_FX6_A001
Breakdown:
| Element | Meaning |
|---|---|
| 20260515 | shoot date |
| NCAR | project code |
| FX6 | camera |
| A001 | reel ID |
This is short enough to avoid long-path problems while still identifying the footage.
36.8 RØDE onboard recording backup location
If RØDE onboard transmitter recording is used, those files must be copied into the project separately.
Recommended folder:
PROJECT/
02_AUDIO_ORIGINALS/
20260515_RODE_TX1/
20260515_RODE_TX2/
ROOM_TONE/
If the onboard files correspond to specific reels, include reel ID in the naming:
02_AUDIO_ORIGINALS/
A001_RODE_TX1/
A001_RODE_TX2/
Possible file naming:
A001_TX1_BACKUP_001.wav
A001_TX2_BACKUP_001.wav
A001_ROOMTONE_INT_ACT_001.wav
The exact extension depends on the RØDE export format. The important rule is that RØDE backup files should be identifiable.
Log the onboard audio:
| Unique Clip ID | Camera Audio | Onboard Backup |
|---|---|---|
| A001_C0001 | CH1 TX1 | TX1 backup copied |
| A001_C0002 | CH1 TX1 / CH2 TX2 | TX1/TX2 backups copied |
| A001_C0003 | CH1 scratch | no onboard backup |
Do not leave onboard recordings trapped in the transmitter after the card has been offloaded.
36.9 Offload checklist
Use this checklist every time.
36.9.1 Before copying
| Check | Done |
|---|---|
| Card identified physically | CFE-01 / CFE-02 |
| Reel ID assigned | A001 / A002 |
| Destination folder created | yes |
| Enough drive space | yes |
| Backup drive available | yes |
| Card not formatted | yes |
36.9.2 During copying
| Check | Done |
|---|---|
| Full card structure copied | yes |
| Not just MXF files | yes |
| Copied into correct reel folder | yes |
| No mixing cards | yes |
| No renaming originals | yes |
36.9.3 After copying
| Check | Done |
|---|---|
| Folder size checked | yes |
| Clips visible | yes |
| First/last clip opens | yes |
| Log updated | yes |
| Second backup copied | yes |
| Second backup verified | yes |
| RØDE onboard files copied if used | yes |
| Room tone/audio copied | yes |
| Card marked safe/not safe to format | yes |
36.9.4 Before formatting card
| Check | Required |
|---|---|
| Full card copied | yes |
| Copy verified | yes |
| Second backup made | yes |
| Log updated | yes |
| No missing audio backups | yes |
| User confirms card can be erased | yes |
Final offload rule:
No format until full card copied, verified, backed up, and logged.
Chapter 37. Large Card / 400GB Footage Management
37.1 Why not to split camera-original folders into arbitrary 100GB chunks
The user asked what to do when a CFexpress card contains about 400GB of footage and the desire is to split it into 100GB separate folders.
The project rule is:
Do not split the camera-original folder into arbitrary 100GB chunks for editing.
That means do not manually divide the copied card structure like this:
A001_PART_1_100GB/
A001_PART_2_100GB/
A001_PART_3_100GB/
A001_PART_4_100GB/
if doing so separates camera files from related metadata and folder structure.
The risk is that arbitrary splitting breaks the integrity of the camera-original copy. It can separate media from support files, confuse editing software, and make relinking harder.
A camera card is not just a pile of equally independent files. It is a structured media set.
Wrong approach:
Take a 400GB card copy
↓
Manually divide files into 100GB groups
↓
Place metadata/support files in some folders but not others
↓
Create uncertain partial camera-original folders
Correct approach:
Copy the full 400GB card as one complete reel master
↓
Verify and back it up
↓
Use proxies, archive volumes, or future smaller reel discipline
The master copy must remain intact.
37.2 Safer method: split archive volumes
If the problem is transfer, storage, or archive size, use split archive volumes rather than manually breaking camera-original folders.
The concept is:
keep the full card folder intact,
compress/archive that complete folder,
create split archive volumes for storage/transfer,
later reassemble/extract to restore the complete folder.
Example concept:
20260515_NCAR_FX6_A001/
[full card copy]
becomes archive volumes such as:
20260515_NCAR_FX6_A001.zip.001
20260515_NCAR_FX6_A001.zip.002
20260515_NCAR_FX6_A001.zip.003
20260515_NCAR_FX6_A001.zip.004
or similar split-volume format depending on the archive tool.
The key point:
The archive split is a storage/transfer method. It is not a new editing folder structure.
Do not edit directly from arbitrary split archive pieces. Reassemble/extract the complete reel folder first.
Split archive volumes are useful when:
a drive has file-size limitations,
transfer target has size limits,
uploading/downloading in parts,
archiving to media that benefits from chunks,
moving large reels across systems.
But the editor should receive the complete restored reel folder.
37.3 Safer method: future smaller reel offloads
The better long-term solution is to avoid enormous card dumps when practical.
Instead of filling a 400GB card before offload, use smaller reel/offload targets.
Preferred reel/offload size:
80–160GB per reel/offload target
This is not a hard technical limit. It is a practical operating range that makes footage easier to:
copy,
verify,
back up,
import,
archive,
track,
recover,
transfer,
log.
A 400GB card is not automatically wrong, but it is more cumbersome and riskier if something goes wrong during copy, verification, or backup.
Smaller reel advantages:
| Advantage | Benefit |
|---|---|
| Faster copy | less waiting |
| Easier verification | smaller batches |
| Easier backup | manageable size |
| Easier troubleshooting | problems isolated |
| Easier logging | fewer clips per reel |
| Lower loss exposure | one failure affects less footage |
| Easier transfer | smaller folders |
Practical future approach:
Start card/reel A001.
Shoot until about 80–160GB or logical scene break.
Offload full card.
Verify and back up.
Format only after safe.
Continue with next reel ID.
This is especially useful for actor reels, features, and documentary shoot days where natural breaks exist.
37.4 Safer method: proxies/transcodes
If the reason for splitting is editing performance, do not split the camera-original folder. Use proxies or transcodes.
The original remains:
01_CAMERA_ORIGINALS/
20260515_NCAR_FX6_A001/
[full card copy]
The edit-friendly files go into:
03_PROXIES/
A001/
A001_C0001_proxy.mov
A001_C0002_proxy.mov
or the NLE’s managed proxy location.
This preserves original integrity while making editing easier.
Use proxies when:
XAVC-I 4K playback is choppy,
computer struggles,
timeline has multiple layers,
storage bandwidth is limited,
laptop editing is needed,
documentary footage volume is large.
Proxy rule:
Edit with proxies if needed. Preserve camera originals untouched. Grade/export from originals when possible.
Do not reduce capture quality just because the edit system struggles. Capture quality and edit performance are separate problems.
37.5 If splitting is unavoidable
If splitting is absolutely unavoidable, preserve an untouched full-card master first.
Minimum safe sequence:
Copy the full 400GB card to one complete master folder.
Verify the master copy.
Make a second backup of the complete master.
Only then create working split folders if absolutely required.
Clearly label split folders as working copies, not camera originals.
Do not delete the complete master.
Working split folder example:
WORKING_SPLITS_NOT_CAMERA_ORIGINALS/
A001_WORK_PART_01/
A001_WORK_PART_02/
A001_WORK_PART_03/
A001_WORK_PART_04/
Each split should be documented.
But this is not preferred. It is a workaround.
If a working split is made, do not pretend each split is a complete reel. It is a derived working division.
The camera-original master remains:
01_CAMERA_ORIGINALS/
20260515_NCAR_FX6_A001/
[full 400GB original card copy]
37.6 Preserve the full-card master untouched
This is the controlling rule for large cards:
The full-card master must remain untouched.
The full-card master is the source of truth. Do not:
rename its files,
split it,
delete support files,
move clips out of it,
mix other files into it,
edit inside it,
store proxies inside it,
store exports inside it.
Keep it clean.
Example:
01_CAMERA_ORIGINALS/
20260515_NCAR_FX6_A001/
[untouched card copy]
Derived materials go elsewhere:
03_PROXIES/
04_PROJECT_FILES/
05_EXPORTS/
00_ADMIN/
This prevents the editing process from contaminating the original media.
37.7 80–160GB reel/offload target
The project’s practical target for future offloads is:
80–160GB per reel/offload
This is not because the FX6 cannot record more. It is because post-production and backup discipline become easier with smaller, logical reels.
Possible reel-break points:
| Break Point | Reason |
|---|---|
| end of scene | natural log boundary |
| end of location | easier organization |
| lunch break | backup opportunity |
| before major setup change | protects prior work |
| after interview | preserves important segment |
| before risky shoot | reduce loss exposure |
| around 80–160GB | manageable size |
Example day:
| Reel | Content | Approx Size |
|---|---|---|
| A001 | indoor actor scene | 90GB |
| A002 | outdoor dialogue | 120GB |
| A003 | chase/action | 110GB |
| A004 | documentary interview | 140GB |
This creates cleaner post organization than one 400GB reel containing everything.
Final large-card rule:
Large cards are convenient in camera but cumbersome in post. Shoot to logical smaller reels when practical, and never break the full-card original after the fact.
Chapter 38. Resolve and Premiere Import and Audio-Channel Workflow
38.1 Import full reel folders
DaVinci Resolve and Adobe Premiere Pro should import or reference the footage from organized reel folders, not from a flat pile of individual MXF files.
Correct source structure:
PROJECT/
01_CAMERA_ORIGINALS/
20260515_NCAR_FX6_A001/
[full card copy]
20260515_NCAR_FX6_A002/
[full card copy]
In the editing application, create bins that mirror the reel structure.
Example Resolve/Premiere bins:
FX6_CAMERA_ORIGINALS/
A001_20260515_NCAR/
A002_20260515_NCAR/
A003_20260516_NCAR/
This keeps the edit project aligned with the physical media organization.
The import rule is:
Import by reel, organize by reel, then describe by scene.
Do not import all clips into one undifferentiated bin called “Footage” unless the project is extremely small. Even then, reel identity should remain visible.
38.2 Do not flatten media from multiple cards
Flattening means mixing clips from multiple cards/reels into one folder or one bin without reel identity.
Bad structure:
All Clips/
C0001.MXF
C0002.MXF
C0003.MXF
C0001.MXF
Bad bin structure:
Footage/
C0001
C0002
C0003
C0001
This creates confusion because camera filenames repeat.
Good bin structure:
FX6/
A001/
C0001
C0002
C0003
A002/
C0001
C0002
Then use clip names or metadata/log notes to identify:
A001_C0001 indoor action
A001_C0002 outdoor dialogue
A001_C0003 outdoor chase
If the NLE allows clip renaming inside the project without changing the original file, it may be useful to rename the clip display name to the unique clip ID plus short description. But the camera-original file on disk should remain unchanged.
38.3 Resolve bin structure
A clean DaVinci Resolve bin structure can be:
01_FX6_CAMERA_ORIGINALS
A001_20260515_NCAR
A002_20260515_NCAR
A003_20260516_NCAR
02_AUDIO_ORIGINALS
RODE_TX1
RODE_TX2
BOOM
ROOM_TONE
03_SYNCED_ORGANIZED
SC01_INT_ACT
SC02_EXT_DLG
SC03_EXT_CHASE
04_SELECTS
Actor Reel Selects
Dialogue Selects
Chase Selects
05_TIMELINES
Assembly
Rough Cut
Fine Cut
Color Version
Export Version
06_PROXIES_OR_OPTIMIZED
Resolve workflow:
Create project.
Set project frame rate before importing if possible.
Import full reel folders.
Keep reel bins.
Check audio channel interpretation.
Create scene bins or smart bins as needed.
Generate proxies if needed.
Edit with proxies.
Grade from original camera files.
Export final.
Resolve audio check is important for split RØDE channels. Do not assume both channels are centered and separated the way you expect. Inspect the audio channel layout.
38.4 Premiere bin structure
A clean Adobe Premiere Pro bin structure can be:
01_FX6_CAMERA_ORIGINALS
A001_20260515_NCAR
A002_20260515_NCAR
A003_20260516_NCAR
02_AUDIO_ORIGINALS
RODE_TX1
RODE_TX2
BOOM
ROOM_TONE
03_SCENES
INT_ACT
EXT_DLG
EXT_CHASE
04_SELECTS
Best Takes
Audio Review
B-Roll
05_SEQUENCES
Assembly
Rough Cut
Fine Cut
Final
06_PROXIES
Premiere workflow:
Create project in organized project folder.
Import full reel folders or use Media Browser-style workflow where appropriate.
Preserve bin organization by reel.
Check audio channel mapping.
Rename clip labels inside Premiere if useful, without renaming original media files.
Generate/attach proxies if needed.
Edit.
Relink/use full-quality media for export.
Premiere users must be especially careful not to import duplicate C0001.MXF files into confusing bins without reel context.
38.5 Left/right audio inspection
For the RØDE split-track workflow, the receiver sends two transmitters as left/right or separate sides that are broken out to FX6 INPUT1 and INPUT2.
The editor must inspect audio channels, not just look at a single waveform.
In the desired two-transmitter workflow:
| Camera Channel | Source |
|---|---|
| CH1 | TX1 / Person 1 |
| CH2 | TX2 / Person 2 |
In the lower-cost merged-lavs-plus-boom workflow:
| Camera Channel | Source |
|---|---|
| CH1 | merged lavs |
| CH2 | boom |
In the boom adapter workflow:
| Camera Channel | Source |
|---|---|
| CH1 | TX1 |
| CH2 | TX2 |
| CH3 | boom |
Post-production must verify channel identity.
Audio inspection procedure:
Open clip in NLE.
Show individual audio channels/lane view if possible.
Solo or inspect CH1.
Confirm TX1 / Person 1.
Solo or inspect CH2.
Confirm TX2 / Person 2.
If CH3 exists, confirm boom.
Label or note channels.
Correct pan/mono handling as needed.
38.6 Why muting a whole event does not prove channel separation
The user observed that when muting audio for one speaking clip/event, both waveforms darkened and both speakers went silent.
That does not prove whether two people were merged or separated. It may simply mean the whole event/clip was muted.
Muting the entire event silences all audio channels inside that event.
To test separation, do not mute the whole event. Instead, inspect or isolate individual channels.
Correct separation test in post:
| Test | Meaning |
|---|---|
| Solo CH1 | should hear TX1/person 1 only |
| Solo CH2 | should hear TX2/person 2 only |
| Mute CH1 only | CH2 should remain if separated |
| Mute CH2 only | CH1 should remain if separated |
| Compare waveforms | should differ when different people speak |
| Both channels identical | may indicate merged/duplicated audio |
If muting one clip item mutes all its channels, that is normal NLE behavior. It is not a valid split-track test.
38.7 Two-transmitter split audio in post
When the split-track workflow is correct, post should treat CH1 and CH2 as separate mono dialogue tracks.
Post workflow:
Identify CH1 as TX1 / Person 1.
Identify CH2 as TX2 / Person 2.
Center each as mono dialogue.
Adjust levels separately.
Cut or reduce unused mic when the other person speaks if needed.
Reduce clothing rub on one channel without affecting the other when possible.
Balance dialogue.
Apply noise reduction carefully if needed.
Use room tone for smoothing.
Example:
| Situation | Post Action |
|---|---|
| Person 1 speaks | favor CH1 |
| Person 2 speaks | favor CH2 |
| Person 1 clothing rub while Person 2 speaks | lower/mute CH1 if safe |
| Person 2 laughs too loud | reduce CH2 only |
| Both speak over each other | balance CH1/CH2 |
This is the main advantage of split lav recording.
38.8 Boom/lav channel organization
If a boom is recorded, organize it clearly.
Professional three-track organization:
| Channel | Source | Post Use |
|---|---|---|
| CH1 | TX1 lav | close isolated dialogue |
| CH2 | TX2 lav | close isolated dialogue |
| CH3 | boom | natural tone / backup / blend |
| CH4 | unused or second shoe input | only if needed |
In post, the boom may be used:
as primary if it sounds better,
blended under lavs,
as backup where lav rubs,
for natural room perspective,
for dialogue continuity.
Boom/lav decision table:
| Situation | Use |
|---|---|
| Lav clean and natural | lav primary |
| Boom cleaner than lav | boom primary |
| Lav has clothing rub | use boom if clean |
| Boom too roomy | use lav primary |
| Both good | blend subtly |
| Outdoor wind on boom | use lav if protected |
| Lav transmitter dropout | use boom backup |
Label channels immediately. Do not leave the editor guessing which channel is boom.
38.9 Solo CH1 mono centering
When recording one transmitter while staying in permanent split mode, the likely result is:
| Channel | Result |
|---|---|
| CH1 | solo mic |
| CH2 | silent/unused |
In post, CH1 must be treated as mono dialogue and centered.
Do not leave CH1 panned hard left. Center it.
Possible post actions:
| Action | Purpose |
|---|---|
| Interpret CH1 as mono | correct dialogue handling |
| Center pan | voice plays in center |
| Duplicate to both L/R if needed | playback balance |
| Disable silent CH2 | avoid empty track |
| Label as TX1 solo | clarity |
Important:
Duplicating CH1 does not create a safety track. It only makes playback come from both speakers or a centered mono path. If CH1 clipped, the duplicate clips too.
If onboard RØDE recording exists, that is the true backup.
38.10 Post-import checklist
After importing footage into Resolve or Premiere, complete this checklist.
38.10.1 Media organization
| Check | Done |
|---|---|
| Reels imported separately | yes |
| A001/A002 bins created | yes |
| No flat mixed-card bin | yes |
| Unique clip IDs used in log | yes |
| Clip log available | yes |
38.10.2 Audio
| Check | Done |
|---|---|
| CH1 source verified | yes |
| CH2 source verified | yes |
| CH3 boom verified if used | yes |
| Solo/mute channel test done | yes |
| Silent CH2 noted if one-person split | yes |
| Room tone imported | yes |
| RØDE onboard backups imported if used | yes |
38.10.3 Picture
| Check | Done |
|---|---|
| S-Log3 recognized | yes |
| LUT/grade workflow set | yes |
| Frame rate correct | yes |
| S&Q clips identified | yes |
| Exposure checked | yes |
| Focus checked | yes |
38.10.4 Proxies
| Check | Done |
|---|---|
| Proxy need assessed | yes |
| Proxy format chosen | yes |
| Proxies generated/attached | yes |
| Proxy/full-res toggle tested | yes |
| Final export set to originals | yes |
Final import rule:
Do not start editing seriously until reel identity, audio channels, and proxy/original workflow are verified.
Chapter 39. Proxy, Storage, and Archive Planning
39.1 Shoot high-quality originals, edit with proxies if needed
The project’s preferred approach is:
Shoot high-quality originals. Use proxies if the computer struggles.
Do not lower capture quality simply because editing the original footage is heavy. Capture quality and edit performance are separate issues.
Capture should be chosen for:
image quality,
grading flexibility,
actor reel polish,
feature scene quality,
documentary archival value.
Editing performance can be improved with:
proxies,
optimized media,
lower-resolution playback,
fast storage,
simpler timelines,
render cache,
transcodes.
The correct workflow is:
FX6 high-quality original
↓
Full-card backup
↓
Proxy generation if needed
↓
Edit with proxy
↓
Grade/export from original
This protects both quality and practicality.
39.2 XAVC-I 4K file-size planning
The project preserved a practical planning estimate:
XAVC-I 4K at 23.98/24p is roughly about 108GB per hour.
This is an approximate planning number, not a substitute for checking actual camera settings.
Examples:
| Recording Time | Approx XAVC-I 4K Size |
|---|---|
| 10 minutes | about 18GB |
| 30 minutes | about 54GB |
| 1 hour | about 108GB |
| 2 hours | about 216GB |
| 4 hours | about 432GB |
This explains why a 400GB card can fill with several hours of high-quality footage.
XAVC-I is preferred for:
actor reels,
feature scenes,
critical interviews,
material needing grade flexibility.
But it requires more storage and a stronger edit workflow.
39.3 XAVC-L 4K file-size planning
The project preserved a practical planning estimate:
XAVC-L 4K may be roughly about 45GB per hour.
Again, this is approximate and depends on exact settings.
Examples:
| Recording Time | Approx XAVC-L 4K Size |
|---|---|
| 10 minutes | about 7.5GB |
| 30 minutes | about 22.5GB |
| 1 hour | about 45GB |
| 2 hours | about 90GB |
| 4 hours | about 180GB |
XAVC-L is useful for:
long documentary interviews,
events,
high-volume b-roll,
storage-constrained shoots,
long recording sessions.
XAVC-L tradeoff:
| Advantage | Tradeoff |
|---|---|
| smaller files | less edit-friendly than intra-frame |
| longer record time | may be harder on CPU |
| storage efficient | less robust for heavy grading than higher-bitrate intra options |
Choose XAVC-L deliberately, not accidentally.
39.4 80–160GB reel/offload target
The project’s practical offload target is:
80–160GB per reel/offload
This is not a camera limit. It is a workflow target.
Benefits:
| Benefit | Explanation |
|---|---|
| faster copy | less waiting |
| easier verification | fewer files/less data |
| easier backup | manageable chunks |
| safer formatting decision | less footage at risk |
| easier logging | fewer clips per reel |
| cleaner import | smaller bins |
| simpler archive | easier to move/store |
Example with XAVC-I 4K:
| Target | Approx Runtime |
|---|---|
| 80GB | about 44 minutes |
| 108GB | about 1 hour |
| 160GB | about 1.5 hours |
Example with XAVC-L 4K:
| Target | Approx Runtime |
|---|---|
| 80GB | about 1.75 hours |
| 160GB | about 3.5 hours |
For actor reels and features, reel breaks can occur at scene breaks. For documentaries, reel breaks can occur at interview/session breaks.
39.5 1080p DNxHR LB proxies
DNxHR LB is a lightweight proxy option.
Use 1080p DNxHR LB proxies when:
the computer struggles with originals,
the project has many clips,
editing speed matters,
final color/export will use originals,
storage for proxies should remain modest.
Advantages:
| Advantage | Meaning |
|---|---|
| lighter playback | easier editing |
| smaller proxy files | less storage |
| adequate for cutting | good for edit decisions |
| separates edit performance from capture quality | original remains strong |
DNxHR LB is not intended as the final master quality. It is for editing performance.
39.6 1080p DNxHR SQ proxies
DNxHR SQ proxies are higher-quality than LB and may look better during editing.
Use 1080p DNxHR SQ when:
the computer can handle slightly larger proxies,
visual quality during editing matters,
judging focus/framing during edit is important,
storage is available.
Comparison:
| Proxy Type | Use |
|---|---|
| DNxHR LB | fastest/lightest practical editing |
| DNxHR SQ | better-looking editing proxy |
| 720p proxy | weak system or huge project |
For actor reels, DNxHR SQ may be useful if the user wants a cleaner editing view. For long documentaries, LB or 720p may be more practical.
39.7 720p proxy use cases
720p proxies are useful when the editing computer is weak or the project is large.
Use 720p proxies when:
playback is still choppy with 1080p proxies,
laptop editing is required,
documentary footage volume is large,
edit decisions matter more than judging final detail,
storage is tight.
Caution:
Do not judge final focus, grain, or fine image quality only from 720p proxies. Use originals for final review, grading, and export.
720p proxy rule:
Use 720p for speed, not final image judgment.
39.8 Resolve proxy workflow
DaVinci Resolve proxy workflow concept:
Import full reel folders.
Preserve bins by reel.
Confirm project frame rate.
Select clips.
Generate proxy media.
Choose proxy format/resolution.
Store proxies in organized proxy folder or Resolve-managed location.
Enable proxy usage for editing.
Edit smoothly.
Disable/bypass proxies or ensure originals are used for final grade/export.
Confirm final export references original high-quality media.
Suggested proxy folder:
PROJECT/
03_PROXIES/
RESOLVE/
A001/
A002/
Resolve proxy rules:
| Rule | Reason |
|---|---|
| Keep originals untouched | source protection |
| Generate proxies from organized reels | avoid confusion |
| Use proxy toggle | edit speed |
| Grade originals | quality |
| Export originals | final quality |
If proxies go offline, originals should still remain organized and intact.
39.9 Premiere proxy workflow
Adobe Premiere Pro proxy workflow concept:
Create organized Premiere project.
Import full reel folders or use a media-browser style import.
Preserve bins by reel.
Create proxies using ingest/proxy workflow or manually.
Attach proxies to original clips.
Use Toggle Proxies button while editing.
Edit with proxies.
Ensure full-resolution media is used for export.
Keep proxy files organized and backed up as needed.
Suggested structure:
PROJECT/
03_PROXIES/
PREMIERE/
A001/
A002/
Premiere proxy rules:
| Rule | Reason |
|---|---|
| Do not rename originals | relink protection |
| Use reel bins | duplicate filename protection |
| Attach proxies properly | edit speed |
| Check audio channel mapping | split tracks |
| Export from originals | final quality |
If Premiere shows offline media, reel-folder organization makes relinking easier.
39.10 Storage planning per 1TB originals
A project with 1TB of camera originals needs more than 1TB of total storage.
Plan for:
| Storage Type | Approx Need |
|---|---|
| Camera originals | 1TB |
| Backup copy | 1TB |
| Proxies | variable, possibly 100–300GB+ |
| Project files/cache | variable |
| Exports | variable |
| Safety overhead | 20–30% free space preferred |
A practical planning estimate:
1TB camera originals
+ 1TB backup
+ 0.2TB proxies/cache/exports
= at least 2.2TB practical working need
Better to plan more.
Do not fill drives to the edge. Drives with very little free space can become slow, unstable, or difficult to manage.
Storage planning rule:
For every 1TB of originals, expect to need at least 2TB+ total storage when backups and working files are included.
39.11 Project folder structure
Use this structure:
PROJECT_NAME/
00_ADMIN/
Clip_Log.xlsx
Paper_Log.pdf
Notes/
Releases/
Settings_Notes/
01_CAMERA_ORIGINALS/
20260515_NCAR_FX6_A001/
20260515_NCAR_FX6_A002/
02_AUDIO_ORIGINALS/
RODE_TX1/
RODE_TX2/
BOOM/
ROOM_TONE/
03_PROXIES/
RESOLVE/
PREMIERE/
04_PROJECT_FILES/
Resolve/
Premiere/
05_EXPORTS/
Review/
Final/
06_DELIVERY/
Master/
Social/
Archive/
This separates:
originals,
audio,
proxies,
project files,
exports,
delivery.
Do not mix exports, proxies, and originals in the same folder.
39.12 Backup/archive rules
Use these backup/archive rules:
39.12.1 Originals
Copy full card structure.
Preserve untouched.
Store by reel.
Back up before formatting.
Do not rename original media files.
39.12.2 Audio originals
Copy RØDE onboard files.
Copy boom/external audio.
Copy room tone.
Label by reel/subject/source.
Back up with project.
39.12.3 Project files
Save Resolve/Premiere project files in 04_PROJECT_FILES.
Create versioned project saves.
Back up project files separately.
Example:
NCAR_Edit_v01
NCAR_Edit_v02
NCAR_Edit_v03
39.12.4 Proxies
Proxies can be regenerated if originals exist.
They are less critical than originals.
Still keep them if they save time.
39.12.5 Exports
Store review exports separately from final exports.
Do not confuse review files with masters.
39.12.6 Archive
Final archive should include:
| Item | Include |
|---|---|
| Camera originals | yes |
| Audio originals | yes |
| Clip log | yes |
| Project files | yes |
| Final exports | yes |
| LUT/settings notes | yes |
| Proxies | optional |
| Cache/render files | usually optional |
Final storage rule:
Originals and logs are irreplaceable. Proxies and cache are replaceable. Protect accordingly.
Chapter 40. Created Deliverables and Templates
40.1 Excel/XLSX Clip Name Footage Description Log
The project created an Excel/XLSX-style Clip Name Footage Description Log concept to track clips from production through post.
The Excel version is the master sortable/filterable log. It is better than paper for:
sorting by reel,
filtering by scene,
tracking selects,
tracking backup status,
tracking proxy status,
tracking import status,
recording detailed notes,
managing large projects.
The Excel log should support the whole workflow:
shoot → slate → field note → full card offload → spreadsheet completion → NLE import → proxy tracking → edit status
The Excel log is not just a list of filenames. It is the project’s media intelligence sheet.
Core Excel columns:
| Column | Purpose |
|---|---|
| Date | shoot date |
| Project Code | short project ID |
| Physical Card ID | reusable card |
| Reel ID | A001 etc. |
| Reel Folder | full folder name |
| Camera File | original filename |
| Unique Clip ID | A001_C0001 |
| Scene Code | INT_ACT etc. |
| Description | what is in the clip |
| Shot Type | WS/MS/CU/etc. |
| Take | take number |
| Audio Routing | CH1/CH2/CH3 Or Other Boom sources |
| Look/Format | S-Log3, LUT, codec |
| Quality Note | focus/exposure/audio |
| Status | select/review/hold/reject |
| Backup | copied/verified |
| Import | NLE status |
| Proxy | proxy status |
| Notes | additional details |
The Excel log is completed after offload because the actual camera filenames must be verified.
40.2 Word/DOCX Clip Name Footage Description Log
The Word/DOCX version is the printable field/document version.
It is useful for:
production binders,
handwritten notes,
simple clip tracking,
non-spreadsheet users,
quick review sheets,
sharing with someone who does not use Excel.
The Word version should not try to do everything the Excel version does. Its purpose is readability and field usability.
Recommended Word log table:
| Reel | Clip | Unique Clip ID | Scene | Take | Description | Audio | Status | Notes |
|---|
Example:
| Reel | Clip | Unique Clip ID | Scene | Take | Description | Audio | Status | Notes |
|---|---|---|---|---|---|---|---|---|
| A001 | C0001 | A001_C0001 | INT_ACT | T01 | indoor action scene | CH1 TX1 / CH2 safety | Review | check focus |
| A001 | C0002 | A001_C0002 | EXT_DLG | T01 | outdoor dialogue | CH1 TX1 / CH2 TX2 | Select | wind okay |
| A001 | C0003 | A001_C0003 | EXT_CHASE | T01 | outdoor chase | scratch/lavs | Review | check motion |
The Word version is ideal for printing and marking up on set.
40.3 Clip Log sheet
The Clip Log sheet is the main working sheet in the Excel workbook.
It should include the most complete set of clip-level fields.
Recommended Clip Log structure:
| Field Group | Columns |
|---|---|
| Identification | Date, Project Code, Reel ID, Physical Card ID, Camera |
| File Identity | Reel Folder, Camera File, Unique Clip ID |
| Scene Info | Scene Code, Scene/Subject, Shot Type, Take, Location |
| Description | Clip description, performance/action notes |
| Audio | Audio routing, RØDE mode, boom used, audio notes |
| Camera | Base ISO, EI, WB, LUT, codec, frame rate |
| Quality | focus note, exposure note, audio note |
| Post | status, imported, proxy, synced, backup |
| Notes | freeform comments |
The Clip Log sheet should be the master clip record.
For the first three example clips:
| Unique Clip ID | Scene Code | Description |
|---|---|---|
| A001_C0001 | INT_ACT | indoor action scene |
| A001_C0002 | EXT_DLG | outdoor dialogue scene |
| A001_C0003 | EXT_CHASE | outdoor chase scene |
Those descriptions can be expanded after review.
40.4 Project Setup sheet
The Project Setup sheet records the rules for the project so the log remains consistent.
It should include:
| Setup Item | Example |
|---|---|
| Project Name | Nelson Actor Reel |
| Project Code | NCAR |
| Camera | FX6 |
| Default Mode | Cine EI |
| Default Color/Gamma | S-Gamut3.Cine/S-Log3 |
| Default LUT Monitor | s709 |
| Internal Rec MLUT | Off |
| Default Codec | XAVC-I |
| Default Frame Rate | 23.98p / 24p |
| Reel Format | A001, A002 |
| Unique Clip Formula | Reel + Camera File Stem |
| Production Card IDs | CFE-01, CFE-02 |
| Settings Card Label | FX6 SETTINGS — DO NOT FORMAT |
The Project Setup sheet prevents the user from reinventing rules during a shoot.
It also documents the baseline for future reopening of the project.
40.5 Code Lists sheet
The Code Lists sheet contains standardized dropdown values or reference values.
Suggested code lists:
40.5.1 Scene codes
| Code | Meaning |
|---|---|
| INT_ACT | indoor action |
| EXT_DLG | exterior dialogue |
| EXT_CHASE | exterior chase |
| INT_INT | interior interview |
| EXT_INT | exterior interview |
| BROLL | b-roll |
| ROOM | room tone |
| TEST | test clip |
40.5.2 Shot type codes
| Code | Meaning |
|---|---|
| WS | wide shot |
| MS | medium shot |
| MCU | medium close-up |
| CU | close-up |
| ECU | extreme close-up |
| OTS | over-the-shoulder |
| INS | insert |
| RXN | reaction |
| MOV | moving shot |
40.5.3 Audio routing codes
| Code | Meaning |
|---|---|
| CH1_TX1_CH2_SAFETY | one transmitter with safety |
| CH1_TX1_CH2_TX2 | two-transmitter split |
| CH1_TX1_CH2_SILENT | one transmitter in split mode |
| CH1_TX1_CH2_TX2_CH3_BOOM | two lavs plus boom |
| CH1_MERGED_CH2_BOOM | merged lavs plus boom |
| SCRATCH | scratch/reference audio |
40.5.4 Status codes
| Code | Meaning |
|---|---|
| Select | strong usable clip |
| Review | needs review |
| Hold | keep but not priority |
| Reject | likely unusable |
| Audio Issue | audio problem |
| Focus Issue | focus problem |
| Exposure Issue | exposure problem |
| Test | technical test only |
The Code Lists sheet keeps the log clean and consistent.
40.6 Paper Log sheet
The Paper Log sheet is the printable minimal field log.
It should not contain every Excel field. It should be simple enough to use while shooting.
Recommended Paper Log:
PROJECT:
DATE:
CAMERA:
PHYSICAL CARD:
REEL:
AUDIO SETUP:
LOOK / LUT:
FRAME RATE:
CLIP LOG
Reel | Clip | Scene | Take | Short Note | Status
Example filled paper log:
| Reel | Clip | Scene | Take | Short Note | Status |
|---|---|---|---|---|---|
| A001 | C0001 | INT_ACT | T01 | indoor action | review focus |
| A001 | C0002 | EXT_DLG | T01 | outdoor dialogue | check wind |
| A001 | C0003 | EXT_CHASE | T01 | outdoor chase | check motion |
The paper log should be fast enough that the operator actually uses it.
Field rule:
One short line per clip is better than a perfect spreadsheet that never gets filled out.
40.7 How to use these templates in the field
Use the templates in a two-stage workflow.
40.7.1 Before the shoot
Prepare:
Project code.
Physical card labels.
Reel ID starting point.
Printed paper log.
Excel log workbook.
Word log if desired.
Code lists.
Audio routing plan.
File structure on storage drive.
Before rolling first clip, fill the paper log header:
Project: NCAR
Date: 2026-05-15
Camera: FX6
Card: CFE-01
Reel: A001
Audio: CH1 TX1 / CH2 TX2
Look: S-Log3 clean / s709 monitor
40.7.2 During the shoot
For each clip:
Slate verbally or visually.
Record the take.
Write one short field log line.
Mark obvious problems.
Do not fill every detailed spreadsheet column on set.
Example:
A001 C0001 INT_ACT indoor action — review focus
A001 C0002 EXT_DLG outdoor dialogue — check wind
A001 C0003 EXT_CHASE outdoor chase — good movement / check audio
40.7.3 After the shoot
After offload:
Copy full card.
Verify.
Make backup.
Open actual camera file list.
Transfer paper log notes into Excel.
Create unique clip IDs.
Add audio/camera/look fields.
Add backup/import/proxy status.
Update Word log if needed.
The field log becomes the memory bridge. The Excel log becomes the master record.
40.8 How to use these templates in post
In post-production, the templates help organize the edit.
40.8.1 Resolve/Premiere import
Use the log to create bins:
A001
A002
INT_ACT
EXT_DLG
EXT_CHASE
SELECTS
40.8.2 Audio inspection
Use the Audio Routing column to know what should be on each channel.
Example:
| Audio Routing | Post Check |
|---|---|
| CH1 TX1 / CH2 TX2 | inspect separate channels |
| CH1 TX1 / CH2 safety | CH2 is lower duplicate |
| CH1 TX1 / CH2 silent | center CH1 mono |
| CH1 TX1 / CH2 TX2 / CH3 boom | label boom track |
| CH1 merged lavs / CH2 boom | do not expect separate lavs |
40.8.3 Selects
Use the Status column to find:
Select,
Review,
Hold,
Audio Issue,
Focus Issue,
Exposure Issue.
This speeds up editing because the user does not have to watch every clip blindly at first.
40.8.4 Proxy tracking
Use Proxy Created to know which clips are ready for smooth editing.
| Unique Clip ID | Proxy Created |
|---|---|
| A001_C0001 | Yes |
| A001_C0002 | Yes |
| A001_C0003 | No |
40.8.5 Backup tracking
Use backup fields to make sure nothing is at risk.
| Reel | Backup 1 | Backup 2 | Verified |
|---|---|---|---|
| A001 | Yes | Yes | Yes |
| A002 | Yes | No | Pending |
Do not format or delete anything until backup status is complete.
40.8.6 Final project archive
At the end of the project, archive:
full camera originals,
RØDE onboard audio,
boom/external audio,
room tone,
Excel log,
Word log,
project files,
final exports,
LUT/settings notes,
relevant proxy files if desired.
Final deliverable/template rule:
The log is not paperwork for its own sake. It is the map that keeps footage, sound, scenes, cards, and post-production from becoming confused.
PART VIII — APPENDICES AND QUICK REFERENCES
Appendix A. One-Transmitter RØDE Quick Reference
A.1 Final settings table
Use this setup when recording one person with one RØDE transmitter and one RØDE receiver, with the FX6 recording the same microphone to CH1 and CH2 at two different levels.
| Item | Final Setting |
|---|---|
| RØDE transmitter | Worn by subject |
| RØDE receiver | Mounted on FX6 shoe if desired |
| Actual audio connection | RØDE receiver 3.5 mm output to FX6 INPUT1 |
| FX6 INPUT1 physical switch | MIC |
| FX6 INPUT2 physical switch | Not used for this baseline |
| Phantom power | Off / do not use MIC+48V |
| RØDE receiver output gain | 0 dB |
| FX6 audio Reference | -30 dB |
| CH1 Source | INPUT1 MIC |
| CH2 Source | INPUT1 MIC |
| CH1 dial | 7 |
| CH2 dial | 5 |
| CH1 role | Main dialogue |
| CH2 role | Lower safety copy |
| Headphones | MDR-7506 into FX6 headphone jack |
| Normal speech target | -12 to -18 dB |
| Loud speech/shout target | around -10 dB |
| Clipping limit | never 0/red |
Correct signal path:
RØDE transmitter
↓ wireless
RØDE receiver
↓ 3.5 mm output
3.5 mm-to-XLR cable/adapter
↓
FX6 INPUT1 set to MIC
↓
CH1 INPUT1 main
CH2 INPUT1 lower safety
Do not confuse physical mounting with audio routing. The RØDE receiver can sit on the FX6 shoe, but the shoe is only a mounting location in this setup. The audio still requires the 3.5 mm cable into the FX6 audio input.
A.2 Safety-track workflow
The one-transmitter safety-track workflow records the same mic twice:
| Channel | Signal | Level | Purpose |
|---|---|---|---|
| CH1 | RØDE via INPUT1 | higher | main dialogue |
| CH2 | same RØDE via INPUT1 | lower | safety backup |
Use this workflow when:
only one person is speaking,
the scene may include shouting or loud emotional moments,
you want a lower backup inside the FX6,
you do not need a second transmitter on CH2.
The safety track is useful only if CH2 is actually lower than CH1. The final proven level relationship is:
CH1 dial 7 = main
CH2 dial 5 = lower safety
If CH1 clips during a shout, CH2 may still be usable.
Do not use this setup for two separate people unless both people are intentionally being recorded together into one input. For two separate RØDE transmitters, use the split-track workflow instead.
A.3 Target meter levels
Use the FX6 meters to verify recorded level.
| Voice / Sound | Target |
|---|---|
| Normal speaking voice | -12 to -18 dB |
| Strong/loud speech | around -12 to -10 dB |
| Shout/laugh | around -10 dB if possible |
| Red / 0 dB | avoid; clipping danger |
Meter rule:
Normal voice: healthy but not hot
Loud voice: still below clipping
0/red: never the target
Headphone loudness is not recording level. If the headphones are too loud, reduce FX6 headphone volume. Do not lower the recording level unless the meters are too hot.
A.4 Troubleshooting checklist
| Problem | Likely Cause | Correction |
|---|---|---|
| No meter movement | INPUT1 not set to MIC | Move INPUT1 switch to center MIC |
| Weak signal | RØDE output too low | Raise RØDE receiver output to 0 dB |
| FX6 dial near 10 but still weak | gain staging wrong | fix RØDE output first; consider -40 dB Reference only after retest |
| Audio clips | CH1 too high / RØDE too hot | lower CH1 dial or reduce RØDE output |
| CH2 not safer | CH2 dial too high | set CH2 around 5 |
| Headphones loud | headphone volume high | lower FX6 headphone volume |
| TV audible | room bleed | turn off TV, close doors, move subject |
| Breathing loud | mic too close to breath path | move mic 6–8 inches below chin |
| Clothing rub | transmitter/lav touching fabric | reposition mic and secure clothing |
| Noise remains after lowering headphones | noise is recorded by mic | fix room/noise source; do not just lower headphone volume |
One-transmitter pre-roll callout:
RØDE 0 dB.
INPUT1 MIC.
Reference -30.
CH1 INPUT1 dial 7.
CH2 INPUT1 dial 5.
Headphones clean.
Normal voice -12 to -18.
Shout below red.
Appendix B. Two-Transmitter RØDE Split Quick Reference
B.1 Receiver Split mode
Use RØDE Split mode when two people are each wearing one RØDE transmitter and you want each person recorded separately.
Correct objective:
TX1 → FX6 CH1
TX2 → FX6 CH2
Do not use Merged mode if the goal is separate tracks.
| RØDE Mode | Result | Use |
|---|---|---|
| Merged | TX1 and TX2 combined | simple mix, no separate control |
| Split | TX1 and TX2 separated left/right | professional two-person workflow |
Split-mode test:
| Test | Correct Result |
|---|---|
| Speak into TX1 only | CH1 moves; CH2 mostly quiet |
| Speak into TX2 only | CH2 moves; CH1 mostly quiet |
| Speak into both | CH1 and CH2 move independently |
If one transmitter makes both channels move equally, stop and troubleshoot before recording.
B.2 Cable Techniques routing
Use the Cable Techniques stereo breakout cable:
3.5 mm TRS stereo male
↓
dual XLR-3M male
Project cable type:
Cable Techniques CT-GO2-YX3M-15
RØDE Wireless GO II-style “Y” to 2 XLR-3M low-profile cable
Required function:
| Cable End | Function |
|---|---|
| 3.5 mm TRS male | plugs into RØDE receiver output |
| Red XLR-3M | left / CH1 side |
| Blue XLR-3M | right / CH2 side |
Do not substitute:
ordinary headphone splitter,
generic Y cable,
single 3.5 mm-to-XLR,
dual XLR female cable,
RØDE SC11 for this FX6 XLR split task,
passive adapter chain that does not preserve left/right split correctly.
B.3 Blue XLR / Red XLR table
| Cable Plug | FX6 Input | FX6 Channel |
|---|---|---|
| Red XLR | INPUT1 | CH1 |
| Blue XLR | INPUT2 | CH2 |
Field phrase:
Red to INPUT1.
Blue to INPUT2.
CH1 equals INPUT1.
CH2 equals INPUT2.
If people are reversed in post, either swap transmitter assignments, swap XLRs, or document the actual channel layout. The important point is that TX1 and TX2 are separated.
B.4 CH1/CH2 setup
FX6 physical input switches:
| Input | Setting |
|---|---|
| INPUT1 | MIC |
| INPUT2 | MIC |
Phantom power:
| Input | Phantom Power |
|---|---|
| INPUT1 receiving RØDE | Off / never MIC+48V |
| INPUT2 receiving RØDE | Off / never MIC+48V |
FX6 channel routing:
| Channel | Input Select |
|---|---|
| CH1 | INPUT1 |
| CH2 | INPUT2 |
Reference:
| Input | MIC Reference |
|---|---|
| INPUT1 | -30 dB |
| INPUT2 | -30 dB |
Starting dials:
| Channel | Starting Dial |
|---|---|
| CH1 | 7 |
| CH2 | 7 |
In split mode, CH2 is not safety. CH2 is Person 2’s main audio. Adjust CH1 and CH2 separately for each person’s real voice level.
B.5 TX1/TX2 test
Perform this test every time the two-transmitter system is installed.
TX1 test
TX1 on.
TX2 silent or off.
Speak into TX1.
Confirm CH1 moves.
Confirm CH2 stays mostly quiet.
TX2 test
TX2 on.
TX1 silent.
Speak into TX2.
Confirm CH2 moves.
Confirm CH1 stays mostly quiet.
Both test
Person 1 speaks.
Person 2 speaks.
Both speak briefly.
Confirm independent channel movement.
Listen with headphones.
Record short test.
Play back before serious recording.
Split-system pre-roll callout:
RØDE Split.
Cable Techniques installed.
Red INPUT1.
Blue INPUT2.
INPUT1 MIC.
INPUT2 MIC.
CH1 INPUT1.
CH2 INPUT2.
Reference -30 both.
TX1 only moves CH1.
TX2 only moves CH2.
Headphones clean.
Appendix C. Boom Mic Quick Reference
C.1 Three-track layout (No! See FX6 Audio Setup Field Guide Ver. 1.0)
Use the professional three-track layout when recording two RØDE transmitters plus a boom mic. (No…Field Guide Setup differs and is already tested and setup—ignore Audio pgs 353-355)
| FX6 Channel | Source | Physical Path |
|---|---|---|
| CH1 | RØDE TX1 | Red XLR to FX6 INPUT1 |
| CH2 | RØDE TX2 | Blue XLR to FX6 INPUT2 |
| CH3 | Boom mic | Sony XLR-K3M/K2M via Shoe CH1 |
| CH4 | Off or optional Shoe CH2 | unused unless needed |
Signal layout:
RØDE receiver in Split mode
↓ Cable Techniques cable
Red XLR → FX6 INPUT1 → CH1
Blue XLR → FX6 INPUT2 → CH2
Boom mic
↓ XLR cable
Sony XLR-K3M/K2M INPUT1
↓ Multi Interface Shoe
FX6 CH3 / Shoe CH1
This preserves:
isolated lav 1,
isolated lav 2,
separate boom.
C.2 XLR-K3M/K2M mounting
The Sony XLR-K3M or XLR-K2M plugs into the FX6 Multi Interface Shoe.
It does not plug into:
FX6 INPUT1,
FX6 INPUT2,
the RØDE receiver,
the Cable Techniques cable.
Physical setup:
| Device | Connection |
|---|---|
| RØDE receiver | 3.5 mm output to Cable Techniques cable |
| Red XLR | FX6 INPUT1 |
| Blue XLR | FX6 INPUT2 |
| XLR-K3M/K2M | FX6 Multi Interface Shoe |
| Boom mic | Adapter INPUT1 |
Boom adapter check:
Adapter seated.
Boom in adapter INPUT1.
CH3 receives Shoe CH1.
CH4 off unless used.
C.3 CH3/Shoe CH1 routing
FX6 channel concept:
| FX6 Channel | Input Select |
|---|---|
| CH1 | INPUT1 |
| CH2 | INPUT2 |
| CH3 | Shoe CH1 |
| CH4 | Off or Shoe CH2 |
Boom test:
Speak into TX1.
CH1 should move.
Speak into TX2.
CH2 should move.
Speak into boom.
CH3 should move.
CH4 should remain off/unused unless deliberately configured.
Record test.
Play back all channels.
C.4 Phantom-power decision table
Phantom power is source-specific.
| Source | Correct Input Setting |
|---|---|
| RØDE receiver | MIC; never MIC+48V |
| Phantom-powered shotgun/condenser boom | MIC+48V on boom adapter input only |
| Battery-powered boom mic | MIC |
| Dynamic mic | MIC |
| External mixer line feed | LINE |
Absolute rule:
Never send phantom power to the RØDE receiver.
Boom-specific rule:
Use phantom power only if the boom microphone requires it,
and only on the input connected to that boom.
C.5 Pro versus lower-cost setup comparison
| Need | Setup | Result |
|---|---|---|
| One person with safety | CH1 INPUT1 / CH2 INPUT1 | main + lower safety |
| Two separate RØDE lavs | RØDE Split + Cable Techniques | CH1 TX1 / CH2 TX2 |
| Two lavs plus separate boom | Add XLR-K3M/K2M | CH1 TX1 / CH2 TX2 / CH3 boom |
| Two lavs plus boom without adapter | RØDE Merged + boom INPUT2 | CH1 merged lavs / CH2 boom |
| Maximum post control | Pro three-track | isolated lavs and boom |
| Lower gear complexity | Merged lavs plus boom | lavs baked together |
Boom pre-roll callout:
CH1 TX1.
CH2 TX2.
CH3 boom.
No phantom to RØDE.
Boom phantom only if required.
Headphones clean.
Test all three channels.
Appendix D. Cine EI Indoor Quick Reference
D.1 Base ISO
Indoor Base ISO decision:
| Interior Condition | Base ISO |
|---|---|
| Lit actor reel | 800 |
| Lit feature dialogue | 800 |
| Controlled interview with key light | 800 |
| Window daylight interior | 800 |
| Dim documentary room | 12800 may be needed |
| Night practical-only scene | 12800 may be needed |
| Scene too dark but lighting can be added | Add light and use 800 if practical |
| Scene too dark and light cannot be added | 12800 |
Indoor rule:
Use Base ISO 800 when you can control or add light.
Use 12800 only when the scene genuinely needs low-light capability.
Check ND first. If the room is dark and ND is accidentally On, clear ND before changing base ISO.
D.2 Shutter
Indoor cinematic shutter:
| Frame Rate | Shutter |
|---|---|
| 24p | 1/48 or 180° |
| 30p | 1/60 or 180° |
| 60p | 1/120 or 180° |
Indoor rule:
Do not change shutter to fix brightness unless solving flicker or making deliberate motion choice.
If lighting flicker appears, test shutter adjustment deliberately.
D.3 Aperture
Indoor aperture guide:
| Shot | Aperture |
|---|---|
| Solo actor close-up | f/2.8–f/4 |
| Dramatic close-up | f/2.8–f/4 |
| Interview | around f/4 |
| Two-person dialogue | f/4–f/5.6 |
| Walk/movement | f/4–f/5.6 |
| Wide/action | f/5.6 if focus reliability matters |
Aperture rule:
Choose aperture for depth, emotion, and focus.
Do not choose shallow aperture if the eyes will go soft.
D.4 ND
Indoor ND starting point:
ND Clear
Use ND indoors only if:
bright windows overpower scene,
studio lights are too bright,
desired aperture must be preserved,
the image is too bright at correct shutter/aperture.
Do not use ND in a dark interior.
Indoor ND callout:
Inside: start Clear.
Add ND only if too bright.
D.5 WB
Indoor white balance:
| Setting | Use |
|---|---|
| A | main indoor custom WB |
| B | alternate indoor/exterior setup |
| Preset | fixed fallback |
| ATW | avoid for controlled actor/feature work |
Indoor WB procedure:
Turn off bad overhead lights if possible.
Establish key/practical lighting.
Place gray/white card at subject face position.
Set WB A.
Press WB SET.
Check skin through LUT.
Lock WB for matching shots.
Indoor rule:
White balance for the face under the actual key light.
D.6 LUT
Indoor LUT monitoring:
| Destination | Setting |
|---|---|
| VF/Proxy/Stream MLUT | On if desired |
| SDI/HDMI MLUT | On for external monitor |
| Internal Rec MLUT | Off |
| External monitor LUT | Off/not used if FX6 sends MLUT |
Indoor LUT phrase:
Monitor LUT On.
Internal Rec LUT Off.
Recording clean S-Log3.
D.7 Focus
Indoor focus workflow:
Place subject.
Set aperture.
Use Focus Magnifier.
Focus near eye.
Check two-person depth if applicable.
Recheck after zoom/reframe.
Test if movement occurs.
Indoor focus rule:
Actor reel close-up = near eye sharp.
Two-person scene = enough depth for both if both matter.
D.8 Audio
Indoor audio checklist:
| Item | Check |
|---|---|
| RØDE gain | 0 dB |
| INPUT1/INPUT2 | MIC |
| Phantom to RØDE | Off |
| CH routing | correct mode |
| Headphones | MDR-7506 |
| TV | off/isolated |
| HVAC | reduced if possible |
| Clothing rub | checked |
| Breathing | mic 6–8 inches below chin |
| Room tone | record 20–30 sec |
Indoor pre-roll callout:
Cine EI.
Base ISO chosen.
Shutter 180.
Aperture chosen.
ND Clear.
WB locked.
LUT monitor on, internal record off.
Focus checked.
Audio routed.
Room clean.
Appendix E. Cine EI Outdoor Quick Reference
E.1 Base ISO
Outdoor daylight baseline:
Base ISO 800
Use Base ISO 800 for:
bright daylight,
open shade,
overcast day,
exterior dialogue,
exterior actor close-up,
documentary interview,
chase/action scene.
Use Base ISO 12800 only for genuine low-light exterior conditions:
night exterior,
very dark available light,
documentary low-light moment.
Outdoor rule:
Daylight exterior = Base ISO 800 + Variable ND.
E.2 Shutter
Outdoor shutter guide:
| Frame Rate | Shutter |
|---|---|
| 24p | 1/48 or 180° |
| 30p | 1/60 or 180° |
| 60p | 1/120 or 180° |
Outdoor rule:
Do not raise shutter because sun is bright.
Use ND.
Change shutter only for:
flicker,
stylized action,
deliberate motion effect,
technical requirement.
E.3 Aperture
Outdoor aperture guide:
| Shot | Aperture |
|---|---|
| Emotional close-up | f/2.8–f/4 if focus allows |
| Interview | f/4–f/5.6 |
| Two-person dialogue | f/4–f/5.6 |
| Walk-and-talk | f/4–f/5.6 |
| Chase/action | f/5.6–f/8 if focus is difficult |
| Wide/context | f/5.6–f/8 |
Outdoor rule:
Choose aperture for look and focus.
Use Variable ND to control exposure.
E.4 Variable ND
Outdoor ND baseline:
Variable ND On
Procedure:
Set Base ISO 800.
Set shutter 180°.
Choose aperture.
Turn Variable ND On.
Adjust ND using waveform/zebras.
Check face and highlights.
Record test if important.
Use Auto ND only when documentary movement through changing light makes manual ND impractical.
Auto ND guide:
| Situation | Auto ND |
|---|---|
| Actor reel | usually no |
| Feature dialogue | usually no |
| Sit-down interview | usually no |
| Walk-and-talk through changing light | can be useful |
| Fast documentary | can be useful |
E.5 WB
Outdoor white balance options:
| Condition | WB Approach |
|---|---|
| controlled exterior | custom B |
| open shade | custom B preferred |
| daylight fallback | Preset/fixed daylight |
| fast documentary | fixed daylight or quick custom |
| changing sun/shade | choose dominant face light |
Outdoor rule:
White balance for the face, not the sky.
Avoid ATW for controlled actor/feature shots. Use it only if documentary conditions demand speed and color drift is acceptable.
E.6 Exposure tools
Outdoor exposure must use tools because sun/glare can mislead the monitor.
Use:
waveform,
zebras,
Focus Magnifier,
monitor shade if possible,
test recording.
Outdoor exposure priorities:
| Scene | Priority |
|---|---|
| Actor close-up | face/eyes |
| Dialogue | both faces |
| Interview | subject face and audio |
| Chase/action | focus/motion and highlight control |
| Landscape/context | protect important highlights |
Outdoor warning:
A bright monitor image is not exposure truth.
Use waveform/zebras.
E.7 Focus
Outdoor focus problems:
bright sun makes monitor hard to see,
longer lenses increase focus sensitivity,
moving subjects drift out of focus,
shallow aperture increases risk,
heat/background shimmer may distract.
Outdoor focus checklist:
| Check | Action |
|---|---|
| Monitor visibility | shade if possible |
| Focus Magnifier | use for critical shots |
| Near eye | check for close-ups |
| Two-person | f/4–f/5.6 |
| Movement | rehearse |
| Zoom change | recheck focus |
| Face/Eye AF | test before relying |
Outdoor focus rule:
Bright sun makes focus judgment harder.
Use magnification and safer aperture when needed.
E.8 Audio/wind
Outdoor audio must be protected from wind and environment.
Outdoor audio checklist:
| Item | Check |
|---|---|
| Lav windscreen | installed |
| Boom wind protection | installed if boom used |
| RØDE routing | verified |
| Headphones | worn |
| Wind rumble | checked |
| Traffic | evaluated |
| Aircraft/mowers | listen before rolling |
| Clothing rub | checked |
| Split TX1/TX2 | tested |
| Room/ambient tone | record if useful |
Outdoor pre-roll callout:
Base ISO 800.
Shutter 180.
Aperture chosen.
Variable ND On.
WB locked.
Waveform/zebras checked.
Focus checked.
Wind/audio checked.
Slate and roll.
Appendix F. Actor Reel Lighting Quick Reference
F.1 Face
Actor reel face priority:
The actor’s face must be readable.
Face lighting checklist:
| Item | Check |
|---|---|
| Key light | soft and directional |
| Shadow side | shaped but not dead |
| Skin | natural, not gray |
| Forehead/nose | not clipped |
| Background | not brighter than face unless intentional |
| WB | locked |
| Exposure | waveform checked |
| LUT | viewing only |
Actor reel face warning:
Do not make the actor too dark in pursuit of a muted look.
F.2 Eyes
Actor reel eye priority:
Eyes must be sharp and alive.
Eye checklist:
| Item | Check |
|---|---|
| Focus | near eye sharp |
| Catchlight | present if appropriate |
| Shadow | not hiding both eyes |
| Glasses | glare controlled |
| Monitor | magnifier used |
| Aperture | not too shallow for performance movement |
Eye rule:
If the eyes are soft, the take is damaged.
F.3 Background
Actor reel background should support the performer.
Control:
bright objects,
loud colors,
logos,
clutter,
white walls,
windows,
moving screens,
random household items.
Background checklist:
| Item | Desired State |
|---|---|
| color | muted |
| brightness | controlled |
| clutter | removed |
| depth | subject away from wall |
| practicals | dimmed/controlled |
| distraction | none stronger than actor |
Background rule:
The viewer should look at the actor first.
F.4 Performance priority
Actor reel hierarchy:
performance,
clean dialogue,
sharp eyes,
readable face,
controlled background,
cinematic lighting,
muted grade.
Do not sacrifice performance clarity for:
extreme darkness,
unnecessary zoom,
overly shallow focus,
aggressive LUT,
distracting lighting,
loud art direction.
Actor reel final callout:
Cinematic but clear.
Muted but alive.
Stylish but performance-first.
Appendix G. Feature Scene Lighting Quick Reference
G.1 Motivated source
Feature lighting should appear motivated.
Possible motivations:
window,
lamp,
hallway,
doorway,
TV,
streetlight,
car headlights,
practical room light,
sun direction.
Motivated lighting rule:
The audience should feel where the light comes from,
even if a hidden light is doing the real work.
Motivated-source checklist:
| Item | Check |
|---|---|
| visible/practical source | plausible |
| key direction | matches source |
| reverse angle | still believable |
| background | supports source |
| WB | consistent |
| practical brightness | controlled |
G.2 Continuity
Feature scenes must cut together.
Continuity checklist:
| Item | Track |
|---|---|
| WB | same or deliberate change |
| aperture | consistent depth |
| exposure | faces match |
| key direction | consistent motivation |
| LUT monitoring | same look |
| audio routing | same channel plan |
| background | not shifting distractingly |
| props | consistent |
| eyeline | correct |
| focal length | intentional pattern |
Continuity rule:
Do not make every angle a separate lighting experiment.
G.3 Contrast
Feature contrast should be shaped, not accidental.
Contrast tools:
soft key,
negative fill,
back edge,
controlled practical,
background level,
wardrobe tone,
set color.
Contrast checklist:
| Problem | Fix |
|---|---|
| too flat | add negative fill / move key |
| too dark | add fill or raise key slightly |
| background too bright | dim/control/reframe |
| shadows muddy | expose cleanly and light intentionally |
| harsh face | soften key |
Contrast rule:
Create mood with lighting ratio, not underexposure.
G.4 Palette
Feature palette should be intentional.
Preferred muted palette:
charcoal,
navy,
gray,
olive,
brown,
taupe,
cream,
burgundy,
rust,
dark wood,
aged metal.
Avoid unless intentional:
neon colors,
bright red,
saturated green,
royal blue,
busy patterns,
shiny plastic,
bright white in key areas.
Palette rule:
Control color before the camera records it.
Feature final callout:
Design the scene.
Match the coverage.
Preserve the negative.
Finish the look in the grade.
Appendix H. Documentary Interview Quick Reference
H.1 Face
Documentary face priority:
The subject must look credible, natural, and readable.
Interview face checklist:
| Item | Check |
|---|---|
| key light | soft and believable |
| eyes | sharp |
| skin | natural |
| background | relevant but controlled |
| WB | locked |
| exposure | waveform checked |
| contrast | shaped but not theatrical |
| monitor LUT | viewing only |
Documentary face warning:
Do not over-stylize the subject until credibility suffers.
H.2 Audio
Documentary audio priority:
Clean speech is essential.
Audio checklist:
| Item | Check |
|---|---|
| lav | placed cleanly |
| boom | used if available |
| RØDE gain | 0 dB baseline |
| INPUT switches | MIC for RØDE |
| phantom | never to RØDE |
| headphones | MDR-7506 |
| room noise | checked |
| wind | controlled outdoors |
| room tone | recorded |
| onboard backup | enabled if available |
Interview audio callout:
Listen before asking the first real question.
H.3 Background
Documentary background should support the subject.
Good background:
relevant,
simple,
not too bright,
not cluttered,
not logo-heavy,
not dominated by windows,
not full of loud colors,
has some depth.
Background checklist:
| Problem | Fix |
|---|---|
| bright window | reframe/curtain/move subject |
| clutter | remove or angle away |
| flat wall | move subject away |
| irrelevant objects | remove |
| logos | remove/avoid |
| TV/screen | turn off |
Documentary background rule:
Preserve truth, remove distractions.
H.4 Setup speed
Documentary setup must be fast enough to preserve subject energy.
Fast interview order:
choose quiet room,
choose background,
place subject,
set soft key/window angle,
set WB,
set exposure,
set focus,
set audio,
record test,
begin.
Fast documentary callout:
Quiet room.
Clean face.
Sharp eyes.
Good audio.
Controlled background.
Roll.
Appendix I. File Naming Quick Reference
I.1 Reel folder format
Use:
YYYYMMDD_PROJECT_FX6_A001
Example:
20260515_NCAR_FX6_A001
Breakdown:
| Element | Meaning |
|---|---|
| 20260515 | date |
| NCAR | project code |
| FX6 | camera |
| A001 | reel ID |
More examples:
20260515_NCAR_FX6_A001
20260515_NCAR_FX6_A002
20260516_NCAR_FX6_A003
Do not put long scene descriptions in the reel folder name.
I.2 Unique Clip ID
Formula:
Unique Clip ID = Reel ID + "_" + Camera File Stem
Examples:
| Reel ID | Camera File | Unique Clip ID |
|---|---|---|
| A001 | C0001.MXF | A001_C0001 |
| A001 | C0002.MXF | A001_C0002 |
| A002 | C0001.MXF | A002_C0001 |
| A003 | C0001.MXF | A003_C0001 |
Use Unique Clip ID in:
log,
notes,
bins,
slates,
proxy names if desired,
audio backup references.
Do not rename camera originals just to create the Unique Clip ID. The ID can live in the log and NLE display name.
I.3 Physical card ID
Label physical cards:
CFE-01
CFE-02
CFE-03
Physical card ID means the reusable card. Reel ID means the recorded/offloaded batch.
Example:
| Physical Card | Reel |
|---|---|
| CFE-01 | A001 |
| CFE-02 | A002 |
| CFE-01 reused later | A003 |
Card rule:
Same physical card reused = new reel ID.
I.4 Settings card label
Settings card label:
FX6 SETTINGS — DO NOT FORMAT
Short version:
FX6 SETTINGS
DO NOT FORMAT
Settings card stores:
ALL Files,
User Files,
Scene Files,
LUT files,
setup notes.
Do not use the settings card as a normal production recording card.
I.5 Do-not-do examples
Do not use long reel folder names:
20260515_Nelson_Cyr_Actor_Reel_Netflix_Muted_Color_Cine_EI_Outdoor_Dialogue_Chase_Scenes_Final_Version_A001
Use:
20260515_NCAR_FX6_A001
Do not rename camera originals like:
Outdoor_chase_scene_best_take_actor_runs_down_driveway_version_final.MXF
Use log entry:
| Unique Clip ID | Description |
|---|---|
| A001_C0003 | outdoor chase scene |
Do not dump all clips into:
ALL_FOOTAGE/
C0001.MXF
C0002.MXF
C0001.MXF
Use:
01_CAMERA_ORIGINALS/
20260515_NCAR_FX6_A001/
20260515_NCAR_FX6_A002/
File naming final callout:
Short names for files and folders.
Rich descriptions in the log.
Full card folders preserved.
Appendix J. Offload and Backup Quick Reference
J.1 Copy full card
Copy the full card structure into a reel folder.
Correct:
01_CAMERA_ORIGINALS/
20260515_NCAR_FX6_A001/
[full card copy]
Do not copy only MXF files.
Do not mix cards.
Do not rename originals.
Do not delete support files.
Full-card copy statement:
Copy the card root contents into the reel folder exactly.
J.2 Verify
Verify before formatting.
Minimum verification:
| Check | Required |
|---|---|
| destination folder exists | yes |
| folder size plausible | yes |
| clips visible | yes |
| first clip opens | yes |
| last clip opens | yes |
| log updated | yes |
| second backup made | yes before formatting |
Better verification:
file count comparison,
copy tool verification,
checksum/verified copy software,
import test in Resolve/Premiere.
Verification rule:
If verification is uncertain, do not format.
J.3 Second backup
Make at least two copies before formatting.
Minimum:
| Copy | Location |
|---|---|
| Copy 1 | working/edit drive |
| Copy 2 | backup drive/NAS/external |
Better:
| Copy | Location |
|---|---|
| Copy 1 | working drive |
| Copy 2 | local backup |
| Copy 3 | NAS/archive drive |
Backup sequence:
Camera card
↓
Working drive
↓ verify
Backup drive
↓ verify
Only then format card if needed
J.4 Log
Update log after offload.
Log fields:
| Field | Example |
|---|---|
| Physical Card | CFE-01 |
| Reel | A001 |
| Reel Folder | 20260515_NCAR_FX6_A001 |
| Copy Status | copied |
| Verify Status | verified |
| Backup 1 | yes |
| Backup 2 | yes |
| Notes | no issues |
Also log RØDE onboard files if used.
J.5 Format only after confirmation
Before formatting production card, confirm:
| Check | Required |
|---|---|
| full card copied | yes |
| copy verified | yes |
| second backup made | yes |
| RØDE onboard audio copied | yes, if used |
| room tone/audio copied | yes |
| log updated | yes |
| card is not settings card | yes |
| user confirms erase | yes |
Format warning:
Never format FX6 SETTINGS — DO NOT FORMAT card as production media.
Offload final callout:
Copy full card.
Verify.
Back up.
Log.
Only then format.
Appendix K. Resolve/Premiere Proxy Quick Reference
K.1 Import rule
Import organized reel folders, not a flat pile of MXF files.
Correct source:
01_CAMERA_ORIGINALS/
20260515_NCAR_FX6_A001/
20260515_NCAR_FX6_A002/
NLE bin structure:
FX6_CAMERA_ORIGINALS/
A001_20260515_NCAR/
A002_20260515_NCAR/
Import rule:
Import by reel.
Preserve reel identity.
Use log for descriptions.
Do not mix same-name clips from different cards without reel context.
K.2 Proxy rule
Use proxies when original playback is heavy.
Preferred proxy options:
| Proxy | Use |
|---|---|
| 1080p DNxHR LB | light editing |
| 1080p DNxHR SQ | better-looking edit proxy |
| 720p proxy | weak system / large documentary project |
Proxy workflow:
High-quality FX6 original
↓
Full-card backup
↓
Proxy generation
↓
Edit with proxy
↓
Grade/export from original
Do not lower capture quality only because editing is slow. Use proxies.
K.3 Grade/export rule
Grade and export from the best practical source.
Preferred:
| Stage | Media |
|---|---|
| Editing | proxies if needed |
| Color grading | camera originals |
| Final export | camera originals |
| Archive | originals + project files + logs |
Before final export:
confirm proxies are not accidentally used for final if full-res is expected,
confirm originals are online,
confirm audio channels are correct,
confirm LUT/grade pipeline is correct,
confirm frame rate is correct.
Final export rule:
Proxies are for editing speed.
Originals are for final quality.
K.4 Audio-channel inspection rule
Inspect audio channels after import.
Possible expected layouts:
| Setup | CH1 | CH2 | CH3 |
|---|---|---|---|
| One RØDE safety | TX1 main | TX1 lower safety | — |
| Two RØDE split | TX1 | TX2 | — |
| One RØDE permanent split | TX1 | silent | — |
| Two lavs + boom | TX1 | TX2 | boom |
| Merged lavs + boom | merged lavs | boom | — |
Post inspection:
Solo CH1.
Identify source.
Solo CH2.
Identify source.
Solo CH3 if present.
Label tracks.
Center mono dialogue.
Disable silent tracks if needed.
Do not assume muting an entire clip proves separation.
Audio post rule:
Inspect channels individually.
Do not judge split audio by muting the whole event.
Final project closeout callout:
Reels preserved.
Clip IDs logged.
Audio channels identified.
Proxies attached.
Originals backed up.
Final export from full-quality media.
###
The final source document for creating the re-named V7.0 published handbook below is the docx file named… FX6_CINE_EI_Muted-Color_Shooting_System_Handbook_V1.0_WORKING_NAV_GUIDE_REPAIRED_V7.
Published file name and final title: “FX6 CINE EI Muted-Color Shooting System Handbook V7.0” .docx and/or .pdf